• Skip to primary navigation
  • Skip to main content
  • Skip to primary sidebar

Flour Child logo

  • About Us
  • Recipes
  • Privacy
menu icon
go to homepage
search icon
Homepage link
  • Home
  • Recipes
  • Classic Cocktails
  • Dinners
  • About Us
    • Email
    • Instagram
    • Pinterest
  • ×
    Home » Mid Century Recipes

    Mid Century Recipes

    Fresh Roasted Asparagus

    March 29, 2023

    Fresh roasted asparagus on a white serving plate, with a serving fork resting on the side.

    Featured in Atomic-Ranch.com

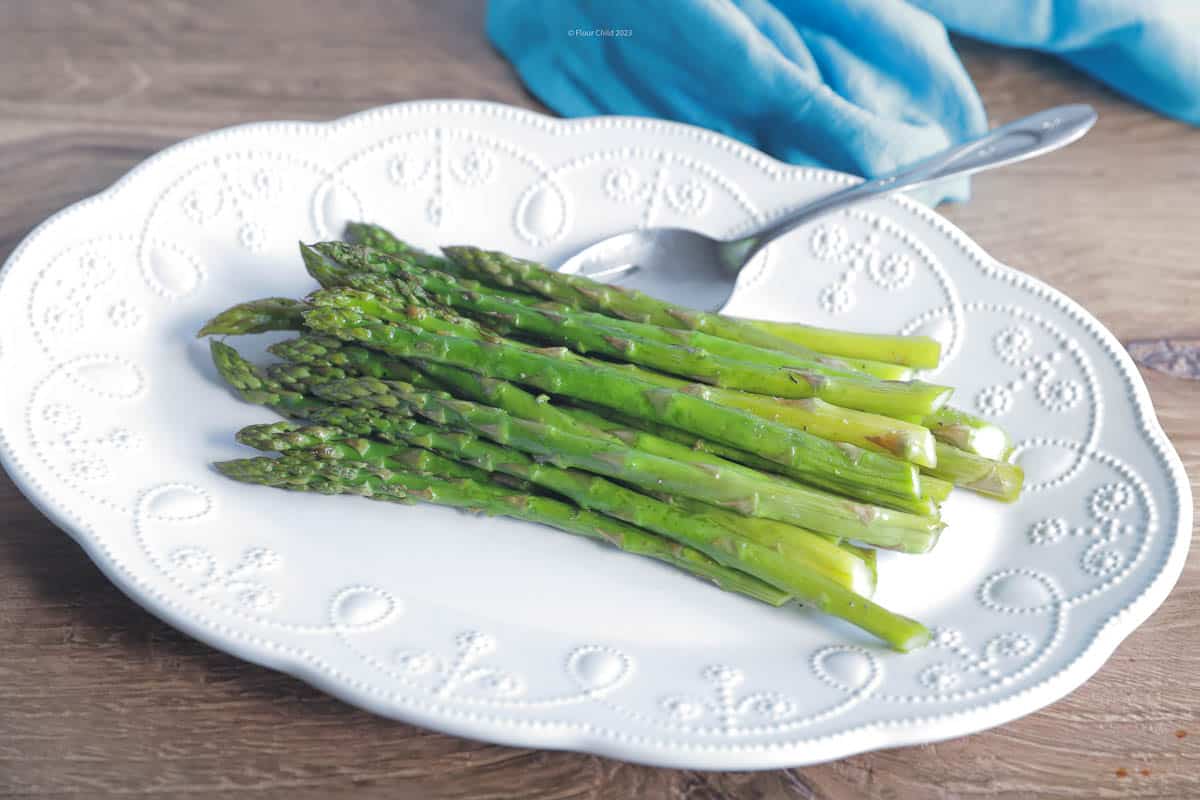
    When you need a fast and easy side dish that's sure to please, fresh roasted asparagus should be your go-to choice!

    Asparagus was a staple on the mid century dinner table. In the 1970's, there was a field across the street from our house in suburban Chicago where asparagus grew wild. Moms would send their kids over there after school to pick some for dinner. I wish I knew of a place to pick wild asparagus now, because it can be a little pricy!

    Benefits of Asparagus

    Fresh asparagus is easy to prepare, delicious, and has many health benefits to boot. In addition to being free of fat and cholesterol, the US Dept. of Agriculture says it contains:

    • Antioxidant vitamins A, C & E, to fight free radicals that can lead to cancer
    • Fiber, which aids in digestion
    • Potassium, which can help lower blood pressure
    • Protein - 13 grams in a serving, benefitting bones and muscles
    • Low in calories - only 27 in a plain 1 cup serving (approximately 8 spears) - great for dieting

    These are just a few of the many health benefits that come from eating asparagus!

    How to Prepare Fresh Roasted Asparagus

    Asparagus bunch on a wooden cutting board, with ends cut off.
    Prep asparagus by cutting off the bottom tips
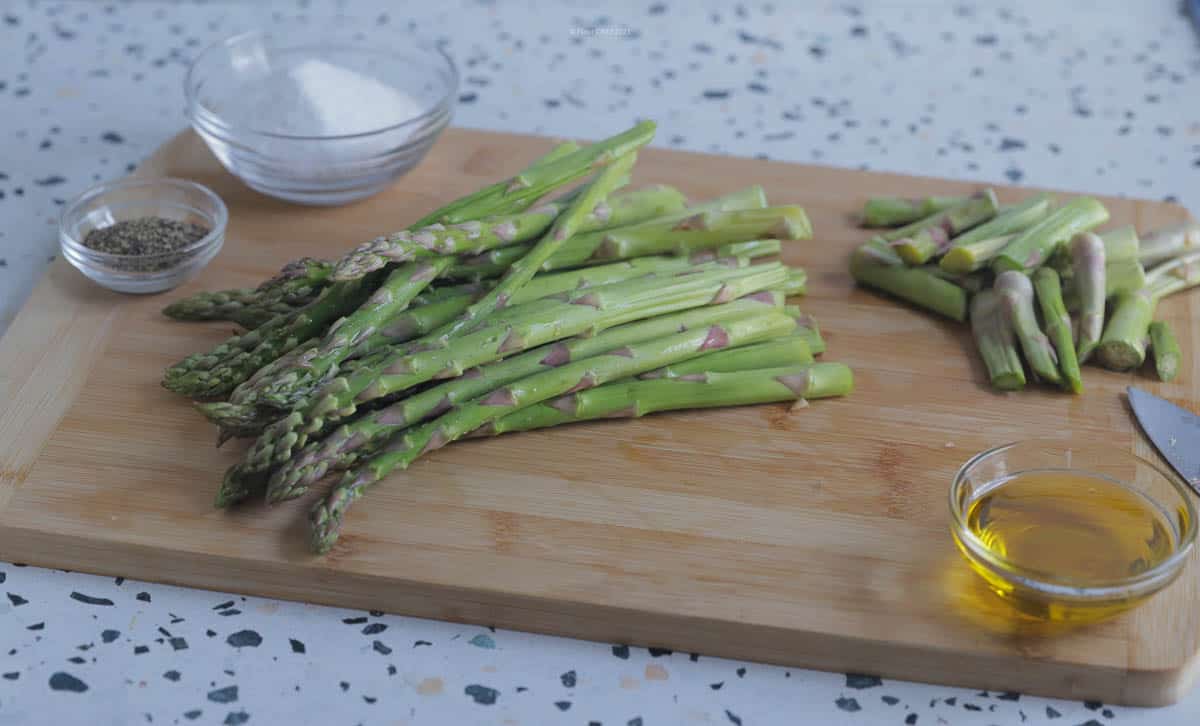
    1. Start by rinsing your asparagus stalks in cold water, then placing them on a cutting board. With a sharp, knife, cut off the tough bottom tips; typically about 1-½ inches.
    2. Place your asparagus in a shallow roasting pan and drizzle with olive oil, being sure to get it coated on all sides.
    3. Sprinkle with salt and pepper, then roast at 450 degrees for 8-10 minutes until asparagus is lightly browned and tender-crisp.

    Transfer to a serving platter and viola, you're done!

    Recipe Variations

    Serving asparagus with just a touch of salt and pepper is perfectly delicious. However, if you'd like to dress it up a little, you can try one of these variations:

    1. Drizzle a rich & creamy hollandaise sauce over the top or serve it on the side. This is a nice accompaniment, particularly for a holiday meal.
    2. Sprinkle some freshly grated parmesan cheese on top before roasting for an additional pop of flavor.
    3. Squeeze some fresh lemon juice on top, then add some lemon slices to the serving plate for an elegant touch.
    Fresh roasted asparagus on a white serving plate, with a serving fork resting on the side.
    Print
    5 from 1 vote

    Fresh Roasted Asparagus

    This delicious veggie is quick and easy to prepare and makes an elegant side dish
    Prep Time4 minutes mins
    Active Time10 minutes mins
    Course: Side Dish
    Cuisine: American
    Diet: Low Calorie, Vegan, Vegetarian
    Yield: 4
    Calories: 85kcal
    Author: Nancy Blackstone

    Materials

    • 1 lb asparagus medium thickness
    • 2 tablespoon olive oil extra virgin
    • .5 teaspoon kosher salt
    • .25 teaspoon black pepper

    Instructions

    • Preheat the oven to 450 degrees
    • Rinse asparagus spears in cold water. Place on cutting board and cut off the tough bottom ends; about 1-½ inches.
    • Place asparagus in a single layer in a shallow roasting pan and coat all sides with olive oil.
    • Sprinkle with salt and pepper
    • Place in 450 degree oven and roast for 8-10 minutes, turning halfway through. Remove when lightly browned and tender-crisp.

    Notes

    This side dish can be served plain, or topped with freshly grated parmesan cheese, freshly squeezed lemon juice, or a creamy hollandaise sauce.

    Nutrition

    Calories: 85kcal | Carbohydrates: 4g | Protein: 3g | Fat: 7g | Saturated Fat: 1g | Polyunsaturated Fat: 1g | Monounsaturated Fat: 5g | Sodium: 293mg | Potassium: 231mg | Fiber: 2g | Sugar: 2g | Vitamin A: 858IU | Vitamin C: 6mg | Calcium: 28mg | Iron: 2mg

    The recipe for a perfect amaretto sour cocktail

    February 23, 2022

    An amaretto sour cocktail in a small glass with orange slice and cherry

    This easy-to-mix 1970's classic sour cocktail is a perfect balance of sweet and sour. It is made using lemon juice and a wonderful Italian liqueur that dates back over 500 years!

    A classic amaretto sour cocktail in an old-fashioned glass with orange slice and cherry. This is the perfect amaretto sour recipe and a delicious sour drink. This is a perfect cocktail and one of the classic cocktail recipes.

    A Classic and Refreshing Sweet and Sour Cocktail

    The combination of sweet and sour has always been popular in food and cocktails. This Amaretto Sour is so easy to mix up and it tastes so good, it'll become your go-to happy hour cocktail for good reason.

    There's an entire category of cocktails called sours which include classics like the Whiskey Sour. In the early 1970's a creative bartender in America mixed a newly-popular, 500 year-old Italian liqueur with some lemon juice, and added this crowd-pleaser to the list of sours. Soon American bars everywhere were including this cocktail on their menus.

    Amaretto is a wonderful liqueur that is made from a secret blend of apricot pits and almond extract for a unique flavor profile. This is such a pleasant-tasting liqueur that you'll keep a bottle of Amaretto on your shelf once you taste this.

    Ingredients Needed for an Amaretto Sour

    The three main ingredients used to mix a sour, liqueur lemon and sugar. Add a maraschino cherry for garnish.

    There are only a few Ingredients needed for an Amaretto Sour:

    • Fresh, large ice cubes--preferably round
    • Sugar cubes
    • Fresh lemon juice
    • Amaretto liqueur--choose a quality liqueur like Amaretto di Saronno which has a nice almond taste and is readily available at your local grocery store or liquor store
    • Orange slices for garnish

    You can also use a plain simple syrup in place of the sugar cubes if you prefer.

    Bar tools needed

    You just need a few standard tools to mix this drink:

    • Jigger
    • Bar spoon
    • Knife
    • Muddler (or the back of a spoon)
    • Mixing glass or large cocktail shaker (if desired, I usually just mix directly in the glass and give it a stir with the bar spoon)

    How to Make it

    This drink is very easy to make. Just follow the 5 steps below:

    two pictures showing how to make a cocktail. The secret ingredient of the new recipes for these craft cocktails is amaretto. No need for homemade sour mix or lemon peels or sugar syrup. Just muddle your own!  Almond liqueur combined with part lemon juice. The best part is a couple of ounces of amaretto (your choice of brand of amaretto) for a cocktail that is a little bitter but on the sweeter side--better than a Pisco sour. Either way, your taste buds will thank you. Make a large batch for friends, they'll enjoy the sour element of this drink.
    1. Pour a dash of water into a glass containing your sugar cubes.
    2. Using a muddler, crush the cubes to mix with the water.
    three pictures showing how to make a cocktail
    1. Pour the water and sugar mixture over a ball of ice.
    2. Pour the Amaretto into the glass.
    3. Last, add the fresh-squeezed lemon juice for the sour flavor.
    4. Add an orange slice or for garnish.

    Give it a stir and add a decorative garnish, such as an orange wedge and cherry.

    Tips for Success

    Even though this Amaretto cocktail is one of the easy cocktails to make at home, keep these things in mind when making this classic recipe:

    • Always take the time to squeeze some fresh juice rather than use bottled. It will make the drink come alive with freshness and will not be overly sour.
    • Choose a quality liqueur to mix with. Inferior mixers will not have the nice almond flavor and can be too sweet.
    • Fresh ice is a must. Never use ice that has been in your freezer for a long time because it will pick up odors from other food over time.

    Frequently Asked Questions

    Is an Amaretto Sour the same as a Whiskey Sour?

    While the two cocktails are similar and both in the Sour family, they are still different cocktails. The Amaretto Sour uses a sweet, almond-flavored liqueur, and the Whiskey Sour uses a stronger tasting bourbon or rye.

    What can you mix with Amaretto?

    Amaretto is a sweet Amaro bitter that pairs nicely with vodka, rum or whiskey. It is also great to sip straight up after dinner -- with or without ice. Some people like to mix it with a bit of bourbon (although I find the addition of bourbon too sweet, I recommend using a rye instead). Others will splash in a little club soda or lemon-lime soda. You can also add a little orange juice or lime juice to balance out the sweetness.

    Try a Frothy Egg White Variation

    For a delicious cocktail, try adding an egg white like you would for a Whiskey Sour. It's pretty easy to do, just add your Amaretto, lemon juice and sugar mixture to a cocktail shaker, then add an egg white and shake for about 15 seconds. This is a dry shake. Then add a handful of fresh ice cubes to the shaker and shake for another 15 seconds. Using a fine mesh strainer, strain into an old fashioned glass (or your glass of choice) for a frothy top. Add a slice of orange or a couple of maraschino cherries for garnish. There are some people who are concerned about using a raw egg, but nowadays most eggs have been pasteurized, so the risk of getting sick is greatly reduced.

    Before you go, did you try this cocktail? Why not leave a comment in the comments section along with a rating? I always appreciate hearing from you and getting your feedback.

    • Greyhound cocktail with a grapefruit wedge in a cocktail glass
      How to Make a Vodka and Grapefruit Greyhound Cocktail
    • Gin Gibson cocktail in a martini glass on a white bar napkin with an ice bucket in the background.
      How to Make the Best Classic Gin Gibson Cocktail
    • A closeup of a whiskey in a rocks glass
      How to Make The Easy Frank Sinatra 3-2-1 Cocktail
    • An apple butter old fashioned cocktail in a tumbler with apples and fall-related items in the background
      Sip into Fall: How to Make the Perfect Apple Butter Old-Fashioned Cocktail
    An amaretto sour cocktail in a small glass with orange slice and cherry

    Simple Amaretto Sour Cocktail

    This easy-to-mix 70's classic is a delicious blend of sweet and sour. It is made using a wonderful Italian liqueur that is over 500 years old!
    5 from 2 votes
    Print Recipe Pin Recipe
    Prep Time 5 minutes mins
    Total Time 5 minutes mins
    Course Drinks
    Cuisine American
    Servings 1 Cocktail
    Calories 143 kcal

    Ingredients


    • 1½ ounces Amaretto Liqueur
    • 2 cubes Sugar
    • ½ ounce Freshly squeezed lemon juice
    • 1 wedge Orange slice

    Instructions
     

    • Place the sugar cubes in a mixing glass
      2 cubes Sugar
    • Pour in a dash of cold water and muddle to crush the cubes
    • Place an ice ball in your small cocktail glass
    • Pour the sugar mixture into the cocktail glass
    • Pour the Amaretto into the cocktail glass
      1½ ounces Amaretto Liqueur
    • Pour the lemon juice into the cocktail glass
      ½ ounce Freshly squeezed lemon juice
    • Stir well to mix
    • Add orange slice and cherry as garnish, if desired
      1 wedge Orange slice

    Notes

    • Always choose a quality liqueur to mix with
    • Use fresh-squeezed lemon juice
    • You can substitute simple syrup for the sugar cubes

    Nutrition

    Serving: 1gCalories: 143kcalCarbohydrates: 17gProtein: 1gFat: 1gSaturated Fat: 1gPolyunsaturated Fat: 1gMonounsaturated Fat: 1gSodium: 3mgPotassium: 15mgFiber: 1gSugar: 17gVitamin A: 2IUVitamin C: 1mgCalcium: 1mgIron: 1mg
    Keyword Amaretto, mid century cocktails, Sweet and Sour Coctails
    Tried this recipe?Let us know how it was!

    Easy Lasagna Soup Recipe (Stove and Crockpot Methods)

    November 10, 2021

    A bowl of lasagna soup with shredded cheese on top and basil garnish. A glass of wine and a hot roll are pictured next to the bowl.

    This dish has all the flavor of lasagna without all the work! Sweet Italian sausage, gooey mozzarella cheese, stewed tomatoes and aromatic spices give this hearty lasagna soup an irresistible flavor that will please the whole family.

    Bowl of lasagna soup with a spoonful being lifted out
    Lasagna Soup

    Every time I see a photo of this soup I want to rush into the kitchen and make it. That's because it has all the classic flavors of lasagna and it tastes as incredible as it looks!

    Our Old World Authentic Italian Lasagna has been a favorite family recipe for generations, and though it's worth the effort, it is time consuming and labor intensive to make. In the 1970's, home cooks looked for ways to make healthy and delicious dinners faster, often turning traditional plated meals into soups and stews. This is one of those -- a quick lasagna recipe!

    [feast_advanced_jump_to]

    Why You'll Love This Recipe

    There are several reasons you're going to want to make this one-pot lasagna soup recipe a part of your regular meal rotation:

    • Can be cooked on the stovetop or in a crockpot
    • Keeps in the refrigerator and makes delicious leftovers
    • Freezes easily and can be quickly heated for fast weeknight meals
    • Its family-pleasing flavor is loved by both kids and adults
    • An easy and delicious dish to serve when having company
    • Makes a great potluck meal when transported in a crockpot

    Lasagna Soup Ingredients

    This dish is made in three separate fast and easy steps, each consisting of their own ingredients. What is lasagna soup made of? The same ingredients you use to make lasagna!

    Italian sausage, onion, two carrots and a head of garlic
    a can of tomato sauce, two cans of stewed tomatoes, a box of chicken broth, Italian seasoning and black pepper
    lasagna noodles, spinach, parmesan cheese, mozzarella cheese, and fresh basil

    Step 1 Ingredients

    • Italian sausage - I highly recommend using sweet Italian sausage for this recipe, as the sweetness provides an irresistible flavor among the tart tomatoes. However, lasagna soup can also be made with mild, hot or spicy Italian sausage, and even ground beef. Each variation has its own distinct flavor profile.
    • Yellow onion - It caramelizes nicely and adds depth to the taste of the soup. While you won't harm the soup using another variety of onion such as sweet or red, it really needs the strong flavor that a yellow onion provides during cooking.
    • Carrots - They add a sweet flavor and a contrast texture to the noodles.
    • Garlic - Adds a strong flavor that enhances the taste of the soup.

    Step 2 Ingredients

    • Chicken broth - The base of the soup broth. The Italian sausage provides a salty base to the soup, so I recommend sticking with low sodium chicken broth for this recipe.
    • Italian seasoning - Herbs that give the soup a classic Italian flavor.
    • Black pepper - Adds a hint of spice
    • Stewed tomatoes - They are pre-cooked and have a softer texture than regular tomatoes, making them easier to eat in soup. Provides a rich flavor to the soup. I prefer to
    • Tomato sauce - Thickens the broth and provides the flavor base and acidity to the soup.

    Step 3 Ingredients

    • Lasagna noodles - Provides the flavor and texture of traditional lasagna.
    • Spinach - Provides color and flavor that complement the tomato based soup, and adds vitamins!
    • Mozzerella - Adds a gooey, rich texture to the soup, just like in a lasagna casserole.
    • Parmesan - Provides a traditional Italian cheesy, salty garnish to the soup.
    • Basil - Adds a fresh, herbal flavor to the soup.

    I prefer using organic ingredients whenever possible, to limit the amount of chemicals we're consuming. The items in this recipe should be readily available in your local grocery store in both organic and non-organic versions.

    Tips For Shopping and Meal Prep

    • Remove the fibrous stems before chopping the spinach, as they get tough during cooking. Here's a great 30-second video showing you how to do it. (If you use baby spinach, you may not need to remove the stems - see video.)
    • Buy a 16 oz. brick of low moisture, part-skim mozzarella cheese, which you'll find in the refrigerated cheese section of your grocery store. It will give you that irresistible gooey, stringy texture that makes this the best lasagna soup recipe there is! Pre-shredded, bagged mozzarella has a waxy coating on it that causes it to clump in soup, so stick with cubing your own. For best results, avoid the fresh, moist balls of mozzarella in the deli department. They don't have the right consistency for this recipe.
    • Get a wedge of Parmesan, Parmesan-reggiano or Romano cheese and shred it fresh. You can use a shredded or grated packaged Parmesan cheese for the topping, but they have a waxy coating added to prevent the cheese from clumping in the bag or container. Using a box grater literally takes seconds to produce plenty of fresh Parmesan with no additives.
    • Add a little low sodium chicken broth to the soup if it gets too thick. Lasagna noodles absorb a lot of liquid, so after sitting in the broth for a while the soup tends to turn into more of a stew consistency. I really like it this way, but It can always be thinned out by adding a little additional low sodium chicken broth or water until it reaches your desired consistency.

    How to Cook Lasagna Soup

    This cozy soup is so easy to make and is the perfect comfort food on a cold winter night. Just follow the simple 3-step process below.

    Step 1

    Italian sausage browning in a large skillet
    Brown Italian sausage over medium heat, stirring occasionally with a wooden spoon until pink disappears.
    Diced onions and carrots cooking sausage pan juices in large skillet
    Cook carrots, onions & garlic in pan juices.
    All step 1 ingredients placed in a 6 quart pot or crockpot
    3. Place all cooked step 1 ingredients in a pot or crockpot.

    Step 2

    Whole stewed tomatoes inside a food processor
    Add stewed tomatoes to food processor.
    Stewed tomatoes after being pulsed 4-5 times in a food processor
    Pulse 3-4 times until they are in bite size pieces.
    Chicken broth pouring into pot with meat, vegetables, tomatoes and spices
    Add all step 2 ingredients to pot with meat and vegetables.
    Step 1 and 2 ingredients in a pot, ready to be simmered
    For stovetop: Simmer for 45 minutes For crockpot: Cook on low 4-5 hours.

    Step 3

    Uncooked lasagna noodles broken into 1 inch pieces, sitting in blue bowl
    Break lasagna into small pieces, about 1-inch. Add to pot 20 minutes before serving
    Chopped spinach on a cutting board
    Chop spinach. Add to pot 20 minutes before serving.
    Cubed mozzarella in bottom of serving bowl
    Place cubed mozzarella in bottom of serving bowl.
    A bowl of lasagna soup with shredded cheese on top and basil garnish. A glass of wine and a hot roll are pictured next to the bowl.
    Add soup, sprinkle w/parmesan, and garnish with basil.

    Tips for Cooking & Serving

    • Cook the sausage in a skillet just until the pink disappears. It will continue to cook and tenderize as it simmers in the pot, so browning it more than that is not necessary. There's enough fat in the meat that it doesn't need extra oil, but if you want to add a small amount of olive oil to the pan to get it started, you can.
    • Use a vegetable dicer to quickly dice your onion and carrots. I dice the onions a bit larger than the carrots, as the onions break down during cooking.
    • You may want to cook the noodles separately if you think you're going to have leftovers. When noodles sit in the pot overnight and get reheated, they can turn mushy. If you prefer al dente noodles, cook them in a separate pot before serving. You can ladle out a cup or two of soup to boil them in so they absorb the flavor, then return it to the pot. I use regular lasagna noodles, but you could use spinach lasagna noodles if you prefer.
    • Cook the noodles in a large soup pot over medium-high heat for a minimum of 20 minutes or at least twice as long as the lasagna package directions call for, so they're not tough when you eat them. Remember, when making pan lasagna the noodles are first boiled, then cooked longer in the oven to soften.
    • Do not add the cheeses to the cooking pot, keep them separate and serve them in the serving bowls. Otherwise the soup will get too thick and gooey, and it will not reheat well.
    • Thin the soup with chicken broth or water if the consistency is thicker than you like, particularly after refrigerating.
    • Serve with a Caesar's salad and a loaf of hot garlic bread for a traditional, Italian-style meal.

    Crockpot Instructions for Slow Cooker Lasagna Soup

    To make this easy lasagna soup recipe in a crock pot, simply follow the instructions in steps 1 and 2, adding the ingredients to the slow cooker. Cover and cook on low 4-5 hours. Add noodles and spinach 20 minutes before serving. That's all there is to it -- such an easy crockpot lasagna soup recipe!

    Storage Instructions

    Refrigerator: Store leftover lasagna soup in an airtight container in the refrigerator for up to 4 days. Reheat on stovetop for serving.

    Freezer: Store lasagna soup without cheeses added in an airtight freezer container for up to 3 months. You can store individual servings in tightly sealed freezer bags for quick busy weeknight meals. If you're going to make this dish ahead for freezing, I recommend not adding the noodles and spinach, and cooking them separately when you are ready to eat. Otherwise your noodles may be much softer than you like.

    Frequently Asked Questions

    Can you make a vegetarian lasagna soup with this recipe?

    Yes! Simply leave out the meat and add more veggies. You might want to try including mushrooms and zucchini with what's already in there.

    Can you make a vegan lasagna soup with this recipe?

    Sure! Leave out the meat, and substitute shredded vegan mozzarella for the mozzarella cubes, and shredded vegan Parmesan for the Parmesan. These items are available in the refrigerated vegan sections of most grocery stores.

    What other noodles can be used?

    If you don't have lasagna noodles handy, mafalda, fusilli and rotini are good choices. A curly noodle makes the recipe look like lasagna!

    Can you make this with gluten free noodles?


    Absolutely! You can substitute a gluten free lasagna or any other noodle to turn it into a delicious gluten free lasagna soup! Be sure to follow the recommended cooking directions for the noodles you choose.

    Can you use other cheeses in this dish?

    Yes, this recipe doesn't have ricotta cheese, but it can be added if you like. Mix a ½ cup grated Parmesan with 8 oz. of ricotta, and add a dollop of ricotta to the top of your soup when serving. Who doesn't love lots of cheese?!

    Can lasagna soup be made with ground turkey?

    Yes! You can substitute plain ground turkey, or one of the spicier, seasoned versions if you like.

    We're sure you're going to love this hearty soup so much that it will make it into your regular rotation of soup recipes! This easy recipe with simple ingredients is the perfect meal in colder months, or any time you want that classic Italian lasagna flavor without all the work!

    Other Delicious Soups and Stews to Try

    • Two bowls of beef burgundy stew with a loaf of French bread sitting on a table
      Beef Burgundy Stew - Warm Comfort on a Cold Night
    • A close up image of vegetable barley soup in a white bowl
      Old Fashioned Vegetable Barley Soup
    • Cream of Chicken & Wild Rice Soup
    • Split Pea and Ham Soup is an Old Fashioned Meal in a Bowl

    Have a comment or a vintage recipe you'd like to share? We'd love to hear from you! Please rate, comment, or send me an email at [email protected].

    A bowl of lasagna soup with shredded cheese on top and basil garnish. A glass of wine and a hot roll are pictured next to the bowl.

    Easy Lasagna Soup Recipe

    Nancy Blackstone
    This dish has all the flavor of lasagna without all the work! Sweet Italian sausage, gooey mozzarella cheese, stewed tomatoes and aromatic spices give this hearty lasagna soup an irresistible flavor that will please the whole family.
    5 from 3 votes
    Print Recipe Pin Recipe
    Prep Time 15 minutes mins
    Cook Time 1 hour hr
    Total Time 1 hour hr 15 minutes mins
    Course Main Dish
    Cuisine Italian
    Servings 10
    Calories 489 kcal

    Equipment

    • 1 large non-stick skillet
    • 2 6 quart pots (or one plus one crockpot) one for noodles, one for soup
    • 1 cutting board
    • 1 sharp knife
    • 1 food processor or immersion blender
    • 1 vegetable dicer optional
    • 1 box grater

    Ingredients


    • 2 pounds ground mild Italian sausage You can substitute sweet or hot Italian sausage if you prefer
    • 1 yellow onion, diced into large cubes
    • 2 carrots, peeled then sliced or diced into small pieces
    • 4 cloves minced fresh garlic, or 2 tsp. minced garlic in jar
    • 32 ounces low sodium chicken broth
    • 1 teaspoon dried Italian seasoning
    • ½ teaspoon black pepper
    • 2 cans (14.5 oz. ea.) stewed tomatoes
    • 1 can (15 oz.) tomato sauce
    • 6 lasagna noodles, broken into 1-inch pieces
    • 2 cups fresh spinach, chopped
    • 1 cup cubed, low-moisture/part-skim mozzarella cheese
    • ½ cup shredded parmesan cheese
    • chopped fresh basil for topping and/or garnish

    Instructions
     

    • Brown Italian sausage in a large non-stick skillet over medium heat, breaking it up into small pieces with a wooden spoon or spatula as it cooks. When meat is no longer pink, use a slotted spoon to transfer it to a 6 quart pot, reserving the cooking juices in the skillet.
    • Add the diced onion and carrots to the same skillet and cook until softened, 4-5 minutes. Add garlic, cook one minute longer. Add the onion, carrots and garlic with the cooking juices into the pot with the meat.
    • Pour in the chicken broth and tomato sauce; mix in the Italian seasoning and pepper.
    • Using a food processor or immersion blender, pulse the stewed tomatoes 3-4 times until broken into bite-sized chunks. Add to the meat mixture.
    • Bring ingredients in pot to a boil, turn down to low and cover. Simmer, stirring periodically, for 40 minutes.
    • Stir in chopped spinach and lasagna noodles. Continue cooking for 20 minutes.
    • When ready to serve, place 8-10 pieces of cubed mozzarella in the bottom of a serving bowl. Ladle soup on mozzarella, sprinkle with shredded Parmesan cheese and chopped basil.
    • Serve with a side salad and a hot loaf of garlic bread.

    Notes

    Crock Pot Instructions:
    • Follow steps 1-4 above, adding the ingredients to a 6 quart crock pot.
    • Set crock pot on low and cover; cook for 4-5 hours.
    • 30 minutes before serving, toss in spinach and lasagna noodles.
    • Place 8-10 pieces of cubed mozzarella to a serving bowl. Ladle soup over mozzarella, top with freshly grated parmesan and sprinkle with chopped basil.
    Serving suggestion: Serve with a side salad and garlic bread, or a hot loaf of bread and butter

    Nutrition

    Serving: 1cupCalories: 489kcalCarbohydrates: 27gProtein: 23gFat: 33gSaturated Fat: 12gPolyunsaturated Fat: 4gMonounsaturated Fat: 14gCholesterol: 81mgSodium: 1365mgPotassium: 834mgFiber: 3gSugar: 7gVitamin A: 3139IUVitamin C: 17mgCalcium: 213mgIron: 4mg
    Keyword Italian soup, lasagna soup, tomato soup
    Tried this recipe?Let us know how it was!

    Candied Orange Peel Recipe

    September 10, 2021

    Candied orange peel tossed in sugar in a white bowl

    Citrusy-tart and candy-sweet all at the same time, this candied orange peel recipe is easy to follow and and makes a fresh tasting snack or a beautiful, edible garnish.

    Candied orange peel piled in a white bowl, ready to use as a garnish or eat as a candy
    Candied orange peel ready to use as a garnish or eat

    When I was looking for a garnish for my Orange Creamsicle Cheesecake, I kept thinking about how candied orange peel would have the exact right flavor profile and eye-catching appeal for the center of the cake. I considered buying candied orange slices to set on top, but they have an artificial look and taste that wouldn't go with the mid century classic orange Creamsicle flavor. So, I set out to make my own -- I'm glad I did, and you will be, too!

    Why You Should Make This Recipe

    Besides being oh-so-fresh and flavorful, candied orange peel has health benefits. Eating the peel helps lower blood pressure and cholesterol, protects your respiratory system, and lessens the effects of seasonal allergies. To learn more about the benefits of orange peel, check out this article from Spoon University: https://spoonuniversity.com/lifestyle/health-benefits-of-eating-orange-peels.

    Ingredients You'll Need

    • Large navel oranges (I prefer organic)
    • Granulated sugar
    • Vanilla extract
    • Salt
    • Water
    • Grand Marnier or other orange liqueur (optional). May be be substituted with fresh squeezed orange juice.
    Ingredients for candied orange peel set on a countertop, including water, sugar, oranges, vanilla, salt and Grand Marnier
    Ingredients for candied orange peel

    How to Remove Orange Peel

    There are a few simple steps to removing the peel, or rind, from an orange:

    1. Set a freshly scrubbed orange on a cutting board. Use a sharp knife to slice off both ends.
    2. Stand the orange on one of the cut ends. Using a peeler, slice in a downward motion.
    3. Be careful to slice off only the outside edge, as you simply want to remove the outer orange rind and leave the spongy white pith on the fruit. The pith can have a bitter taste which will affect the flavor of your candied peel.
    4. Once the citrus peel is removed, slice it into the desired size. In photo 4 (below), the rind is being cut into thin slices to use as a cheesecake garnish. If you prefer to make an orange peel candy for snacking on, cut it into larger, bite-sized pieces.
    • Orange on cutting board with both ends sliced off
      1. Slice both ends of orange
    • Orange standing on cut-off end; peeler going down the side removing the peel
      2. Stand on end and peel
    • Peeled orange on a cutting board with orange peel laying next to it
      3. Remove peel, leaving pith
    • Orange peel being sliced into narrow pieces on a cutting board
      4. Slice into desired size pieces
    How to remove orange peel

    How to Candy Orange Peel

    Now that you have your citrus rind prepared, it's time to turn it into candied peel in five easy steps.

    1. Place all the sliced orange peel into a medium sized saucepan and fill it with water.
    2. Mix in the sugar and salt and bring to a simmer over low heat. Allow to simmer until softened, stirring occasionally (approximately 20 minutes.)
    3. Remove the saucepan from heat and stir in the vanilla and orange liqueur or freshly squeezed orange juice. Allow the mixture to stand undisturbed for five minutes.
    4. Place the orange peel on a rack to partially dry for about 15-20 minutes.
    5. Put the peel in a bowl. Add the sugar and toss to combine. Then allow to dry completely at room temperature.
    • Sliced orange peel on a cutting board next to a peeled orange.
      1. Place sliced orange peel in a saucepan.
    • Orange peel in a pot of water with sugar and salt added
      2. Mix in sugar and salt; simmer on low for 20 minutes.
    • Orange peel resting in sugar and vanilla before removal to cooling rack
      3. Remove from heat; add vanilla and liqueur and let stand.
    • Orange peel drying on a cookie sheet
      4. Place orange peel on a drying rack for 15 minutes.
    • Candied orange peel tossed in sugar in a white bowl
      5. Toss peel in a bowl with sugar and allow to dry.
    How to candy orange peel

    Expert Tips

    • Simmer orange peel on a very low heat. If it cooks too long or at too high a temperature, the peel will turn brown.
    • Use tongs for the easiest handling of cut orange peel.
    • Set a sheet of foil or wax paper beneath the drying rack to catch the sticky drippings from the candied fruit peel.

    Citrus Peel Recipe Variations

    Candied Lemon Peel (Sugared Lemon Peel)

    Follow the same directions as above for peeling the lemons, but replace the Grand Marnier orange liqueur with limoncello lemon liqueur. Adding liqueur is optional, and can be replaced with a tablespoon of fresh squeezed lemon juice.

    Candied Lime Peel

    Follow the same directions as above for peeling the limes. Replace the Grand Marnier orange liqueur with 1 tablespoon of lime juice.

    Now you have a beautiful and delicious pastry garnish or homemade orange candy to snack on!

    Orange creamsicle cheesecake on a cake pedestal with candied orange peel and mint leaves garnishing the top in the center.
    Candied orange peel as a lovely cheesecake garnish

    If you have a vintage recipe you'd like share with us for possible publication, please scan it and email it to [email protected]. We'd love to hear from you!

    Candied orange peel tossed in sugar in a white bowl

    Candied Orange Peel Recipe

    An easy-to-make, delicious and attractive sweet-tart homemade orange candy that can be used as a snack, or as a garnish for cakes and other baked goods. 
    5 from 1 vote
    Print Recipe Pin Recipe
    Prep Time 30 minutes mins
    Cook Time 20 minutes mins
    Total Time 50 minutes mins
    Course Dessert
    Cuisine American
    Servings 10
    Calories 119 kcal

    Ingredients


    • 5 large oranges
    • 2 cups water
    • 1.5 cups granulated sugar
    • 1 teaspoon vanilla extract
    • 1 teaspoon orange liqueur
    • .5 teaspoon salt

    Instructions
     

    • Place a clean orange on a cutting board and cut off the ends. 
    • Stand orange on one end. Using a vegetable peeler, peel just the exterior (rind) from the fruit using a downward motion, being careful to leave the pith (white spongy coating) on the fruit. Repeat until all oranges are peeled.
    • Trim orange peels to desired size.
    • Add water to a medium saucepan and place trimmed orange peels inside. Add the sugar and salt and bring to a simmer. Allow peel to simmer on low for 20 minutes or until soft. Do not cook longer or on a higher flame, as it will cause the orange peel to turn brown.
    • Place ½ cup of sugar in a bowl, then prepare the drying rack by setting a sheet of foil or wax paper beneath it to catch the sticky drippings. 
    • After 20 minutes, stir in the vanilla extract and orange liqueur. Remove from heat and allow the peel to set for 5 minutes.
    • Remove orange peel from the cooling rack with tongs and place them in the bowl with the sugar. Toss to coat. 
    • Allow the orange peel to sit at room temperature until completely dry. 
    • Store in an airtight container or plastic storage bag in the refrigerator for up to 1 month, or in the freezer for up to 3 months. 

    Notes

    • In place of the orange liqueur, you can use 1 teaspoon of freshly squeezed orange juice. 
    • You can use the same recipe to make candied lemon peel (sugared lemon peel), simply substituting 1 teaspoon of a limoncello lemon liqueur or fresh squeezed lemon juice in place of orange liqueur. 
    • You can also use this recipe to make candied lime peel. Just add 1 teaspoon of freshly squeezed lime juice in place of the orange liqueur. 

    Nutrition

    Calories: 119kcalCarbohydrates: 303gProtein: 1gFat: 1gSaturated Fat: 1gPolyunsaturated Fat: 1gSodium: 1190mgPotassium: 23mgFiber: 1gSugar: 302gVitamin A: 11IUVitamin C: 3mgCalcium: 20mgIron: 1mg
    Keyword candied citrus peel, oange peel
    Tried this recipe?Let us know how it was!

    Orange Creamsicle Cheesecake

    August 11, 2021

    Orange creamsicle cheesecake on a cake pedestal with candied orange peel and mint leaves garnishing the top in the center.

    This lucious baked orange Creamsicle cheesecake with a Golden vanilla Oreo crust contains a just hint of Grand Mariner and has a fluffy whipped cream topping. Candied orange peel tops it all off for a burst of citrus flavor. A light-tasting dessert that is the perfect ending to any meal!

    Slice of orange Creamsicle cheesecake on a dessert plate with a fork, garnished with small orange wedges all around. A second plate is in the background.

    Why This Recipe Works

    When you think of cheesecake, you probably think of the tall, dense, rich kind that you find at The Cheesecake Factory. But if you find that's too heavy after a big meal, you're going to love this orange Creamsicle version. Unlike our New York Style Cheesecake which is oh-so-rich and filling, this one is light, fluffy and just the right end to a nice dinner.

    I remember chasing down the ice cream truck to buy a Creamsicle as a kid growing up in the 1960's. This cheesecake really does taste like an orange Creamsicle, and who doesn't love that? Just like the ice cream, its citrus flavor makes a lovely summertime dessert. But I find I make it most often as a light end to a heavy holiday meal, when everyone is foraging for a delicate treat to top off their dinner.

    There are several no bake orange Creamsicle cheesecake recipes made with Jello to be found. This is a baked Creamsicle cheesecake recipe. It contains eggs and natural orange flavoring, which I believe give it a richer taste and lighter, fluffier texture.

    Equipment You'll Need

    • A 9-inch springform pan
    • Parchment circle to cover the bottom of the pan
    • Roasting pan with rack
    • Heavy duty, 18" aluminum foil

    Five Tips For a Perfect Cheesecake

    There are 5 things I do to ensure a perfect cheesecake:

    1. Bring all cold cheesecake ingredients to room temperature before mixing (to prevent lumpy batter that is unevenly distributed.)
    2. Use only a springform pan (the sides remove; a cake this soft cannot be lifted out.) All springform pans are not created equal -- I prefer this springform pan which is pricier than others but worth it. It is heavy duty, cooks evenly, doesn't leak, and won't damage the sides of the cheesecake upon removal. Plus, it's made in the USA!
    3. Always wrap the springform pan in heavy duty, wide aluminum foil and use a circle of parchment paper in the bottom. This prevents the cake from sticking and makes it easy to slide off the pan. I use pre-cut parchment circles, but you can cut your own circle from a roll of parchment if you prefer.
    4. Grease the sides of the pan and the top of the parchment paper with butter before pouring in the batter (prevents the cheesecake from sticking.)
    5. Bake the cheesecake in a water bath. When ready to bake, place the foil-wrapped pan in a larger pan (I use a roasting pan) with hot water coming a half inch up the side of the pan (ensures even cooking, a smooth texture, and helps prevent cracks.)

    These steps are not difficult, and they seem like small details that are tempting to skip. But they make a HUGE difference in getting the proper cheesecake consistency, texture and finish

    Cheesecake pan with parchment circle inserted
    Springform pan with parchment circle inside
    Cookie crust on bottom of springform pan with foil wrapped around the outside
    Wrapped in heavy duty foil
    Springform pan with cake batter and wrapped in foil sitting inside a large roasting pan on a rack with water coming a ½ inch up the side of the springform pan
    Inside roasting pan with ½ inch of water coming up the side

    Ingredients You'll Need For Baked Orange Creamsicle Cheesecake

    Here's everything you're going to need for the crust, filling, and topping:

    Golden Oreo Cookie Crust Ingredients

    • Golden Oreo cookies (vanilla)
    • butter
    Vanilla Oreo cookies in a bowl with a small bowl of butter next to it
    Cheesecake crust ingredients

    Cheesecake Filling Ingredients

    • cream cheese
    • sugar
    • Grand Mariner liqueur
    • orange juice
    • orange zest
    • vanilla
    • eggs
    Cheesecake filling ingredients

    Stabilized Whipped Cream Topping Ingredients

    • heavy whipping cream
    • powdered sugar
    • cream cheese
    • orange slices and/or candied orange peel for garnish (optional)
    Cheesecake topping ingredients

    Fast and Easy Golden Oreo Cookie Crust Prep

    With only two ingredients in the orange creamsicle cheesecake crust, preparing it is a breeze!

    Place the cookies in a food processor and pulse until they turn into a fairly fine crumb, then transfer to a mixing bowl. Melt the butter in the microwave, then combine it in with the cookie crumbs. Using the back of a tablespoon, press the crumb mixture into the bottom of the springform pan, on top of the parchment circle. Bake for 10 minutes, then you're ready to add the filling!

    Oreo cookies crust crumbs
    Cookie crust crumbs
    Cookie crust on bottom of springform pan with foil wrapped around the outside
    Buttered crumbs pressed into springform pan

    Making the Creamsicle Cheesecake Filling is Easy, Just Don't Rush the Process

    It's surprisingly simple to make the cheesecake filling. If you're in a hurry, it may be tempting to use cold ingredients, but I can't emphasize enough how important it is to let the ingredients come to room temperature. They need to sit out on the counter for about one hour before they're ready to mix.

    Once your items are at room temperature, there are only a few steps to preparing the filling:

    1. Put all filling ingredients except the eggs into a large mixing bowl. Mix at low speed until items are blended, then turn the speed up to medium and mix until well combined, about 1-2 minutes.
    2. Add the eggs one at a time, beating on low just until fully incorporated. It's important not to over beat the batter.
    3. Make sure your beaters are completely clean and dry, then whip the egg whites until they form stiff peaks.
    4. Using a spatula, gently fold the eggs whites into the batter until fully combined. Do not mix or stir the egg whites, just lightly fold them in to create a thick, fluffy batter. Then pour the batter into the springform pan over the prepared Oreo cookie crust.

    Expert Tip: Use only full fat cream cheese in your cheesecake. Reduced fat cream cheese can negatively impact the consistency and flavor.

    Orange creamsicle cheesecake filling with eggs combines
    Mix ingredients and add eggs
    eggs whites with stiff peaks
    Beat egg whites to stiff peaks
    cheesecake filling with egg whites folded in
    Fold egg whites in to batter
    Pour batter into springform pan over Oreo cookie crust

    Substitutions

    • If you don't have Golden Oreo cookies for the crust, you can substitute 1-¼ cups of graham cracker crumbs, 3 tablespoons of sugar, and 4 tablespoons of melted butter. Combine the graham cracker crumbs and sugar, melt the butter and mix in, and follow the same baking directions.
    • You can use margarine in place of butter in the cookie crust.
    • In place of Grand Mariner in the filling, you can use Cointreau or any orange flavored liqueur. If you prefer not to use alcohol, add another teaspoon of orange juice.
    • If you don't have whipped cream cheese for the stabilized whip cream, you can substitute a tablespoon of brick cream cheese. Just make sure it is softened so that it mixes in smoothly.
    • Instead of a whipped cream topping, you can substitute a non-dairy topping such as Cool Whip. I think you lose a bit of the Creamsicle flavor with a non-dairy topping, but it is still delicious.

    Prepare a Water Bath for Your Cheesecake

    You may be tempted to skip this step and place your pan directly into the oven. Don't do it! You've come this far, and a water bath helps your cheesecake bake evenly, results in a smooth texture, and prevents cracking on top.

    It's important to start with a foil-wrapped high quality springform pan that doesn't leak. After adding the cheesecake batter to the pan, place it on top of a shallow rack inside a large roasting pan. Fill the roasting pan with hot tap water until it comes up ½ inch on the side of the springform pan. Carefully place the water filled pan into the preheated oven and bake.

    Springform pan with cake batter and wrapped in foil sitting inside a large roasting pan on a rack with water coming a ½ inch up the side of the springform pan
    Springform pan inside roasting pan water bath

    Expert Tips for Cheesecake Baking

    • No matter how tempting, do not open the oven door while the cheesecake is baking! Cheesecake success depends on having an even baking temperature and no disruption in the baking process. The door and the pan should never be touched until it is ready to come out of the oven.
    • Cheesecakes should bake at the recommended temperature for the recommended baking time. To ensure an accurate oven temperature, use an oven thermometer. I always have to set my oven to 5 degrees higher than the recommended baking temperature, because the oven thermometer shows that it runs 5 degrees low. You may need to adjust yours up or down, too.
    • When the timer rings, remove the cheesecake to a nearby waiting cooling rack. Check for doneness by holding the edge of the pan with your oven mitt and very gently shaking the pan. If it jiggles slightly in the center, it is finished.
    • Let the cheesecake sit on the wire rack untouched for two hours. Then cover it with plastic wrap and gently place it in the refrigerator to chill completely for at least 6 hours, but preferably overnight. Chilling overnight allows it to set completely and firm up.
    • Once the cheesecake is fully chilled, gently release the sides of the springform pan and add the topping and garnish.

    How to Make the Stabilized Whipped Cream Topping

    With just three ingredients, you can create a tasty topping for your cheesecake that complements the orange flavor without overpowering it with too much sweetness.

    I use a little cream cheese blended into the whipping cream to make it a stabilized whipping cream, meaning that it won't melt or fall away before you can serve it. It holds together nicely, even when you store it in the refrigerator for a couple of days (if it lasts that long in your house -- it definitely doesn't in mine!)

    Begin by beating the whipping cream at low speed until it starts to thicken. Then add the powdered sugar and turn the speed up to medium and beat until it is thicker, but not all the way. Then add the cream cheese, turn the beater on high and whip until it is finished; the consistency should be very thick. Apply a thick layer of the whipped cream to the top of your cheesecake and you're done!

    Expert Tip: When making whipped cream, always chill your bowl and beaters in the freezer for at least 15 minutes before starting, and keep the whipping cream in the refrigerator right until you're ready to begin. This helps increase the volume and fluffiness of the whipped cream. If the ingredients and equipment are warm, the whipped cream can flatten.

    Garnishing Your Orange Creamsicle Cheesecake

    Now that it's ready, here are several things you can garnish your cheesecake with to make it look pretty for serving:

    • candied orange peel
    • orange zest
    • thin orange slices
    • orange fruit slice candies
    • small Mandarin orange wedges
    • mint leaves

    Or, use your creativity to come up with a completely different garnish!

    How to Slice a Cheesecake

    Cheesecake is sticky, so you can't cut it like a regular flour cake and get good results. To slice a perfect piece of cheesecake, follow these steps:

    1. Run a long, sharp knife under hot water for a few seconds, then dry it.
    2. Place the tip of the knife to the center of the cheesecake. Push the knife down to the bottom of the cheesecake, then drag it straight out of the cake without lifting. Rinse the knife in hot water, then dry it and repeat on the opposite side of the cake, so that it is cut completely in half.
    3. Rinse the knife in hot water, dry it, reposition the knife and press down firmly to the bottom of the cake to cut your first slice.
    4. Slide a pie server spatula gently underneath the slice, lift it straight up and and pull it out.

    Expert tip: It's important to rinse the knife in hot water and dry it in between each slice. This prevents residue from building up on the knife and tearing the sides of your delicate cake.

    Now you should have a perfect slice of cheesecake! Enjoy!

    If you have a vintage recipe you'd like share with us for possible publication, please scan it and email it to [email protected]. We'd love to hear from you!

    Orange creamsicle cheesecake on a cake pedestal with candied orange peel and mint leaves garnishing the top in the center.

    Orange Creamsicle Cheesecake

    Nancy Blackstone
    This orange Creamsicle cheesecake is a grown up version of your favorite childhood dessert! The delicious orange filling is sandwiched between a vanilla cookie crust and a fluffy whipped cream topping. Every bite just melts in your mouth!
    4.80 from 5 votes
    Print Recipe Pin Recipe
    Prep Time 30 minutes mins
    Cook Time 55 minutes mins
    Total Time 1 hour hr 25 minutes mins
    Course Dessert
    Cuisine American
    Servings 8 -10 servings
    Calories 712 kcal

    Ingredients


    Crust:

    • 30 vanilla Oreo cookies crushed
    • 5 tablespoons melted butter

    Cheesecake:

    • 2 packages cream cheese, room temperature 8 oz each
    • ½ cup sugar
    • 1 teaspoon Grand Marnier liqueur
    • 1 tablespoon fresh squeezed orange juice
    • 1 tablespoon orange zest
    • 1 teaspoon vanilla
    • 2 large eggs separated

    Topping:

    • 1 cup heavy whipping cream
    • 1 tablespoon powdered sugar
    • 1 tablespoon of tub cream cheese room temperature
    • Candied orange peel or orange zest for garnish optional

    Instructions
     

    Prepare Pan:

    • Preheat oven to 325 degrees. Prepare a 9-inch springform pan by lightly greasing the sides, setting a parchment circle in the bottom, then wrapping the exterior in heavy duty foil.

    Prepare Crust:

    • Place cookies in a food processor and pulse until they form fine crumbs. Transfer to a mixing bowl.
    • Melt butter in microwave, the pour into mixing bowl with cookie crumbs and stir until combined.
    • Using the back of a spoon, firmly press crumb mixture onto the bottom of the springform pan.
    • Bake at 325 degrees for 10 minutes. 

    Prepare Cheesecake Filling:

    • Using an electric mixer, in a large bowl beat the cream cheese, sugar, Grand Marnier, orange juice, orange zest and vanilla on medium speed for about 2 minutes, until smooth.
    • Reduce mixing speed to low and add egg yolks one at a time, mixing only until completely combined (do not overmix.)
    • Beat the eggs whites until they form stiff peaks. Gently fold into the cream cheese batter until completely combined.
    • Pour over the graham cracker crust and bake in a shallow hot water bath at 325 degrees for 50 minutes. Do not open the oven door while baking.
    • Remove from the oven and place on a wire rack. Check for doneness by gently shaking the pan with your oven mitt. If it jiggles slightly only in the center, it is finished. 
    • Allow to cool undisturbed on wire rack for 2 hours, then cover with plastic wrap and move to refrigerator to chill six hours, or preferably overnight.
    • When completely chilled, carefully remove the sides of the springform pan. 

    Prepare Topping:

    • Chill a glass bowl and beaters in freezer for 15 minutes.
    • When chilled, add cold whipping cream to bowl and beat at low speed until the mixture begins to thicken.
    • Add the powdered sugar and blend in at low speed, then gradually increase the speed on the mixer to medium and beat until thickened more, but not all the way.
    • Add in the cream cheese and mix in at medium speed, then increase mixing speed to high and beat until whipped cream is very thick.
    • Using a flat spatula, smooth whipped cream over top of cheesecake. Garnish with candied orange peel, mandarin orange slices or orange zest. 

    Notes

    You can substitute a graham cracker crust in place of a Golden Oreo crust by using 1-½ cups of graham crackers, 3 tablespoons of sugar, and 4 tablespoons of butter. Bake as directed.
    Margarine can be substituted for butter in the crust, if desired.
    It is best to use full fat cream cheese in cheesecake recipes. Low fat cream cheese may affect the consistency as well as the taste.
    You can substitute Cointreau or any orange liqueur for Grand Marnier. Or leave out the alcohol and add another teaspoon of orange juice.
    In the whipped topping, you can substitute a tablespoon of room temperature brick cream cheese in place of the tub cream cheese.
    A non-dairy whipped topping such as Cool Whip can be used in place of whipped cream, although it loses some of the Creamsicle taste.
    Cheesecake can be wrapped in an airtight container and stored in the freezer for up to one month.

    Nutrition

    Calories: 712kcalCarbohydrates: 58gProtein: 8gFat: 51gSaturated Fat: 25gPolyunsaturated Fat: 6gMonounsaturated Fat: 15gTrans Fat: 1gCholesterol: 170mgSodium: 476mgPotassium: 181mgFiber: 1gSugar: 38gVitamin A: 1517IUVitamin C: 2mgCalcium: 103mgIron: 2mg
    Keyword easy cheesecake, flavored cheesecake, fruit dessert, Holiday dessert, orange cheesecake, summer dessert
    Tried this recipe?Let us know how it was!

    Are you making cheesecake for the first time? Let me know how it turns out!

    Classic Manhattan Cocktail with Bourbon

    August 6, 2021

    The simple, elegant Manhattan cocktail with Bourbon in a cocktail glass

    This classic Manhattan recipe originated in New York, but it is a world-famous rat pack favorite. Everyone should know how to make a Manhattan cocktail.

    The simple, elegant Manhattan cocktail with Bourbon in a cocktail glass
    The secret to the best Manhattan recipe is to use Bourbon rather than rye for a smooth, delicious classic drink.

    A Smooth Classic Cocktail

    Different from many vintage cocktails, the basic ingredients for a Manhattan haven’t really changed much since its beginnings. It is a favorite cocktail that has stood the test of time. It is mentioned in books and television shows, and is seen in the mid-century classic movie Some Like it Hot. Even Marylin Monroe knew to make it using Bourbon rather than rye whiskey!

    Is it Really From Manhattan?

    The drink’s origins are a little murky. It seems to have been invented at a club in the New York area in the mid 1800’s, hence its name. It really is a mid-century cocktail—just a different century! There are tales of it being created to celebrate a dinner for Winston Churchill’s mother. Unfortunately, that appears to be just a myth, since records show she was in Paris at the time.

    Ingredients Needed to Make a Manhattan Cocktail

    My favorite bourbon Manhattan recipe is simply great bourbon, bitters and sweet vermouth--add a cherry or two for garnish.
    Just three simple ingredients are what make the Manhattan drink such a classic cocktail. Don't forget to use a delicious Maraschino cherry such as Luxardo.

    One of the reasons the Manhattan is such a long-time favorite cocktail is that it uses just these 3 ingredients in the right amounts:

    1. Whiskey--I prefer Bourbon, but you can use rye
    2. Sweet Vermouth
    3. Bitters

    Of course, no Manhattan is complete without the cherries for garnish.

    What is the Best Bourbon for a Manhattan?

    The good folks at Heaven Hill Distillery make a couple of my favorites, such as McKenna Single Barrel or the surprisingly affordable Larceny Small Batch. If I'm mixing drinks for a group, I always reach for Maker's Mark Bourbon.

    What is the Best Vermouth for a Manhattan?

    I prefer to make mine with Cocchi Vermouth from Torino, Italy. It’s been around since 1891 so it has stood the test of time, and it's delicious to sip all by itself.

    What are the Best Bitters for a Manhattan?

    When it comes to bitters, I use the tried and true Angostura Bitters. The company has an amazing history and it truly is the standard. The only thing I’ll note here is that it is worth your time to buy a fresh bottle right now. If you have the same stained yellow-capped bottle that's been in your bar since about the 50’s, it's time for a fresh new bottle!

    There's Really Only One Brand of Cherries to Use--Luxardo!

    Lastly, the garnish. Back in the old days people just used the pinkish-red cocktail cherries because that’s all they had. Treat yourself to a real candied Maraschino cherry such as Luxardo brand. Pricey, but you don't go through them very fast and they're worth it. Plus, it's not the worst thing in the world if you spill a little extra juice in the cocktail—it’s that good!  

    Bar Tools Needed

    This classic cocktail stays popular because it is so easy to make. It doesn't 'require' any special tools, but here are a few basics your bar most likely already has that will make a good drink every time out:

    • Mixing glass
    • Jigger
    • Bar spoon
    • Strainer

    How to Make a Classic Manhattan Cocktail using Bourbon

    Step 1 Pour in the Bourbon
    Step 2 Add the vermouth
    Step 3 Add 2-3 dashes of bitters
    Step 4 Stir with ice to chill
    The simple steps to make a Manhattan Cocktail with Bourbon
    Step 5 Strain into a coupe glass
    These simple steps will yield the best Manhattan cocktail you can drink.

    How to Serve this Cocktail

    A note about the glass for a Manhattan. I've seen many places serve it in a cocktail glass, but I've always preferred to drink this in a coupe glass. Because it is a stemmed glass, my hand doesn't warm it up and the broad bowl lets me enjoy the smell of the drink and really engage my senses.

    Tips for Success

    Keep these tips in mind to make a simple classic without going off course:

    1. Use quality Bourbon -- If it's something you wouldn't drink neat, you shouldn't mix with it.
    2. Choose a craft vermouth that you like, rather than just the obvious choices at the supermarket.

    For the best tasting drink remember: If you wouldn't drink it by itself, don't mix with it, either.

    Variations

    It's always fun to play around with the ingredients of a cocktail. I've been known to use different bitters occasionally. But when you change out the base spirits in the drink, it becomes something completely different, often with a different name. These variations are examples of modifications to the Manhattan that have stuck around.

    Rob Roy

    This is another classic that deserves its own story one day. Substitute Scotch for the Bourbon.

    Rye Manhattan

    We've touched on this already, but simply substitute Rye whiskey for the Bourbon.

    Black Manhattan

    This is a relatively new twist on the Manhattan that uses orange bitters and Italian Averna Amaro instead of vermouth.

    Perfect Manhattan

    This adaption mixes sweet and dry vermouth in a 50/50 combination rather than just sweet vermouth.

    Frequently Asked Questions

    What's the difference between a Manhattan and an Old Fashioned

    These are two classic whiskey drinks. The main difference is that the Manhattan uses a sweet vermouth, whereas the old fashioned gets its sweetness from sugar cubes.

    Should a Manhattan be made with Rye or Bourbon?

    For me this is a matter of personal preference. I tend to enjoy the smoothness that Bourbon brings to a cocktail. Others enjoy the spicy flavor that a rye adds. My go-to guide for drink mixing is Jacques Straub's Drinks book from 1914. He simply states 'Whiskey' as the third ingredient. So it's up to you to decide which you prefer.

    How should you drink a Manhattan?

    Most people prefer a Manhattan 'straight up' in a cocktail glass or coupe. This is because the drink is already chilled when it is mixed with ice. However, some people do like to drink it over ice and served in a rocks glass.

    So enough with the chatter, let’s get to the directions for making this smooth classic cocktail.

    Before you go, did you try this cocktail? Why not leave a comment in the Comments section along with a rating? I always appreciate hearing from you and getting your feedback.

    • The simple, elegant Manhattan cocktail with Bourbon in a cocktail glass
      Classic Manhattan Cocktail with Bourbon
    • mint julep in a silver cup.
      Fresh Mint Julep Recipe
    • Closeup of a maple manhattan in a coupe glass
      How to Make the Perfect Maple Manhattan Cocktail
    • Hot Toddy cocktail in a clear mug with a lemon wheel and 2 small cranberries for garnish
      How to Make an Easy Bourbon and Honey Hot Toddy
    The simple, elegant Manhattan cocktail with Bourbon in a cocktail glass

    Manhattan Cocktail

    Kevin Mayfield
    A tried and true classic cocktail that came into it's own during the mid-century era.
    5 from 2 votes
    Print Recipe Pin Recipe
    Prep Time 7 minutes mins
    Total Time 7 minutes mins
    Course Classic Cocktails
    Cuisine American
    Servings 1 Serving
    Calories 176 kcal

    Ingredients


    • 2 oz Bourbon
    • 1 oz vermouth
    • 3 dashes bitters
    • 1-2 maraschino cherries

    Instructions
     

    • Fill your cocktail mixer with a couple of generous scoops of crushed ice.
    • Pour in the bourbon and vermouth.
    • Add the dashes of bitters.
    • Mix thoroughly with a long handled bar spoon.
    • Using a bar strainer, pour into a coupe glass.

    Notes

    A nice variation is an ounce and a half of Bourbon and a half ounce of cognac rather than 2 full ounces of Bourbon.
    Try other bitters such as black walnut or orange. One substitution can change the whole vibe of the drink. It may not technically be a "Manhattan," but that's okay!

    Nutrition

    Calories: 176kcalCarbohydrates: 5gProtein: 1gFat: 1gSodium: 1mgPotassium: 2mgFiber: 1gSugar: 2gVitamin A: 2IUCalcium: 3mgIron: 1mg
    Keyword 1950's cocktails, 1960's cocktails, Bitters, bourbon, madmen cocktails, mid century cocktails, rat pack cocktails, rye, Vermouth
    Tried this recipe?Let us know how it was!

    The Tasty Rum Runner Cocktail

    August 1, 2021

    A Rum Runner Cocktail in a hurricane glass with ingredients.

    Strong as a tropical storm, the rum runner cocktail is so good it's worth the potential hangover!

    A Rum Runner Cocktail in a hurricane glass with ingredients
    The delicious Rum Runner Cocktail is a mid century classic.

    The Rum Runner Cocktail is a Florida Keys Favorite

    When you are looking for a good mid century, fun, tropical drink, look no further than the rum runner cocktail. It is said to have been invented in the Florida Keys at the Holiday Isle Tiki Bar. Legend has it that the owner was trying to use up surplus liquor inventory, so he threw a bunch of rums and liqueurs together to create this classic tiki favorite. This story sounds similar to the Hurricane cocktail's creation, and probably could be said for several other tiki drinks. Supposedly it is named after the bootleggers that brought illegal rum up from the Caribbean, especially during Prohibition.

    I stopped in for a Rum Runner during spring break in college. That's about all I remember!

    Ingredients for a Delicious Rum Runner Cocktail

    Like many Tiki drinks, there's a long list of ingredients, but it's worth it:

    • White rum
    • Dark (or aged) rum
    • Pineapple juice
    • Orange juice
    • Banana liqueur
    • Blackberry liqueur
    • 151 rum
    • Grenadine

    You can blend the drink, or shake it for a frothier mix. Either way it's delicious!

    Tips for Success

    Quality ingredients and a festive presentation is paramount when enjoying a good tiki drink. Keep these pointers in mind:

    • Always use fresh squeezed fruit juices where you can--the drink will taste so much better than when using packaged products.
    • Use premium rums to avoid a harsh-tasting cocktail. As a rule of thumb, if you wouldn't drink it straight, don't use it.
    • Serve this drink in a hurricane glass -- it really adds to the fun spirit of the cocktail.
    • Add a colorful umbrella and straw with some fruit garnish for a festive flair.

    Frequently Asked Questions

    Who invented the rum runner drink?

    The owner of the Holiday Isle Tiki Bar, John Ebert, is said to be the creator of the cocktail.

    What can I mix with rum?

    A well made rum will retain some of the sweetness of the sugar cane it was produced from, but it also has a bit of an alcohol-forward taste. Therefore, you should look to mix it with something like fruit juices--just about any work well. A sweet liqueur also mixes well with rum.

    What is the most popular rum drink?

    There are many popular rum drinks, but the first ones to come to mind are The Mojito, Mai Tai, Cuba Libre, and Pina Colada. The list is almost endless!

    What is your favorite Rum Runner Cocktail adventure? Or can you recall it? Be sure and add some Tiki appetizers like a PuPu Platter to your next party.

    A Rum Runner Cocktail in a hurricane glass with ingredients.

    The Tasty Rum Runner Cocktail

    Kevin Mayfield
    This Florida Keys creation has many delicious variations but the original is a classic tiki favorite!
    5 from 1 vote
    Print Recipe Pin Recipe
    Prep Time 4 minutes mins
    Total Time 4 minutes mins
    Course Classic Cocktail
    Cuisine American
    Servings 1 Cocktail
    Calories 350 kcal

    Ingredients


    • 1 ounce white rum
    • 1 ounce dark or aged rum
    • 1 ounce banana liqueur
    • 1 ounce blackberry liqueur
    • 1 ounce pineapple juice
    • 1 ounce orange juice
    • Splash of grenadine
    • Splash of overproof rum
    • Orange slice or pineapple slice for garnish

    Instructions
     

    • Add two scoops of fresh ice to a cocktail shaker
    • Pour in all wet ingredients except the overproof rum and shake for 30 seconds
    • Strain into a hurricane glass
    • Add a dash of overproof rum on top
    • Add garnish

    Notes

    This drink can be blended if you prefer. Instead of a cocktail shaker, simply place all ingredients in a blender and hit the button!
    Don't be afraid to go a little wild with the garnishes. I like to use an orange slice, pineapple slice and cocktail cherries as well as a colorful umbrella.

    Nutrition

    Calories: 350kcalCarbohydrates: 27gProtein: 1gFat: 1gSaturated Fat: 1gPolyunsaturated Fat: 1gMonounsaturated Fat: 1gSodium: 4mgPotassium: 103mgFiber: 1gSugar: 25gVitamin A: 58IUVitamin C: 17mgCalcium: 7mgIron: 1mg
    Keyword 151 Rum, Florida Keys, frozen drinks, rum drinks, rum runner, Tiki cocktails
    Tried this recipe?Let us know how it was!

    Homemade Vinegar and Oil Salad Dressing

    June 10, 2021

    A bottle of homemade vinegar and oil salad dressing on a table, with a red checked napkin on the table and a green salad in the background.

    Homemade vinegar and oil salad dressing is fast and easy to prepare. It has a zesty, fresh taste and no preservatives!

    Salad dressing in a glass bottle, being poured over a green salad I a white bowl, with a red checked napkin next to it

    Fresh, healthy and tastes great -- these are the reasons to make your vinaigrette salad dressing at home!

    How To Make Vinegar & Oil Dressing From Scratch

    The popular formula for vinegar and oil dressing is one part vinegar to 3 parts oil. So for one cup of dressing, that would be ¼ cup vinegar and ¾ cup oil. If you find this ratio too oily, try using equal amounts of vinegar and oil, which makes for a more tangy dressing. You may need to experiment a little to come up with your favorite proportion of oil to vinegar.

    What Kind of Vinegar and Oil To Use

    You have several options when choosing your vinegar and oil. For this recipe I used a white balsamic vinegar with a light olive oil.

    Difference Between Traditional Balsamic And White Balsamic

    Traditional balsamic vinegar is a dark, Italian vinegar made from pressed white grapes. It is cooked, then aged in wooden barrels, typically 12-25 years. The longer it ages, the thicker it becomes. It has a strong and complex taste. Very high quality aged balsamic is sweet with the consistency of syrup, and is delicious as a dessert topping or for sipping as an aperitif.

    White balsamic vinegar is a golden-white colored vinegar which is also made from white grapes. It undergoes a different cooking process and is not barrel-aged. It has a milder flavor and color than traditional balsamic, and won't overpower the taste of a salad or cooked vegetables when used as a topping.

    Difference Between Extra Virgin Olive Oil and Light Olive Oil

    Extra virgin olive oil has a dark, greenish color and a distinct olive aroma and flavor. It is a healthy, high quality oil rich in antioxidants. It is frequently the oil of choice for a vinegar and oil salad dressing, but some people find the taste a little too powerful.

    Light olive oil has a light yellow tint color and has a much milder flavor than extra virgin olive oil. Its neutral taste makes it interchangeable with vegetable oil, and a good option for baking. It doesn't have all the same nutritional benefits as extra virgin olive oil, but it's a good option for the times when a lighter flavor is desired.

    Variations of Vinegar and Oil Dressing

    You really can't make a mistake when making a vinegar and oil dressing. Try substituting some of these combinations in our recipe for different flavor options:

    • Lemon vinaigrette: ¼ cup lemon juice + ¼ cup olive oil
    • Red wine vinaigrette: ¼ cup red wine vinegar + ½ cup of olive oil
    • Apple cider vinaigrette: ¼ cup apple cider vinegar + ¼ cup olive oil
    • White Wine vinaigrette: ¼ cup white wine vinegar + ¼ cup olive oil

    Or try this sweet vinaigrette that goes great with fruit salads.

    All of these vinaigrettes will stay fresh in the refrigerator for up to 2 weeks with the exception of the lemon vinaigrette, which can be kept for up to 5 days.

    Add a Bit of Spice For Enhanced Flavor

    Original handwritten recipe for vinegar and oil dressing
    Handwritten recipe for vinegar and oil dressing

    Vinegar and oil alone can be a little bland, so this recipe spices it up a bit with some dijon mustard, smashed garlic, salt and pepper. A pinch of sugar takes the edge off the sharpness of the vinegar. You can substitute a tablespoon of honey in place of the vinegar.

    Smashed garlic is called for to add flavor without adding actual bits of garlic to the salad dressing. You simply smash a whole clove of peeled garlic in a bowl, then pour the vinegar and oil mixture over it. Prior to serving, you remove the garlic clove. This will add a subtle garlic flavor to the dressing without leaving in grains of minced garlic. I'm a big garlic fan and don't mind having the minced garlic in the salad, so I opt to use that instead.

    Why does vinegar and oil separate?

    Oil and vinegar have a different molecular makeup, which causes the oil to repel water. Adding other items to the mixture, like herbs, mustard, and pepper help emulsify, or combine, the two ingredients. Always make sure to shake the ingredients together before pouring.

    Is a vinaigrette a healthy salad dressing?

    Yes, it is one of the healthiest salad dressings you can use. If you have dietary restrictions, reduce the amount of salt you use or eliminate it altogether.

    Can I use something other than olive oil?

    Yes! Some nice tasting oils include coconut oil, sunflower oil, safflower oil, walnut oil and sesame oil.

    If you have a vintage recipe you'd like share with us for possible publication, please scan it and email it to [email protected]. We'd love to hear from you!

    A bottle of homemade vinegar and oil salad dressing on a table, with a red checked napkin on the table and a green salad in the background.

    Homemade Vinegar and Oil Salad Dressing

    Nancy Blackstone
    Homemade vinegar and oil salad dressing is fast and easy to prepare. It has a wonderfully fresh taste and no preservatives!
    4.94 from 48 votes
    Print Recipe Pin Recipe
    Prep Time 10 minutes mins
    Total Time 10 minutes mins
    Course Salad
    Cuisine American
    Servings 1 cup
    Calories 98 kcal

    Ingredients


    • ¾ cup light olive oil
    • ¼ cup white balsamic vinegar
    • 1 garlic clove minced
    • 1 tablespoon dijon mustard
    • ¾ teaspoon salt
    • ¾ teaspoon pepper
    • 1 tablespoon honey or ¼ teaspoon sugar

    Instructions
     

    • Whisk all ingredients in a mixing bowl until throughly combined and oil & vinegar are emulsified. 
    • Transfer to a glass jar with a lid, and store in refrigerator.
    • Shake well before serving.

    Notes

    Can be stored in the refrigerator for up to 2 weeks. 

    Nutrition

    Serving: 2TablespoonsCalories: 98kcalCarbohydrates: 2gProtein: 1gFat: 10gSaturated Fat: 1gPolyunsaturated Fat: 1gMonounsaturated Fat: 7gSodium: 121mgPotassium: 9mgFiber: 1gSugar: 2gVitamin A: 1IUVitamin C: 1mgCalcium: 3mgIron: 1mg
    Keyword garlic, Salad dressing, vinegar
    Tried this recipe?Let us know how it was!

    The Original Screwdriver Cocktail Recipe

    May 28, 2021

    Screw driver cocktail in a tall glass with orange slice and orange straw.

    The simple screwdriver cocktail is a classic brunch staple, and makes a refreshing evening drink as well.

    Screw driver cocktail in a tall glass with orange slice and orange straw

    The Original Screwdriver Recipe

    A simple cocktail made only of orange juice and vodka, the screwdriver was a mid century favorite. Like many vodka drinks, the screwdriver soared in popularity in the 1960's as Americans moved away from gin, and like their favorite spy James Bond, embraced vodka. It became a popular Sunday brunch cocktail in the 1970's, and still remains on brunch menus with the ever-fashionable champagne Mimosa.

    Origin of the Screwdriver Cocktail

    How did the screwdriver originate? One story is that it was invented by American oil well workers in the Persian Gulf who snuck vodka into their juice. Another tale attributes it to Marines sneaking a splash into their orange juice during WWII. Yet another legend from Time magazine in 1949 says it was served to Turkish spies, Balkan refugees and American engineers at the Park Hotel in Turkey. No one is really certain, but I like to believe the version where inventive, thirsty American oil well workers discretely added a kick to their fruit juice while working in the hot sun. Not having a spoon handy, they just grabbed a screwdriver to mix it up! Sounds entirely plausible to me.

    Ingredients for a delicious Screwdriver Cocktail

    The ingredients needed for a delicious Screwdriver cocktail include vodka and orange juice but we add extras like orange bitters, simple syrup and a spritz of seltzer.
    The ingredients needed to make a vodka and orange juice Screwdriver cocktail. But I like to add orange bitters, simple syrup and a spritz of seltzer water for added taste.

    This is an easy drink to whip up since it is a duo cocktail, meaning only two ingredients. But you can still make a few improvements if you like. The base ingredients for a screwdriver drink recipe are:

    • Vodka
    • Fresh-squeezed orange juice

    Enhancements to the classic screwdriver cocktail can include:

    • Simple syrup
    • Orange bitters
    • Seltzer water

    Bar Tools Needed to mix a Screwdriver

    This cocktail doesn't require anything fancy to mix. Just use these basic tools:

    • Jigger
    • Bar spoon
    • Orange juicer (optional)

    How to make it

    Step 1 Pour in the vodka
    Process photos of making a screwdriver cocktail
    Step 2 Pour in the orange juice
    Step 3 Pour in your favorite optional ingredients

    How to serve it

    I like to serve my Screwdriver cocktails in a tall glass with plenty of room for ice. I usually use a Collins glass. But really, anything will do--even a champagne flute!

    Tips for Making a Screwdriver

    Even though this cocktail is essentially vodka and orange juice, keep these things in mind to mix an extra delicious and refreshing drink:

    • Use only a premium vodka (such as Grey Goose or Belvedere) so that you don't make a 'medicine-y' tasting drink.
    • Fresh-squeeze oranges at home for a really fresh, sweet drink. If you prefer to buy it, for the best taste stick with a carton of fresh juice rather than frozen, and try to find an organic juice with a little pulp and very little sugar and other additives.
    • Add a little simple syrup to smooth out the orange juice if it's too tart. It also mellows the taste of a strong vodka.
    • Include a spritz of carbonated soda water for a little bit of fizz. I like to pull out my iSi Sodamaker Classic for such an occasion.
    • For a spicy, aromatic element to your drink, add a few dashes of orange bitters.

    Frequently Asked Questions

    Can you use other alcohol instead of vodka?

    Yes, you can use gin instead of vodka, but then it is technically no longer a screwdriver and becomes an orange blossom cocktail.

    Can you use a different fruit juice to make a screwdriver?

    The choice is yours! You can use grapefruit juice and vodka, but that drink is called a greyhound cocktail. There are many variations of fruit juice you can choose, but it's no longer called a screwdriver. Mix away to your hearts content!

    When do you like to enjoy a Screwdriver? Just for brunch, or evenings, too?

    Before you go, did you try this cocktail? Why not leave a comment in the Comments section along with a rating? I always appreciate hearing from you and getting your feedback.

    • El Presidente cocktail in a cocktail glass with a twist of orange peel
      The Cuban El Presidente Classic Rum Cocktail Recipe
    • An amaretto sour cocktail in a small glass with orange slice and cherry
      The recipe for a perfect amaretto sour cocktail
    • Screw driver cocktail in a tall glass with orange slice and orange straw.
      The Original Screwdriver Cocktail Recipe
    • A Zombie Tiki cocktail in a clear tiki mug.
      Easy Zombie Tiki Cocktail Recipe
    Screw driver cocktail in a tall glass with orange slice and orange straw.

    The Original Screwdriver Drink Recipe

    Kevin Mayfield
    The sweet and tasty classic Screwdriver cocktail is a brunch must-have! 
    5 from 1 vote
    Print Recipe Pin Recipe
    Prep Time 3 minutes mins
    Total Time 3 minutes mins
    Course Classic Cocktails
    Cuisine American
    Servings 1 Cocktail
    Calories 215 kcal

    Ingredients


    • 2 ounces vodka
    • 4-6 ounces fresh-squeezed orange juice
    • 2 bar spoons simple syrup optional
    • 3-4 dashes orange bitters optional
    • spritz of seltzer water optional

    Instructions
     

    • Add a scoop of fresh ice to a highball cocktail glass.
    • Pour in the vodka and orange juice.
    • Stir the ingredients with a bar spoon to mix well.
    • Add a couple of dashes of orange bitters.
    • Add a couple of bar spoons of simple syrup and stir again.
    • Lastly, give a spritz from a seltzer bottle or pour some club soda into the drink to give it a little sparkle.

    Notes

    If you don't want to squeeze the oranges yourself you can use a store-bought brand, but pick one that is low in sugar and features some pulp for an authentic taste.
    You can muddle some orange peel in the cocktail glass for an extra-intense taste.

    Nutrition

    Calories: 215kcalCarbohydrates: 18gProtein: 1gFat: 1gSaturated Fat: 1gPolyunsaturated Fat: 1gMonounsaturated Fat: 1gSodium: 6mgPotassium: 232mgFiber: 1gSugar: 15gVitamin A: 227IUVitamin C: 57mgCalcium: 13mgIron: 1mg
    Keyword brunch cocktails, classic cocktails, orange juice drinks, screwdriver drink, vodka cocktails
    Tried this recipe?Let us know how it was!

    Homemade Pupu Platter Recipes

    May 20, 2021

    Divided 3-way pupu platter tray with crab rangoon, teriyaki meatballs, and fresh pineapple chunks.

    A homemade pupu platter with crab rangoon, teriyaki meatballs, and fresh cut pineapple chunks will make your tiki party, luau, or summer a bash a delicious success!

    Divided 3-way pupu platter tray with crab rangoon, teriyaki meatballs, and fresh pineapple chunks

    What is a Pupu Platter?

    A pupu platter is an assortment of Polynesian appetizers. In Hawaiian, "pupu" translates to "hors d'oeuvre," so it's a dish you would serve either before dinner, or as small bites at a cocktail party.

    Pupu platters were first served in the 1930's at Don the Beachcomber's Polynesian restaurant in San Francisco. They soon caught on at Trader Vic's and many Asian restaurants as well. In the 1960's and 70's it was a popular party tray, and is still a favorite appetizer on menus in tropical destinations.

    What Goes on a Pupu Platter?

    There are no hard and fast rules on what should be served, but following are items you will often find on a pupu platter:

    • Crab rangoon
    • Teriyaki meatballs
    • Coconut shrimp
    • Tempura shrimp
    • Tempura vegetables
    • Teriyaki beef skewers
    • Pineapple chunks
    • Spare ribs
    • Spring rolls
    • Chicken satay

    Preparing Your Platter for Serving

    We have three easy to prepare recipes for you to choose from for your pupu platter: coconut shrimp, teriyaki meatballs and crab rangoon. We suggest serving two hot appetizers along with some fresh pineapple chunks for an appetizer tray that will be the talk of the party!

    How To Make a Pupu Platter

    1. Make the meatballs first

    Easy Teriyaki Meatballs can be made in advance. Prepare the raw meatballs and place them in a covered container in the refrigerator for up to 2 days before cooking. Once they are baked, they can be mixed with teriyaki sauce and kept warm in a crockpot on the lowest setting. When ready to serve, simply transfer them to your serving tray and keep extras in the crockpot to refill the serving plate when it gets low.

    2. Cut up fresh pineapple

    There is no comparison between canned pineapple and fresh pineapple. For a memorable appetizer, you will want to serve fresh pineapple chunks on your pupu platter. Though you can buy pre-cut pineapple in your grocery store's produce section, you will pay a lot more for it. Cutting a pineapple may seem daunting if you've never done it before, but it only takes a few minutes and it's really quite easy. Head over to this post and video from Williams Sonoma on the easiest and fastest way to cut fresh pineapple bites.

    3. Make the coconut shrimp or crab rangoon

    If you're making the baked coconut shrimp, prepare the baking sheets of uncooked shrimp 2-3 hours before guests arrive, then gently cover with plastic wrap and place in the refrigerator. About 30 minutes before guests arrive, preheat the oven to 400 degrees. When ready, place cookie sheets in the oven to bake for 15-20 minutes. While baking, mix up the dipping sauce. Transfer to a serving platter when you remove shrimp from the oven.

    If you're making the crab rangoon, mix up the cream cheese mixture about 30 minutes before guests arrive. Fill and pinch the wanton wrappers, and preheat the oil. Just before guests arrive drop the first batch in the oil for 2-3 minutes, then remove to the serving platter.

    Planning and prepping in advance makes this impressive appetizer tray so easy to prepare!

    Tiki Cocktails To Go With The Hawaiian Small Bites

    Now that you've got your food menu set, whip up some fabulous tiki cocktails to go with it. Here are some of our favorites:

    • Easy Hurricane Cocktail Recipe
    • Original Piña Colada Recipe
    • Easy Zombie Tiki Cocktail Recipe
    • Classic Mai Tai Cocktail Recipe
    • Easy Blue Hawaiian Cocktail
    • Simple Blue Hawaii Tiki Cocktail

    The winning combination of tropical appetizers and cocktails is sure to put your party guests in the aloha spirit!

    If you have a vintage recipe you'd like share with us for possible publication, please scan it and email it to [email protected]. We'd love to hear from you!

    Crab Rangoon Appetizer Recipe

    May 6, 2021

    Three pieces of crab rangoon on a blue plate.

    Crab rangoon's rich garlic and scallion infused cream cheese & crabmeat filling in a deep fried won ton wrapper is a tasty Polynesian appetizer!

    Two pieces of crab rangoon on a blue plate with a blue bowl of crab rangoon in the background

    In the mid-1950's Trader Vic's famous Polynesian-style restaurant put this item on its appetizer menu in San Francisco, and it has been a party favorite ever since. Though no one knows for sure, it is thought that the owner of the restaurant, Victor Bergeron, invented the dish himself.

    What is Crab Rangoon?

    Crab rangoon is an appetizer dish that is frequently found on the menu at Asian, Polynesian, and Asian-fusion restaurants. It has a crunchy, deep-fried outer shell and a hot & creamy filling consisting of cream cheese, crab meat, garlic, green onions and Worcestershire or steak sauce. When paired with a tiki cocktail such as the Blue Hawaii, the Hurricane, or the Mai Tai, you've got a winning combination!

    Handwritten recipe for crab rangoon
    My sister's mid century handwritten recipe for crab rangoon

    Ingredients for Crab Rangoon

    • won ton wrappers
    • crab meat
    • cream cheese
    • garlic
    • green onions (a small shallot can be substituted)
    • steak sauce or Worcestershire sauce
    • vegetable oil for frying

    Tips for Making This Recipe

    • Use genuine crab meat rather than imitation crab meat. While the taste is similar, the nutritional value of real crab meat is much higher. I recommend using a canned, white crabmeat which can be found in the grocery store near the canned tuna fish.
    • Soften the cream cheese to room temperature to make it easier to mix with the other ingredients.
    • Thaw the won ton wrappers in the refrigerator overnight before using them. Be careful not to confuse them with dumpling wrappers, which are a different size, shape and consistency.
    • To fill the won ton wrapper, put a small amount of the crab meat mixture in the center, then dip your finger into water and run your wet finger around all 4 edges. Then bring two opposite corners together and pinch, then the remaining two opposite corners together and pinch until it is closed. Be careful not to overfill the wrappers or the filling will spill out during cooking.
    • Preheat oil in an electric skillet, wok or deep fry pan to 350-360 degrees Fahrenheit. Use enough oil to cover the won tons as they cook. The amount of oil will vary with the size of the pan you're using, but plan on 1-½ to 2 quarts.
    • Cook in batches of 4 until golden brown, about 2 minutes. Using a slotted spoon, remove to a paper towel-lined serving bowl. Serve hot.

    Frequently Asked Questions

    What is imitation crab made of?

    Created in Japan in the 1970's as an affordable option to expensive crab meat, imitation crab is a paste made of minced white fish (usually pollack) along with fillers including sugar, starch, sodium, egg whites, plus artificial colors, flavors and preservatives. Therefore, contrary to popular belief imitation crab is not a vegetarian item. Genuine crab has far more vitamins, minerals, and protein than imitation crab, and the ingredients in my can of Crown Prince fancy white lump crabmeat was crab and water with some sodium and citric acid to maintain the PH balance

    What are won ton wrappers?

    Won ton wrappers are small squares of dough made from flour, eggs and water. They hold a variety of fillings and can be deep fried or boiled in a soup. They are different from dumpling wrappers, which are round and have a different consistency because they are made without using egg in the dough. Both can be found in the freezer section of most grocery stores and Asian markets.

    Can crab rangoon be reheated?

    Yes! To keep them as crispy as possible, preheat oven to 375 degrees (190ºC). Place in a foil covered pan and heat for 8 minutes, then remove foil and heat for 2 more minutes. Serve immediately.

    How long can crab rangoon be kept for reheating?

    Store in an airtight container in the refrigerator for up to 2 days. To freeze, first place them in a single layer on a cookie sheet lined with parchment paper. Set them in the freezer just until frozen, then transfer to a freezer bag for long term storage.

    If you're looking for more Polynesian appetizers, try our Easy Teriyaki Meatballs Appetizer and our Baked Coconut Shrimp with Apricot Dipping Sauce.

    If you have a vintage recipe you'd like share with us for possible publication, please scan it and email it to [email protected]. We'd love to hear from you!

    Three pieces of crab rangoon on a blue plate.

    Crab Rangoon Appetizer Recipe

    Nancy Blackstone
    Crab rangoon's rich garlic and scallion infused cream cheese & crabmeat filling in a deep fried won ton wrapper is a tasty Polynesian appetizer!
    5 from 1 vote
    Print Recipe Pin Recipe
    Prep Time 25 minutes mins
    Cook Time 8 minutes mins
    Total Time 33 minutes mins
    Course Appetizer
    Cuisine Polynesian
    Servings 18 pieces
    Calories 52 kcal

    Ingredients


    • 6 oz can fancy white crabmeat drained
    • 8 oz cream cheese softened to room temperature
    • 3 green onions minced
    • 2 cloves minced garlic
    • ¼ teaspoon Worcestershire sauce or steak sauce
    • 2 quarts vegetable oil

    Instructions
     

    • In a large bowl, mix cream cheese, crabmeat, garlic, green onions and Worcestershire sauce. 
    • Place 4 individual won ton wrappers on the counter. Dip your finger in water and run it around all 4 edges of each wrapper.
    • Place a small dollop (about 1 tablespoon) of cream cheese mixture in the center of each. 
    • Bring two opposite corners of the won ton wrapper together and pinch, then bring the other two together and pinch, until the won ton wrapper is tightly closed.
    • Place in oil making sure the won ton is fully covered, and fry approximately 2 minutes until golden brown. Remove with slotted spoon and place in a serving bowl lined with a paper towel. Repeat until all won tons are fried, and serve immediately.

    Notes

    You can substitute a small shallot for the green onions
    You can use a steak sauce (such as A-1) in place of the Worcestershire sauce

    Nutrition

    Calories: 52kcalCarbohydrates: 1gProtein: 2gFat: 4gSaturated Fat: 2gPolyunsaturated Fat: 1gMonounsaturated Fat: 1gTrans Fat: 1gCholesterol: 23mgSodium: 79mgPotassium: 49mgFiber: 1gSugar: 1gVitamin A: 189IUVitamin C: 1mgCalcium: 23mgIron: 1mg
    Keyword crab, cream cheese
    Tried this recipe?Let us know how it was!

    .

    Classic Mojito Cocktail Recipe with Simple Syrup

    April 30, 2021

    Mojito cocktail in a highball glass chunks of lime and mint leaves.

    Mojitos are famous for their refreshing combination of sweet, tart, and minty flavors. It's a classic rum cocktail that will cool you off on a hot summer day.

    Mojito cocktail in a highball glass chunks of lime and mint leaves
    The classic Mojito recipe takes just a few ingredients, then you're set to enjoy a taste of Old Havana.

    Sipping a Fun Mojito Cocktail is an Easy Way to Beat the Heat or Enjoy the Happy Hours at your Favorite Tropical Bar

    The best Mojito recipe probably originated at a famous hotel bar in Havana, Cuba but its exact origins are lost to the mists of time. And while the mint Mojito drink is certainly one of Cuba's most famous creations, other great cocktails originated there, including the Cuba Libre and the Daquiri.

    This simple cocktail can be seen in movies and books and is a favorite of many a tropical fan. James Bond can seen sipping a classic Mojito cocktail beachside in the movie Die Another Day. After all, what better way to have a good time and escape the heat than sipping a cocktail made from local ingredients such as sugar cane, rum, and lime? And of course, Ernest Hemingway was known to consume a pitcher of Mojitos just to get the day started. Either way, it is the perfect summer cocktail.

    The Best Recipe and Ingredients for a Delicious Cocktail will Yield Many Classic Drinks

    This is an easy recipe for the Mojito cocktail. It's a classic cocktail that contains simple ingredients:

    • Bacardi Silver light rum from Puerto Rico is the best rum to use. It is easily available at most grocery stores and reasonably priced. Plus, it is easier to find than Cuban rum. The mint Mojito recipe is typically made with a white rum and not a dark rum, but really it's whatever your taste buds prefer. Always use the best alcohol you can when mixing a Mojito, because an inferior rum will ruin the drink.
    • I prefer to use simple syrup, which is easily made with a little sugar and ensures there are no sugar granules in your drink.
    • Plenty of fresh mint leaves cut from the mint sprig.
    • Lime wedges for fresh lime juice -- the best part of the drink! It infuses all those zesty lime flavors.
    • Soda water or bubbly club soda.

    Many Mojito recipes use short cuts, such as sweetening with cane sugar or using lime juice from a bottle. Believe me, it's worth taking the time to mix this cocktail by hand using the best Mojito recipe--a classic one such as this, with fresh ingredients. And this is an easy Mojito recipe!

    I prefer to use this easy-to-make simple syrup to mix with rather than the fine, powdered sugar some recipes call for. It helps keep the mint leaves intact while muddling, and it doesn't leave a sugary mess in the bottom of the glass.

    Tools Needed to Make a Mojito

    Aside from some common tools such as:

    • Cocktail Shaker
    • Bar knife
    • Bar spoon
    • Cocktail jigger

    You'll also want to use a high quality muddler to gently mash the mint leaves to release their natural oils and mint flavors I prefer a simple wooden muddler like this one.

    A simple wooden cocktail muddler laying on a cutting board.
    A simple wooden cocktail muddler is a must-have for making a Mojito drink.

    They are easy to use and clean and are very affordable and can be used to make several cocktails such as an Old Fashioned or Mint Julep.

    How to make a Classic Mojito

    mint leaves
    Place freshly cut mint leaves in a glass
    mint leaves muddled in simple syrup.
    Add the simple syrup over the muddled mint leaves
    mint leaves muddled in simple syrup.
    Gently muddle to release the mint oil

    There are not too many special steps needed to mix a Mojito. Just follow these simple steps:

    1. Place some fresh ice cubes in a tall glass and set aside.
    2. Place some more fresh ice cubes in your cocktail shaker and set aside.
    3. In a small glass, place the mint leaves and pour using your muddler, mash them up--careful not to completely tear them.
    4. Pour this mixture into your shaker along with the rum and lime juice and shake for a good 30 seconds to cool the drink completely.
    5. Pour into the tall glass of ice and top with club soda.
    6. Add some additional mint leaves, sprigs and lime wedges for garnish.

    Tips for Success for an Easy Mojito Cocktail

    How to make a mint Mojito with fresh ingredients? It's pretty simple, really.

    • Use a cocktail muddler to help mash the mint leaves to release the oils from the plant.
    • Don't use a Mojito mix. They contain many chemicals and plenty of sugar, and you don't get the fresh, authentic taste. Also, avoid bottled lime juice since it has a very harsh, sour flavor.
    • Muddling of the fresh mint leaves should be done gently. No need to destroy the leaves and have specs of green floating in the drink, making it hard to swallow -- go easy.


    Frequently Asked Questions

    How do you muddle mint without a muddler?


    If you don't have a muddler in your home bar, simply use bottom of a wooden spoon to mash the mint leaves. Remember, the objective is not to shred them; you just want to mash them to release the mint oils.

    What is a virgin Mojito?


    A virgin Mojito is just one of the fun variations of the original Mojito but without the alcohol content. Follow the recipe below, and simply leave out the rum for the perfect balance of refreshing taste without the effects of alcohol. For another refreshing drink try a regular or virgin Strawberry Mojito -- one of many delicious fresh fruit rum cocktails based on a Mojito. Or, leave out the fruit juice and stick with the simple Mojito with basic ingredients -- an easy drink to love!

    What's the difference between a Mojito and a Margarita?


    These fun cocktails are quite different, individual drinks. The Mojito is an easy cocktail that uses white rum as the base spirit, whereas the Margarita uses tequila. The Mojito originated in Cuba and the Margarita may have originated in Mexico. It hard to know for sure, so it depends on which legend of the origins of the Mojito and Margarita you believe.

    What's your favorite cocktail recipe to cool off with during the hot summer months? In addition to the mojito, other mint-flavored drinks I like include the Grasshopper, Mint Julep and the Stinger. 

    Before you go, did you try this cocktail? Why not leave a comment in the comments section along with a rating? I always appreciate hearing from you and getting your feedback.

    Mojito cocktail in a highball glass chunks of lime and mint leaves.

    Classic Mojito Cocktail Recipe with Simple Syrup

    Kevin Mayfield
    The classic Mojito cocktail is a refreshing citrus and mint drink that will cool you off on a hot summer day
    5 from 3 votes
    Print Recipe Pin Recipe
    Prep Time 2 minutes mins
    Total Time 2 minutes mins
    Course Classic Cocktails
    Cuisine American
    Servings 1 Cocktail
    Calories 198 kcal

    Ingredients


    • 2 ounces white rum
    • ¾ ounce simple syrup
    • ¾ ounce fresh-squeezed lime juice
    • 6-8 mint leaves
    • 6 ounces club soda

    Instructions
     

    • Place fresh ice into a tall glass and set aside.
    • Place fresh ice cubes into your cocktail shaker and set aside.
    • Add the mint leaves to a small, short glass.
    • Pour the simple syrup into the glass over the mint leaves.
    • Gently muddle the leaves until you really smell the oils.
    • Pour this mixture into your cocktail shaker.
    • Add the fresh lime juice and rum and shake for 30 seconds.
    • Pour into the tall glass of ice.
    • Fill the remainder of the glass with club soda and stir.
    • Garnish with a lime wedge and some sprigs of mint.

    Notes

    I like to rub some of the mint leaves around the rim of the glass to release the oils and give the drink a pop of mint flavor and aroma
    Looking to cut back sugar? Try a sugar substitute like Stevia instead of the simple syrup
    Feel free to leave out the rum and make it a virgin mojito

    Nutrition

    Calories: 198kcalCarbohydrates: 18gProtein: 1gFat: 1gSaturated Fat: 1gPolyunsaturated Fat: 1gSodium: 51mgPotassium: 77mgFiber: 1gSugar: 16gVitamin A: 266IUVitamin C: 8mgCalcium: 29mgIron: 1mg
    Keyword cuban cocktail, cuban drinks, hemingway cocktail, James Bond cocktail, Mexican drinks, mid century cocktails, mojito, muddler, peppermint cocktails
    Tried this recipe?Let us know how it was!

    Easy Teriyaki Meatballs Appetizer

    April 28, 2021

    Four teriyaki meatballs on a blue plate.

    Savory homemade meatballs contain a hint of ginger, and with a sweet and tangy teriyaki sauce drizzled on top have an authentic, island-style flavor!

    Four meatballs on a small plate with a side of teriyaki sauce, and a bowl of additional meatballs in the background

    Whether you're throwing a tiki-themed party or just craving a Polynesian appetizer, this teriyaki meatball recipe will hit the spot. Served with a tropical cocktail like the piña colada, hurricane, or mai tai, this is truly an island treat!

    Start With Easy Homemade Baked Meatballs

    There are many teriyaki meatball recipes that call for frozen meatballs and a homemade teriyaki sauce. But when Polynesian food and drinks became a mid-century rage in the 1950's, people were making them from scratch, not buying them in bags. I admit I have used frozen meatballs in a pinch, and they're quite bland. Plus, many frozen meatballs have Italian spices in them, and you don't want an Italian meatball for this Asian-fusion dish.

    These easy homemade baked meatballs are a breeze to make and the flavor can't be beat. They contain fresh ginger, garlic, and dijon mustard. When paired with the slightly sweet teriyaki sauce, you get an authentic tropical taste.

    Serving Suggestions

    This recipe makes 48 meatballs, a nice, party-sized platter. Figure on guests eating 3-4 meatballs per person. You could also serve them as a main course over a bed of rice -- in that case, figure 6-8 meatballs per person. If you don't eat them all, you can refrigerate or freeze the leftovers.

    Flavorful Teriyaki Sauce for Meatballs

    This oh-so-easy sauce comes together in just a few minutes. It has a pleasant, sweet flavor with a tangy aftertaste. The sweetness of the brown sugar combined with the saltiness of the soy sauce mix well with the similar flavors of the hoisin sauce. Adding in the fresh garlic and ginger give the flavor a complexity and depth that you won't get out of a jarred dipping sauce.

    Making the teriyaki sauce literally takes minutes. Simply add the six ingredients to a small saucepan and let the mixture simmer just long enough to warm it, about 3 minutes. Adding a garnish of chopped green onions and sesame seeds adds additional flavor and texture to this mid century tiki appetizer.

    Ingredients for Meatballs

    • Ingredients for meatballs
      Ground beef, ground pork, eggs, panko, kosher salt, dijon mustard, fresh ginger and fresh garlic

    The Secrets To Good Tasting Meatballs

    Fifteen uncooked meatballs on a foil lined cookie sheet, ready for baking
    These meatballs are oven ready!
    • Make the meatballs uniform in size so they cook evenly. If the size varies widely, some might not be fully cooked at the end of the cooking time. I use a cookie scoop to make the meatballs the same size.
    • Don't over mix the meat. Over mixing causes ground meat to become tough. The best method for mixing is to use your fingers to work all the ingredients together, and to stop mixing as soon as they are combined.
    • Use meat that has some fat. Using meat that is very lean will result in a meatball that is a bit dryer and less flavorful. Fat gives the meat flavor, and since this is an appetizer no one will be consuming that much.

    Frequently Asked Questions

    What type of ground meat should I use for the best tasting teriyaki meatballs?

    For the most flavorful meatballs, use one pound of ground beef that is 80/20 lean, and one pound of plain ground pork (not Italian sausage).

    How do I know when the meatballs are done baking?

    The best way to tell if meatballs are done is to use a meat thermometer to check the internal temperature. After 18 minutes, insert the thermometer into the center of a few of meatballs. Once they reach an internal temperature of 155 degrees, they can be removed and allowed to rest, during which time their internal temperature will continue to rise to the proper level of doneness. For more information on cooking perfect meatballs, refer to these five quick tips from Cooksmarts.

    Can I make meatballs using ground turkey?

    Yes, simply substitute 2 pounds of ground turkey for the beef/pork mixture. Bake at 400 degrees until internal temperature reaches 165 degrees, approximately 20-22 minutes.

    What is hoisin sauce?

    It is a dark colored, vegetable-based Cantonese paste used in cooking Asian foods such as stir fry dishes and dipping sauces. The main ingredient is fermented soybean paste along with other spices. It has a slightly sweet and salty taste. Hoisin sauce is a vegan item containing no animal products. It can be found in grocery stores near where soy sauce is sold.

    Having a tiki party? Also try our Baked Coconut Shrimp with Apricot Dipping Sauce.

    If you have a vintage recipe you'd like share with us for possible publication, please scan it and email it to [email protected]. We'd love to hear from you!

    Four teriyaki meatballs on a blue plate.

    Easy Teriyaki Meatballs Appetizer

    Nancy Blackstone
    Savory homemade meatballs contain a hint of ginger, and with a sweet and tangy teriyaki sauce drizzled on top have an authentic, island-style flavor!
    5 from 2 votes
    Print Recipe Pin Recipe
    Prep Time 30 minutes mins
    Cook Time 20 minutes mins
    Total Time 50 minutes mins
    Course Appetizer
    Cuisine Polynesian
    Servings 48 meatballs
    Calories 65 kcal

    Ingredients


    Meatballs

    • 1 pound ground beef
    • 1 pound ground pork
    • 2 large eggs
    • 1 cup panko bread crumbs
    • 2 teaspoons fresh ginger grated
    • 4 cloves minced garlic
    • 1 teaspoon dijon mustard

    Teriyaki Sauce

    • ¼ cup light brown sugar
    • 2 tablespoons hoisin sauce
    • 1 tablespoon soy sauce
    • ½ tablespoon sesame oil
    • 1 garlic clove
    • ½ teaspoon fresh ginger grated

    Toppings

    • chopped green onions
    • sesame seeds

    Instructions
     

    • Meatballs
    • Preheat oven to 400 degrees.
    • Add all meatball ingredients to a large bowl, then mix with your hands or a spatula just until combined.  Roll into approximately 48 balls using roughly 1-½ tablespoons of meat mixture for each. Place on a large cookie sheet line with non-stick foil.
    • Bake at 400 degrees for 18-20 minutes or until internal temperature reaches 155 degrees. Allow meatballs to rest 5 minutes before serving. Temperature will continue to rise as they rest.
    • Teriyaki Sauce
    • In a small saucepan, mix all the teriyaki sauce ingredients together and heat over a low heat, stirring constantly. Simmer for 3 minutes, remove from heat and drizzle over the meatballs. 
    • Garnish with sliced green onions and/or sesame seeds, if desired. 

    Notes

    You can make and store unbaked meatballs in the freezer in an airtight container for 3-4 months. 
    You can store baked meatballs in the freezer in an airtight container for 2-3 months.
    You can store baked meatballs in the refrigerator for 3-4 days.

    Nutrition

    Serving: 1meatballCalories: 65kcalCarbohydrates: 2gProtein: 4gFat: 4gSaturated Fat: 2gPolyunsaturated Fat: 1gMonounsaturated Fat: 2gTrans Fat: 1gCholesterol: 21mgSodium: 57mgPotassium: 63mgFiber: 1gSugar: 1gVitamin A: 12IUVitamin C: 1mgCalcium: 8mgIron: 1mg
    Keyword 1950's appetizer, asian meatballs, asian-fusion dishes, Hawaiian Meatballs, Mid century appetizer, Tiki appetizer
    Tried this recipe?Let us know how it was!

    Fresh Mint Julep Recipe

    April 23, 2021

    mint julep in a silver cup.

    The frosty, classic mint julep recipe is refreshing and so easy to mix. This is the traditional Kentucky Derby drink that you'll want to sip while cheering on your winning horse!

    mint julep in a silver cup with a bottle of McKenna bourbon
    A frosty mint julep cocktail is perfect for watching a horse race--or cooling off on a hot summer day

    A few years ago, I was lucky enough to attend the Kentucky Derby at Churchill Downs where I enjoyed an authentic Kentucky Derby mint julep (or two.) I can attest to the fact that this is the best mint julep recipe outside of Churchill Downs!

    The Mint Julep is a Kentucky Derby Requirement

    When you think Kentucky Derby cocktail, your mind immediately thinks of the mint julep drink. As well it should, considering roughly 120,000 mint juleps are sold at Churchill Downs during this historic annual event.

    Since 1938, the mint julep has been the official drink of the Kentucky Derby, where the julep's signature silver cup has been awarded to the winner every year since 1816. This refreshing cocktail has long been associated with the American South and aristocracy, perhaps because only the rich had plenty of ice. Plus, they were the ones who could afford the silver for the traditional julep cups.

    History of the Mint Julep

    Like many cocktails, juleps got their start as medicine. The word julep derives from the Persian word gulab, a sweetened rosewater that was used to make medicine easier to swallow.

    The drink began appearing in print in the late 1700's. Known as the Virginia Dram, the spirit used was flexible. When the cocktail migrated to Kentucky from Virginia, Bourbon became the staple ingredient. The famous Kentucky senator Henry Clay introduced the mint julep to the society crowd in Washington D.C., where it took off in popularity.

    The mint julep is a cousin to the Mojito since both use muddled mint leaves and are from the family of cocktails known as smashes. As a result, they share similar ingredients and mixing styles.

    Mint Julep Ingredients

    What is in a mint julep? Only three basic items plus ice! Here are the ingredients you'll need to make some mint juleps for your Kentucky Derby viewing party:

    • Quality Bourbon
    • Simple syrup
    • Fresh mint leaves
    • Crushed ice

    What is the Best Bourbon For Mint Juleps?

    People always ask me what the best Bourbon is for mint juleps. My answer is any Bourbon you would drink straight. An inferior Bourbon will almost always make a poor-tasting cocktail. I've seen people try and pass off a julep drink mixed with a poor quality Bourbon or Canadian whiskey and they are bitter and unpleasant, and lack the sweet vanilla taste of a good Bourbon.

    I prefer a good wheated Bourbon to sip and mix with. My day-to-day Bourbon is Maker's Mark. It is consistently very smooth sipped neat, but it also stands up well in a cocktail. I've also recently been drinking McKenna 10-year old Bourbon and it makes a wonderful julep drink.

    How to Make a Mint Julep

    The classic mint julep recipe is a very easy cocktail to whip up in a short time. Make sure you have a wooden muddler to grind the mint leaves. This is a staple you should have in your home bar, and it can be purchased online or at your local liquor store.

    Keep these tips in mind and you'll make a delicious cocktail that will be a 'winner' every time!

    • Don't completely crush the mint leaves while muddling them. The intent of muddling is to release the sweet oils from the mint leaves, and not to have tiny bits of green leaves floating in your cocktail, making it hard to drink.
    • Use a simple syrup rather than sugar cubes to make a clean drink with no sugary sediment in the glass. Follow our easy homemade simple syrup recipe to make the best simple syrup you could use in a matter of minutes.
    • mint leaves
      Place freshly cut mint leaves in a glass
    • mint leaves muddled in simple syrup
      Pour simple syrup over the mint leaves
    • mint leaves muddled in simple syrup
      Gently muddle to release the mint oil
    • After you've gently muddled the simple syrup and mint leaves, pour that mixture into your julep cup.
    • Add plenty of crushed ice and mound it up.
    • Pour the Bourbon through the ice and stir.
    • Make sure you stir the drink briskly. The point is to have your julep cup build up a frost on the outside. Insert some mint sprigs for garnish and you are ready to enjoy a Kentucky classic!

    Frequently Asked Questions

    Do mint juleps taste good?

    The short answer is, yes! The long answer is they do if they are made properly. By that, I mean made with fresh mint leaves, good Bourbon, and the proper ration of simple syrup. When mixed properly, the drink should start out with a nice vanilla taste from the Bourbon, then a wave of sweetness from the simple syrup, and finish with the refreshing minty taste of the gently muddled mint leaves.

    Kevin and Rick at the Kentucky Derby toasting with mint julep cocktails
    Me with my brother-in-law toasting the winning horse with our mint juleps at the Kentucky Colonels Ball.

    Have you been to the Kentucky Derby? Churchill Downs is a wonderful landmark with a long history of competition and southern hospitality that is a 'bucket list' place to visit. While you are in the northern Kentucky area, it is also worth visiting some of the Bourbon distilleries along famed 'Bourbon Trail' to see how it is made and to sample some delicious whiskey.

    If you've been to the Derby, I'd love to hear about your experience and how this mint julep cocktail measures up to the one you had there!

    mint julep in a silver cup.

    Fresh Mint Julep Recipe

    Kevin Mayfield
    This refreshing minty cocktail is a southern classic and a Derby winner.
    5 from 1 vote
    Print Recipe Pin Recipe
    Prep Time 2 minutes mins
    Total Time 2 minutes mins
    Course Whiskey Cocktail
    Cuisine American
    Servings 1 Cocktail
    Calories 211 kcal

    Ingredients


    • 2 ounces Bourbon
    • 1 ounce simple syrup
    • 6-8 fresh mint leaves
    • 2 cups of crushed ice

    Instructions
     

    • Place the mint leaves in a cocktail shaker
    • Pour in the simple syrup and gently muddle with a wooden muddler
    • Pour the mixture into a julep cup
    • Add plenty of crushed ice
    • Pour the Bourbon in through the crushed ice
    • Stir until the silver julep cup has a nice frost to it
    • Add the mint sprig for garnish

    Notes

    You could use a tablespoon of powdered sugar and a dash of water instead of simple syrup
    If you don't have a julep cup, use a highball glass

    Nutrition

    Calories: 211kcalCarbohydrates: 22gProtein: 1gFat: 1gSaturated Fat: 1gPolyunsaturated Fat: 1gSodium: 19mgPotassium: 53mgFiber: 1gSugar: 21gVitamin A: 255IUVitamin C: 2mgCalcium: 18mgIron: 1mg
    Keyword bourbon cocktail, classic cocktail, derby drink, julep drink, Kentucky Derby, mint julep
    Tried this recipe?Let us know how it was!

    Homemade Quiche Crust Recipe

    April 15, 2021

    An empty quiche crust in a pie plate.

    This flakey homemade quiche crust recipe has only five ingredients plus water. It comes together in minutes and will nicely complement any quiche filling!

    An empty quiche crust in a pie plate
    Homemade Quiche Crust

    Why Make Your Own Quiche Crust When You Can Buy One?

    Cooking from scratch allows you to control the ingredients that go into the foods you eat. I prefer organic ingredients whenever possible. Plus, I try to avoid prepared foods with additives such as preservatives and food dyes. The refrigerated pie crust that I have used in the past contains both of those, so I switched to making my own.

    All Crust Recipes Are Not The Same

    There are three different types of pie crusts:

    1. A basic pastry crust made primarily of butter, flour, salt, egg and water. Known also by the French term pâte brisée, it is a light and flaky crust that works well with savory dishes like quiche. Our quiche crust recipe falls into this category.
    2. A sweet pastry crust usually made from butter, flour, salt, sugar, and water. Also known by the French term paté sucrée, this type of crust has a cookie-like dough which is typically used for dessert pies and tarts.
    3. A rich, sweet shortbread-like crust made with butter, flour salt sugar, and vanilla. Known in the U.S. as a 1-2-3 dough for containing 1 part fat, 2 parts sugar, 3 parts flour, and alternately by the French term paté sablée. It has a crumbly, sandy texture and is used mainly for fruit tarts.

    You will find minor variations of these recipes -- some calling for a particular flour, or lard instead of butter, or different types of sugar. But the flavor outcome will remain consistent, so it's important to choose the crust recipe you use to complement the item you're making. For example, you wouldn't want a sweet, crumbly shortbread crust for a salty, savory dish such as Bacon and Asparagus Quiche or Broccoli & Cheddar Jack Cheese Quiche.

    Ingredients for a Flaky, Savory Quiche Crust

    Homemade quiche crust ingredients
    • Flour
    • Butter
    • Egg
    • Salt
    • Parsley
    • Ice water

    I add the parsley because I like the flecks of color it adds to my quiche crust. It won't substantially impact the taste if you would rather not add it.

    How To Make Homemade Quiche Crust

    Start with your food processor...

    Add flour, parsley and salt and pulse to distribute
    Add cubed, cold butter. Pulse until tiny beads form
    Mix egg and cold water and add to food processor
    Pulse until a dough forms
    An empty quiche crust in a pie plate
    Roll dough on floured surface and place in pie dish
    Chill, then add quiche mixture
    Single slice of bacon and asparagus quiche on a small plate with a fork
    Bake until top is golden and toothpick inserted in center comes out clean

    Hints for a Perfect Quiche Crust

    • Use ice cold butter. You don't want it to soften and mash in with the flour, you want it to be cold enough to form little beads when the butter and flour mix.
    • Don't overwork the dough. It is not necessary to do heavy kneeding. Simply remove it from the food processor, fold it over on a floured surface a few times, form a disc with it, then roll it out. Too much handling can cause it to become tough, and it will get too warm and tear as you're trying to place it in the pie plate.
    • Literally use ice water to mix with the eggs. Everything going into this dough should be extremely cold to keep the butter from melting. This will ensure a flaky crust.
    • Refrigerate the crust for 30 minutes after putting it in the pie pan and before adding the quiche mixture to it. This will prevent the crust edges from shrinking during baking. There is no need to bake this crust prior to adding the egg mixture.
    • Watch the edge of the pie crust while baking to ensure crust doesn't get too brown. If it's getting too dark, add a pie shield over it.

    This crust turns out reliably well, but if it doesn't turn out picture perfect, that's okay! We're not entering it into a beauty contest. It will have a fabulous buttery, flaky homemade taste to complement your quiche, and that's what counts!

    If you have a vintage recipe you'd like share with us for possible publication, please scan it and email it to [email protected]. We'd love to hear from you!

    An empty quiche crust in a pie plate.

    Homemade Quiche Crust Recipe

    Nancy Blackstone
    This flakey homemade quiche crust recipe has only five ingredients plus water. It comes together in minutes and will nicely complement any quiche filling!
    5 from 2 votes
    Print Recipe Pin Recipe
    Prep Time 20 minutes mins
    Cook Time 30 minutes mins
    Total Time 50 minutes mins
    Course Breakfast
    Cuisine American
    Servings 1 crust
    Calories 220 kcal

    Ingredients


    • 1 ½ cups flour
    • ½ teaspoon parsley flakes
    • ¼ teaspoon kosher salt
    • 10 tablespoons butter
    • 1 large egg
    • 2 ½ tablespoons ice water

    Instructions
     

    • Add flour, parsley, and salt to food processor and pulse a few times to mix and distribute parsley flakes throughout.
    • Add cubed, cold butter. Pulse a few times until small pebble shapes form. 
    • Mix egg and cold water together, then pour into flour mixture. Pulse until dough forms.
    • Remove dough from food processor and roll out on well floured surface to a size that will fit your pie or tart pan.
    • Gently fold dough in half using floured hands, then lift into your pie plate and carefully arrange inside. Flute edges if desired, and cut excess dough from sides.
    • Place pie plate with crust in the freezer for 20 minutes while you prepare the quiche.
    • When quiche mixture is ready, remove crust from freezer and pour inside. Bake according to quiche instructions.

    Nutrition

    Serving: 0.125crustCalories: 220kcalCarbohydrates: 18gProtein: 3gFat: 15gSaturated Fat: 9gPolyunsaturated Fat: 1gMonounsaturated Fat: 4gTrans Fat: 1gCholesterol: 61mgSodium: 207mgPotassium: 38mgFiber: 1gSugar: 1gVitamin A: 471IUVitamin C: 1mgCalcium: 11mgIron: 1mg
    Keyword crust, pie crust, quiche, quiche crust
    Tried this recipe?Let us know how it was!

    Broccoli & Cheddar Jack Cheese Quiche Recipe

    April 14, 2021

    A slice of broccoli & cheddar jack cheese quiche on a plate with a fork next to it.

    This creamy broccoli and cheddar jack cheese quiche is a delicious, protein rich meal in a dish. Quick and easy to prepare, it makes a great meal for breakfast, lunch or dinner!

    A slice of broccoli and cheddar jack cheese quiche on a plate
    Broccoli and Cheddar Jack Cheese Quiche

    Most people do their entertaining at dinner, but I enjoy having people over for brunch. And when I do, quiche is always one of the items on the menu. It's easy to make in advance, refrigerates and re-heats well, tastes delicious, and never fails to impress!

    What is Quiche?

    Quiche is an egg and cream based dish baked in a light and flaky crust. The recipe originated in Germany and has been around for a few hundred years. It became popular in the United States in the 1950's, after soldiers brought the traditional egg, cheese, and bacon Quiche Lorraine recipe back from Europe.

    Over time, variations of the recipe developed, and by the 1970's quiche recipes varied from restaurant to restaurant. Home cooks liked making it because it was an easy, economical casserole-style meal that came together quickly and could be eaten for breakfast, lunch or dinner.

    This recipe combines chopped broccoli, cheddar, and Monterey Jack cheese for a rich, creamy, mild tasting vegetable quiche.

    Broccoli and Cheddar Jack Cheese Quiche Ingredients

    Ingredients for broccoli & cheddar jack cheese quiche
    Ingredients for broccoli & cheddar jack cheese

    You'll need the following ingredients to prepare broccoli and cheddar jack cheese quiche:

    • 2 cups broccoli florets (I buy about 12-14 oz. at the grocery store)
    • 5 eggs
    • ¾ cup whole milk
    • ¼ cup heavy cream
    • ½ teaspoon kosher salt
    • ¼ teaspoon black pepper
    • ¾ cup shredded sharp cheddar cheese
    • ¼ cup shredded Monterey Jack cheese
    • Nine inch prepared pie crust

    I prefer to bake my own crust for quiche, but to save time you can use a refrigerated pie crust or a frozen prepared pie crust. Just make sure you purchase a crust made of pastry dough and not graham crackers!

    Just 4 Easy Steps For Making Broccoli and Cheese Quiche

    • Cook broccoli florets in water until crisp-tender, about 10 minutes. Cool, drain, and chop into small pieces.
    • Stir together eggs, milk, cream, salt and pepper.
    • Mix in broccoli, cheddar cheese, and Monterey Jack cheese.
    • Pour into unbaked pie crust and bake about 45 minutes until golden and toothpick inserted in center comes out clean.
    • Quiche ingredients mixed together in a bowl
      Mix all ingredients in bowl
    • Baked quiche just removed from the oven
      Bake in pie shell until golden

    Other Items To Add to Quiche

    If you'd like to add further flavor and texture to your quiche, feel free to add in your own favorite ingredients. Some ideas include:

    • chopped yellow or white onion
    • chopped bell pepper
    • sautéed mushrooms
    • cooked cubed ham
    • cooked chopped bacon
    • chopped green onions

    You can add in up to 1 cup of additional items to the broccoli in any combination. I usually add items in ¼ - ½ cup increments so as not to overpower the taste with any one item.

    Hints for Delicious Quiche

    • Refrigerate your pie crust for at least 30 minutes after it's rolled out and placed in the dish, and before adding the filling. Pie crust needs to be very cold when the filling is added or it will shrink while baking.
    • Grate your own cheese for the freshest taste. It only takes a couple of minutes using a box grater (pictured in the ingredients photo above.) Personally, I don't care for the preservatives and waxy coating added to shredded cheeses to prevent them from clumping while in the package, so I always grate my own cheese.
    • Dry the broccoli throughly before you add it to the bowl with the eggs to avoid having soggy quiche. If you are adding in other vegetables such as onions or mushrooms, make sure those are also throughly dried after rinsing.
    • Keep an eye on the quiche crust while it's in the oven to avoid burning. If it's getting too brown, cover the edges with a crust protector or some foil.

    Looking for more quiche recipes? Check out our delicious Bacon and Asparagus Quiche for a delicious alternative.

    If you have a vintage recipe you'd like share with us for possible publication, please scan it and email it to [email protected]. We'd love to hear from you!

    A slice of broccoli & cheddar jack cheese quiche on a plate with a fork next to it.

    Broccoli & Cheddar Jack Cheese Quiche Recipe

    Nancy Blackstone
    This creamy broccoli and cheddar jack cheese quiche is a delicious, protein rich meal in a dish. It is quick and easy to prepare and can be served for breakfast, lunch or dinner!
    5 from 1 vote
    Print Recipe Pin Recipe
    Prep Time 30 minutes mins
    Cook Time 45 minutes mins
    Total Time 1 hour hr 15 minutes mins
    Course Breakfast
    Cuisine French
    Servings 8 Servings
    Calories 247 kcal

    Ingredients


    • 2 cups broccoli florets
    • 5 large eggs
    • ¾ cup whole milk
    • ¼ cup heavy cream
    • ½ teaspoon kosher salt
    • ¼ teaspoon pepper
    • ¾ cup shredded sharp cheddar cheese
    • ¼ cup shredded Monterey Jack cheese
    • nine-inch prepared pie crust

    Instructions
     

    • Put broccoli florets in a saucepan with 2 cups of water. Bring to a boil, then turn down heat, cover, and simmer for 4 minutes until crisp-tender. Rinse in cold water and drain. When fully drained, pat with paper towels to remove any remaining water. Chop broccoli and set aside.
    • Stir together eggs, milk, cream, salt and pepper until throughly combined. 
    • Add chopped broccoli, cheddar cheese, and Monterey Jack cheese and mix well. 
    • Pour into prepared pie crust and bake at 375 approximately 45 minutes or until crust and egg mixture are golden and wooden toothpick inserted in center comes out clean. 

    Notes

    Start checking the quiche after 20 minutes to ensure the crust is not getting too brown. If it is, cover the crust only with a crust protector or pieces of foil.
    Add in ¼ - ½ cup of any of the following for extra flavor: chopped onion, cooked bacon, cooked cubed ham, chopped bell pepper, sautéed mushrooms.

    Nutrition

    Calories: 247kcalCarbohydrates: 14gProtein: 10gFat: 17gSaturated Fat: 8gPolyunsaturated Fat: 2gMonounsaturated Fat: 6gTrans Fat: 1gCholesterol: 143mgSodium: 383mgPotassium: 186mgFiber: 1gSugar: 2gVitamin A: 591IUVitamin C: 20mgCalcium: 166mgIron: 1mg
    Keyword breakfast egg recipe, brunch casserole, French breakfast, holiday breakfast recipe, holiday brunch recipe, mid century breakfast
    Tried this recipe?Let us know how it was!

    Easy Zombie Tiki Cocktail Recipe

    April 2, 2021

    A Zombie Tiki cocktail in a clear tiki mug.

    When you drink the famous Zombie tiki cocktail, you too will feel brain dead. But given the amount of rum this Tiki drink contains, it tastes surprisingly delicious!

    A Zombie Tiki cocktail in a clear tiki mug
    A frosty Zombie Tiki cocktail served in a clear Tiki-themed mug is delicious and fun to drink.

    The Zombie Tiki Cocktail is a Classic

    This tiki classic has a long history that is shrouded in codes and secrecy. It was originally created by Donn Beach, founder of the famous Don the Beachcomber tiki restaurants. He didn't want his cocktails copied, so he created an elaborate set of coded phrases and secret ingredient mixes that only he knew.

    Over the years there have been many attempts to crack the codes and recreate this classic recipe. Some are probably more successful than others. I'm not certain that my easy Zombie Tiki cocktail is perfectly accurate, but I like the way it tastes. And from what I've read, it's probably pretty close to the original!

    This drink is one I prefer to drink at home so that I have control over what actually goes into it. In a restaurant or bar it runs the risk of becoming a dumping ground for different syrups and cheap spirits that the bar makes a hefty markup on.

    Ingredients for a Zombie Tiki Cocktail

    Admittedly this tiki drink does have a long list of ingredients. So get ready to give your bar a workout!

    • Light rum
    • Dark rum
    • 151 overproof rum
    • Pernod
    • Fresh-squeezed lime juice
    • Falernum
    • Cinnamon simple syrup (use this recipe, but add two cinnamon sticks to the boiling water)
    • Grapefruit juice
    • Grendine
    • Angostura bitters
    • Yellow Chartreuse

    Garnish with a grapefruit wedge, lime and a cocktail cherry and you're all set.

    Bar tools needed

    • Bar spoon
    • knife
    • Jigger
    • Cutting board
    • Lemon/lime juicer

    How to serve it

    Make sure you have some fun with your Tiki drinks. So use a zany tiki glass to serve it in.

    There are plenty of vintage tiki glasses at thrift stores and even more at sites like Amazon. I actually feel more comfortable using newer glasses since it takes the worry out of breaking an old glass when the spirits are flowing on a wets slippery glass.

    Tips for a Successful Zombie

    Keep these pointers in mind to mix it like a pro:

    • Add the Chartreuse to the glass and swirl it around to coat the inside, then pour it out to give the drink a touch of licorice flavor.
    • Always use freshly squeezed fruit juices instead of bottles so that the drink will be less sweet and will mix better with the rums.
    • Don't skip some of the more obscure spirits, such as Falernum. I admit that I hadn't tried Falernum before, and even had to ask where to find it at the large liquor store where I shop. It was worth the effort. It's a wonderful, tropical tasting liqueur with flavors like spices and cloves.
    • Do get a bottle of strong, overproof rum for your collection. Overproof rum is 151 proof, whereas regular rum is 80 proof. The extra power really gives your tiki drinks a special boost of flavor.

    Frequently Asked Questions

    What alcohol is in a Zombie Cocktail?

    What isn't? The base spirit for this drink is rum. It uses both light and dark as well as 151 proof rum.

    Who created the Zombie Cocktail?

    It is pretty generally accepted that Donn Beach invented this drink at his Hollywood Don the Beachcomber restaurant.

    If you're having a Tiki themed night, you need to try this baked coconut shrimp which can be served as an appetizer or main course.

    What is your go-to Tiki cocktail? Do you follow a different recipe? If so, drop me a line and let me know!

    Before you go, did you try this cocktail? Why not leave a comment in the Comments section along with a rating? I always appreciate hearing from you and getting your feedback.

    • A Rum Runner Cocktail in a hurricane glass with ingredients.
      The Tasty Rum Runner Cocktail
    • A tangy rum-based cocktail featured in a hurricane glass.
      Easy Hurricane Cocktail Recipe
    • a pina colada tiki cocktail in a hurricane glass.
      Original 4 Ingredient Piña Colada Recipe
    • Blue Hawaiian cocktail with spirits and tiki mugs.
      Easy Blue Hawaiian Cocktail
    A Zombie Tiki cocktail in a clear tiki mug.

    Easy Zombie Tiki Cocktail Recipe

    Kevin Mayfield
    This classic tiki cocktail packs a strong, but delicious, punch!
    5 from 1 vote
    Print Recipe Pin Recipe
    Prep Time 5 minutes mins
    Total Time 5 minutes mins
    Course Classic Cocktails
    Cuisine American
    Servings 1 Cocktail
    Calories 336 kcal

    Ingredients


    • 1 ½ ounces light rum
    • 1 ½ ounces dark rum or gold rum
    • 1 ounce overproof rum
    • 1 teaspoon grenadine
    • ½ teaspoon Pernod
    • ½ ounce fresh-squeezed lime juice
    • ½ ounce Falernum
    • ½ teaspoon cinnamon simple syrup
    • Dash of grapefruit juice
    • Dash of Angostura bitters
    • Dash of Yellow Chartreuse swirled in the tiki glass then discarded
    • Garnish

    Instructions
     

    • Place a small scoop of ice cubes in your blender
    • Pour in the liquid ingredients and pulse a few times in the blender -- just enough to mix it up and crush the ice a little
    • Pour into a tiki glass (add a little more ice if you prefer)
    • Add the garnish of grapefruit wedge, bar cherry, lime slice and mint 

    Notes

    Supposedly Donn Beach added something he called Donn's Mix. I'm not entirely sure what that is, but a bartender friend of mine told me it is a simple syrup made with cinnamon sticks and a dash or two of grapefruit juice mixed in.
    You don't have to blend this drink, it is perfectly fine to use a cocktail shaker instead.

    Nutrition

    Calories: 336kcalCarbohydrates: 18gProtein: 1gFat: 1gSodium: 13mgPotassium: 32mgFiber: 1gSugar: 16gVitamin A: 7IUVitamin C: 4mgCalcium: 5mgIron: 1mg
    Keyword 151 rum cocktails, falernum, overproof rum, rum drinks, Tiki cocktails, tiki drinks, tropical drinks
    Tried this recipe?Let us know how it was!

    Homemade Bolognese Sauce With Pappardelle Pasta

    April 1, 2021

    homemade bolognese sauce with pepperdelle pasta with a basil leaf on top in a white bowl.

    This homemade bolognese sauce has chunks of Italian sausage and ground beef in a white wine tomato sauce. It also contains a secret ingredient that makes it extra flavorful!

    A white bowl filled with homemade bolognese sauce with pappardelle pasta and topped with a basil leaf
    Homemade Bolognese sauce with pappardelle pasta

    If it's true that you eat with your eyes, then I have just devoured this bowl of pasta...again! Every time I look at this photo with chunks of Italian sausage and ground beef clinging to the wide, swirling pappardelle noodles in a smooth, white wine tomato sauce topped with fresh grated parmesan cheese...wait...I'm about to faint.

    Okay I'm back. This dish makes me weak in the knees, and looking at the picture makes me want to rush in the kitchen and start cooking it all over again! My husband Kevin, who doesn't normally care for leftovers, has no problem eating this dinner three days in a row. Of course I could freeze it rather than eat it for so many nights, but that would mean it would have to pass our faces on the way to the freezer, and honestly it would never make it that far.

    What is Bolognese Sauce?

    Bolognese sauce is a tomato-based meat sauce that originated in the 18th century in Bologna, Italy. The recipe was developed by Alberto Alivisi, the chef for Pope Pius VII. It was first published in 1891 by Pellegrino Artusi in the cooking manual La Scienza in Cucina e l'Arte di Mangiar Bene. For those of you who are fans of Stanley Tucci's show Searching for Italy, this historic book is discussed when he visits Bologna in Season 1, Episode 3.

    The Difference Between Ragu and Bolognese Sauce

    Of course there are regional differences and recipes will vary. And while most recipes for these two items use a red tomato sauce base, as my neighbor Joe pointed out to me today, not all do. These sauces are called white Bolognese and white ragu, and they are slow-cooked with a variety of meats and non-tomato based seasonings.

    But the traditional ragu and Bolognese sauces are very similar; ragu is typically made with ground meat (the type of meat varies), finely chopped vegetables, red wine and a small amount of tomato sauce. Ragu literally means "meat sauce" in Italian, and it's heavy on meat and light on tomato sauce.

    Bolognese is a ragu alla bolognese, meaning a meat sauce from Bologna. It is traditionally made with ground meat, finely chopped vegetables white wine, a small amount of nutmeg, and also a minimal amount of tomato sauce.

    Both the ragu and Bolognese sauces are usually served with a tagliatelle or pappardelle pasta. These pastas are flat and wide, which allows the meat sauce to cling to them much better than they do on a thin, round noodle like spaghetti. In Italy, there is no such dish as spaghetti Bolognese!

    The Secret Ingredient In This Non-Traditional Sauce

    This is my own take on a Bolognese recipe -- you will not find it in Italy, and I am not claiming it is authentically Italian. But it is delicious! This is a mild sauce that is slightly sweet -- it is not hot and peppery, and the tomato sauce is very smooth tasting and flavorful.

    What's different about my recipe? Three things. First, I skip the traditional ¼ teaspoon of nutmeg. I just don't care for the taste of nutmeg in tomato sauce -- but by all means, add it in if you do.

    Second, mine has some minced garlic. That might not sound so surprising, but typically Bolognese sauce does not contain garlic.

    Third is my surprise secret ingredient -- I add a tablespoon or two of grape jelly. Yep, you read that right, grape jelly!

    Southern Italians have been adding a tablespoon or two of sugar to their tomato-based sauces for decades. It was originally used to balance the flavor of sharp tasting or late season tomatoes that weren't completely ripe.

    The grape jelly serves the same purpose. It reduces the sharpness of the tomato sauce, and adds a delicate hint of sweetness to it. Come on, give it a chance. After all, the sauce already has grapes in it...from the wine!

    Bolognese Sauce Ingredients

    It's a long list, but it's easy because it all goes into one pot!

    • Olive oil
    • Minced garlic
    • Onion
    • Carrot
    • Celery
    • Ground Beef
    • Ground sweet Italian sausage
    • Salt/Pepper
    • Milk
    • White wine
    • Diced tomatoes
    • Tomato sauce
    • Tomato paste
    • Grape jelly
    • Italian seasoning
    • Basil
    • Parmigiano Reggiano or Parmesan cheese

    Pick a Great Pasta

    Look at these gorgeous pastas! I found them in a little Italian market near my house, but you can find some beautiful pastas at stores such as Whole Foods, Trader Joes, and Cost Plus World Market.

    • Packages of pappardelle and tagliatelle pasta, side by side
    Pick a good quality pappardelle or tagliatelle pasta for your homemade sauce

    Hints For Cooking Bolognese Sauce

    • Cook it a day ahead if you can. Letting the flavors steep overnight always makes for a better tasting sauce.
    • Cook over a low heat and stir frequently to avoid meat sticking to the pot and scorching.
    • Taste-test it as it's cooking and tweak seasonings to your preferences if necessary.
    • Choose an artisan pasta made in Italy rather than the popular grocery store brands. If you're putting the time and effort into cooking a lovely sauce, serve it with a lovely Italian pasta.
    • Store pasta sealed in the refrigerator for up to 5 days. If you want to freeze it, let it cool completely, then store it in an airtight container for up to 3 months.
    What is the difference between Bolognese sauce and marinara?

    Marinara is a garlic tomato sauce with no meat, and Bolognese contains meat and is typically made without garlic.

    What meats can you use to make a Bolognese or Ragu?

    You can use ground beef, pork, Italian sausage, veal, or ground poultry.

    What kind of white wine works best in Bolognese sauce?

    A dry white wine such as sauvignon blanc, pinot grigio or pinot blanc works well. You can use a dry white cooking wine, but it won't have the depth of flavor that a bottled drinking wine will have.

    What can I substitute for white wine in Bolognese sauce?

    You can use white wine vinegar (it's alcohol-free) or apple cider vinegar.

    Serve this fabulous pasta dish with a bottle of wine, a side of garlic bread, and some freshly grated Parmigiano Reggiano on top.

    Delizioso!

    For some truly authentic Italian pasta dishes, try our Old World Authentic Italian Sunday Sauce, Old World Authentic Italian Meatballs, and Old World Authentic Italian Lasagna.

    If you have a vintage recipe you'd like share with us for possible publication, please scan it and email it to [email protected]. We'd love to hear from you!

    homemade bolognese sauce with pepperdelle pasta with a basil leaf on top in a white bowl.

    Homemade Bolognese Sauce With Pappardelle Pasta

    Nancy Blackstone
    This homemade bolognese sauce with chunks of Italian sausage and ground beef in a white wine tomato sauce also contains a secret ingredient that makes it extra flavorful!
    5 from 3 votes
    Print Recipe Pin Recipe
    Prep Time 15 minutes mins
    Cook Time 1 hour hr
    Total Time 1 hour hr 15 minutes mins
    Course Main Dish
    Cuisine Italian
    Servings 8 Servings
    Calories 692 kcal

    Ingredients


    • 2 tablespoons olive oil
    • 4 cloves garlic minced (or 2 teaspoons minced garlic from jar)
    • 1 yellow onion diced
    • 1 carrot diced
    • 1 stick celery diced
    • 1 pound ground beef
    • 1 pound ground sweet Italian sausage
    • 1 teaspoon kosher salt
    • 1 teaspoon black pepper
    • ⅓ cup whole milk or half and half
    • ½ cup dry white wine white cooking wine is okay
    • 14.5 ounce can petite diced tomatoes
    • 6 ounce can tomato paste
    • 30 ounce tomato sauce 2 cans
    • 1-2 tablespoons grape jelly
    • 1 teaspoon Italian seasoning
    • 2 teaspoons fresh chopped basil or 2 teaspoons dried basil
    • 2 Tablespoons freshly grated Parmigiano Reggiano cheese or parmesan cheese plus enough for garnishing.
    • 1 pound pappardelle pasta noodles cooked to al dente and drained

    Instructions
     

    • In a large stockpot, heat olive oil over medium-low heat. Add minced garlic and sauté one minute. 
    • Add diced onions, carrots and celery and sauté 7 more minutes, stirring constantly to ensure garlic doesn't burn. 
    • Add ground beef and Italian sausage to the pot, mixing with vegetables. Brown over medium heat, breaking up the meats with a spatula as you cook. 
    • Add in milk and simmer until nearly gone, about 20 minutes.
    • Stir in white wine and simmer 10 minutes.
    • Add salt and pepper, diced tomatoes, tomato sauce, tomato paste, and grape jelly until thoroughly combined. 
    • Add in Italian seasoning, basil, parmesan cheese. Cover and simmer on low for 2 hours. Stir occasionally and add small amounts of water as needed to avoid the sauce from reducing too much.
    • In the last 15 minutes of cooking, boil a large pot of salted water and cook the pappardelle pasta. Drain in colander.
    • Serve Bolognese sauce over pasta.

    Notes

    Serve with freshly grated Parmigiano Reggiano cheese and some garlic bread.
    Sauce can be made the day before and refrigerated to let flavors steep overnight.
    If you want some heat in your sauce, add in a teaspoon of red pepper flakes with the tomatoes, or you can serve red pepper flakes as a condiment at the table.

    Nutrition

    Calories: 692kcalCarbohydrates: 60gProtein: 30gFat: 36gSaturated Fat: 12gPolyunsaturated Fat: 4gMonounsaturated Fat: 17gTrans Fat: 1gCholesterol: 133mgSodium: 1584mgPotassium: 1250mgFiber: 6gSugar: 13gVitamin A: 2260IUVitamin C: 20mgCalcium: 123mgIron: 6mg
    Keyword grape jelly pasta sauce, meat pasta sauce, meat spaghetti sauce, pasta sauce, pasta with meat sauce, ragu sauce, spaghetti sauce
    Tried this recipe?Let us know how it was!

    Easy Hurricane Cocktail Recipe

    March 26, 2021

    A tangy rum-based cocktail featured in a hurricane glass.

    This post-war classic is a must-have if you want a delicious rum-based cocktail with a punch.

    A tangy rum-based cocktail featured in a hurricane glass surrounded by three types of rum
    This New Orleans classic cocktail is a must at your next Tiki party.

    The Hurricane Cocktail Lives up to its Name

    Let's admit it up front -- this rum-based cocktail packs a punch, but it also tastes darn good! Unlike many drinks that are made with rum and fruit juices, this cocktail is not sweet at all. It has a tangy, sweet-tart taste thanks to the combination of Passion fruit puree and fresh lime juice.

    It is said that the New Orleans bar, Pat O'Brien's, invented this drink to use up excess rum stocks in the early 1940's. Other stories claim the drink appeared at World's Fair in the '30's. Like any good cocktail history, there are several possibilities. I prefer the Pat O'Brien story, because I like a good cocktail tale.

    How to serve your Hurricane Cocktail

    The hurricane glass is possibly more famous than the drink itself. It gets its name from the shape of a hurricane lamp, which was a curvy oil lantern used on ships -- probably a good reason for the nautical/tropical theme. The story goes that an enterprising salesman had some leftover glasses and sold them to Pat O'Brien on the cheap. I'm not sure if that's true, but it sounds plausible.

    Ingredients Needed

    While this drink does have a long list of ingredients, they come together well. You'll need:

    • Light rum
    • Dark rum
    • Overproof 151 rum
    • Lime juice
    • Orange juice
    • Passion fruit puree
    • Grenadine
    • Simple syrup (I have an easy to follow recipe here)

    And don't forget plenty of ice! You'll want to shake it over ice, and then strain the drink into a Hurricane glass full of more fresh ice.

    Where to Find Passion Fruit Puree

    The passion fruit puree used in the cocktail can be a challenge to find. I thought I'd have no problem getting it my local grocer, considering Southern California has fruit growing everywhere. No such luck! I eventually found it online in a large, 2 pound plastic pouch that is way more than I need for my modest Hurricane consumption. I figure I'll freeze the rest for the next time my cocktail mood forecasts a Hurricane.

    If you don't want to go that route, you can get a syrup like Torani. They make a variety of fruit syrups that work well in cocktails. (I don't get compensation from them, I just like their syrups.)

    Bar tools needed

    This Tiki drink uses only a few of your bar tools:

    • Jigger
    • Bar spoon
    • Knife
    • Cutting board
    • Lemon/lime Juicer

    Tips for Success

    Tropical or Tiki drinks have a reputation for being difficult to make. That is just not the case! Once you have the ingredients lined up, you merely pour them all into a large cocktail shaker, then shake long enough to get them well blended and chilled. But do keep these things in mind:

    • Add an overproof rum -- one of my favorite parts of this drink! This serious alcohol blends nicely with the other rums and fruit juices while giving it an extra kick -- the hurricane effect.
    • Incorporate the fresh fruit you're using for the juice into the garnish for the drink as well. Because this drink requires orange juice, I save some of the orange for a wedge or wheel.
    • Go easy on the grenadine and passion fruit syrup, unless you prefer the drink to be sweet.

    Frequently Asked Questions

    What is the best rum for a Hurricane?

    Many people prefer to use Jamaican rum exclusively. I like to mix it up a little and use Puerto Rican rum as well as a dark rum from the Dominican Republic that I like, Brugal. The Hurricane uses light and dark rum and as a special treat, I like to add a little overproof 151 rum such as Goslings Black Seal.

    What is the most popular drink in New Orleans?

    New Orleans is a great party city, and while the Hurricane is a favorite, many people also enjoy a Sazerac which is a close cousin to the Old Fashioned, except the Sazerac is made with Rye Whiskey rather than Bourbon.

    If you're having a Tiki themed night, you need to try this baked coconut shrimp which can be served as an appetizer or main course.

    What rums do you like in your Hurricanes? Drop me a line and let me know!

    Before you go, did you try this cocktail? Why not leave a comment in the Comments section along with a rating? I always appreciate hearing from you and getting your feedback.

    • Mai Tai cocktail in highball glass.
      Classic Mai Tai Cocktail Recipe
    • A Blue Hawaii cocktail in a hurricane glass with fruit and umbrella.
      Simple Blue Hawaii Tiki Cocktail
    • A Cuba Libre cocktail in a tall collins glass with a lime wedge and straw
      How to Make the Best Cuba Libre Drink (Rum and Coke)

    A tangy rum-based cocktail featured in a hurricane glass.

    Easy Hurricane Cocktail Recipe

    Kevin Mayfield
    This New Orleans classic is delicious and packs the punch of a category 4 tropical storm!
    5 from 3 votes
    Print Recipe Pin Recipe
    Prep Time 5 minutes mins
    Total Time 5 minutes mins
    Course Classic Cocktails
    Cuisine American
    Servings 1 Cocktail
    Calories 421 kcal

    Ingredients


    • 2 ounces light rum
    • 2 ounces dark rum
    • ½ ounce overproof 151 rum
    • 2 ounces passion fruit puree
    • ½ ounce fresh squeezed lime juice
    • 1 ounce fresh squeezed orange juice
    • ½ ounce simple syrup
    • ½ ounce grenadine syrup

    Instructions
     

    • Fill a large cocktail shaker with two scoops of fresh ice.
    • Pour all of the ingredients into the shaker and shake for at least 30 seconds, until drink is fully mixed and chilled.
    • Strain into a hurricane glass filled with one scoop of ice.
    • Add an orange and cherry garnish.

    Notes

    You can blend this drink if you choose. Just add two cups of ice to the blender with the wet ingredients and blend until smooth.
    You can skip the overproof rum if you prefer. I like the taste it gives the drink, but be forewarned that it can be strong.
    If you prefer a sweeter drink, increase the simple syrup to 1 ounce, or to desired level of sweetness.

    Nutrition

    Calories: 421kcalCarbohydrates: 32gProtein: 1gFat: 1gSaturated Fat: 1gPolyunsaturated Fat: 1gMonounsaturated Fat: 1gSodium: 14mgPotassium: 184mgFiber: 1gSugar: 27gVitamin A: 677IUVitamin C: 39mgCalcium: 14mgIron: 1mg
    Keyword classic cocktails, overproof rum, rum cocktails, Tiki cocktails, tropical cocktails
    Tried this recipe?Let us know how it was!

    Peanut Butter Oatmeal Squares Recipe; aka Baby Ruth Bars

    March 24, 2021

    A stack of peanut butter oatmeal squares on an orange plate.

    These chewy and crunchy peanut butter oatmeal squares topped with a creamy peanut butter infused frosting make a great high-energy breakfast or dessert!

    A stack of 3 oatmeal squares on an orange plate with a fork sitting next to them

    I love it when readers send me their family recipes, and this one is fantastic!

    I wasn't sure how to classify this item -- is it an oatmeal breakfast bar? A high energy snack? A chocolatey-peanut butter dessert? It can be all three! But I noticed myself reaching for them most often in the morning for a quick, protein-rich breakfast, so I'm leaning toward favoring it as a breakfast bar.

    This is a really flexible recipe - you can make the peanut oatmeal bar alone if you prefer to cut down on the sugar and calories, or you can top it with the irresistible frosting for an extra-special treat.

    Why Bake A Breakfast Bar When You Can Buy One?

    Ingredients for peanut butter oatmeal bars

    Because the peanut butter oatmeal bar itself has only 5 ingredients:

    • oatmeal
    • butter
    • brown sugar
    • crunchy peanut butter
    • dark Karo syrup (contains no high fructose corn syrup)

    And the topping has only three:

    • semi-sweet chocolate chips
    • butterscotch chips
    • creamy peanut butter

    When you compare that to a commercially sold breakfast bar (some containing over 30 ingredients) there's quite a difference. In this world of so many artificial colors, flavors, additives and preservatives, I prefer homemade whenever possible. To keep things extra-healthy, I recommend using organic ingredients in your cooking and baking whenever possible.

    Why Is It Also Known as a Baby Ruth Bar?

    The Curtiss Candy Company, located in Chicago near Wrigley Field, introduced the Baby Ruth Bar in 1921. Consisting mainly of chocolate nougat, caramel, and peanuts, the company claimed to have named the candy bar in honor of President Grover Cleveland's daughter, Ruth (often called baby Ruth when she was little.) This story is pretty weak considering that in 1921 famed baseball slugger Babe Ruth was the hottest commodity in the sport. Plus, Grover Cleveland had been out of office for 24 years, and his daughter Ruth had sadly been deceased for 17 years, having succumbed to diphtheria at the age of 12. But the court bought the story, and Curtiss was allowed to pedal the candy bar without paying royalties to its actual namesake, baseball legend Babe Ruth.

    As the Baby Ruth Bar took off in popularity, this recipe for a similar chewy, chocolatey homemade peanut butter bar became a family favorite that is still much loved today.

    The Origin of Our Recipe

    Steve, a reader in Rochester, Michigan, originally wrote to me about his set of Salem Tricorne dishes, a 1930's dinnerware set that we both collect.

    Original handwritten recipe for peanut butter squares
    Betty's original handwritten recipe

    In a follow-up email, he sent me this well-loved handwritten recipe that was given to him by his 85 year old mom, Betty. She picked up the recipe years ago from one of his cousins at a high school graduation and open house. Tempted by the recipe, Steve decided to try his hand at baking them himself. The bars were an immediate hit, and ever since he's been the official cookie bar expert in his circle of family and friends!

    Only 3 Steps To Make Peanut Butter Oatmeal Squares

    • Oatmeal bar ingredients in a bowl
      Mix oatmeal bar ingredients in a large bowl
    • Oatmeal bar ingredients pressed in bottom of 10 X 14 pan
      Press into bottom of 10x14 pan lined with nonstick foil
    Chocolate frosting over top of oatmeal bars
    Pour melted frosting on top and spread

    Hints for Making Peanut Butter Oatmeal Squares

    • Be sure to use old fashioned oatmeal and not quick cooking oats for the proper results.
    • Line the pan with non-stick foil for easy removal and clean up.
    • Cut into squares or bars after chilling for 20 minutes. If you try to cut them earlier, they will be too soft. If you let them chill longer, they get very difficult to cut.
    • Leave off the frosting if you prefer a lower calorie, lower sugar oatmeal breakfast bar. Without frosting, each square contains 171 calories and 12 grams of sugar.
    • Store in an airtight container in the refrigerator and serve cold.

    With a prep time of just 15 minutes and a baking time of about 10 minutes, these treats are a snap to make and a great item to grab out of the 'fridge on your way to work or school. Enjoy!

    If you have a vintage recipe you'd like share with us for possible publication, please scan it and email it to [email protected]. We'd love to hear from you!

    A stack of peanut butter oatmeal squares on an orange plate.

    Peanut Butter Oatmeal Squares Recipe; aka Baby Ruth Bars

    Nancy Blackstone
    These chewy and crunchy peanut butter oatmeal squares topped with a creamy peanut butter infused frosting make a great high-energy breakfast or dessert!
    5 from 5 votes
    Print Recipe Pin Recipe
    Prep Time 15 minutes mins
    Cook Time 10 minutes mins
    Total Time 25 minutes mins
    Course Breakfast
    Cuisine American
    Servings 24 Squares
    Calories 340 kcal

    Ingredients


    Peanut Butter Oatmeal Squares

    • 4 cups old fashioned oatmeal
    • ⅔ cup melted butter
    • 1 cup brown sugar
    • ½ cup crunchy peanut butter
    • ¼ cup dark Karo syrup

    Frosting

    • 10 oz. package semi-sweet chocolate chips
    • 11 oz. package butterscotch chips
    • ¾ cup creamy peanut butter

    Instructions
     

    • Preheat oven to 400 degrees
    • In a large bowl, thoroughly mix the first five ingredients together.
    • Press into a 10 x 14 baking pan lined with non-stick foil.
    • Bake in oven for 6-10 minutes, until they begin to turn lightly golden and bubble slightly. Remove and let cool.
    • Combine the 3 frosting ingredients in a nonstick saucepan and melt over low heat, stirring constantly.
    • Pour over peanut butter oatmeal squares and spread over top.
    • Chill in refrigerator for 20 minutes. Remove and cut into squares or bars. Return to refrigerator and continue chilling for at least 2 hours before serving. Store covered in refrigerator and serve cold.

    Notes

    You can use a different size pan for the recipe. If you use a large (11 x 17) cookie sheet, your baking time will be approximately 6-8 minutes. If you use a smaller pan (9 x 13), your baking time will increase to approximately 12-15 minutes or maybe a little more. The smaller the pan, the longer the baking time will be because the bars will be thicker. Keep an eye on them so they don't over bake.
    If you prefer just a chocolate-peanut butter frosting without the butterscotch, use 20 oz. of chocolate chips and 1 cup of creamy peanut butter.

    Nutrition

    Calories: 340kcalCarbohydrates: 42gProtein: 6gFat: 18gSaturated Fat: 8gPolyunsaturated Fat: 3gMonounsaturated Fat: 6gTrans Fat: 1gCholesterol: 15mgSodium: 169mgPotassium: 224mgFiber: 3gSugar: 28gVitamin A: 176IUCalcium: 31mgIron: 2mg
    Keyword Baby Ruth Bars, chocolate, oatmeal, Oatmeal Peanut Butter Chocolate Cookies
    Tried this recipe?Let us know how it was!

    Original 4 Ingredient Piña Colada Recipe

    March 19, 2021

    a pina colada tiki cocktail in a hurricane glass.

    The original Puerto Rican mid century Piña Colada has hints of pineapple, coconut and rum. It's light and refreshing without being overly sweet.

    a pina colada tiki cocktail in a hurricane glass
    The Puerto Rican delight is a staple at Tiki cocktail gatherings.

    The Original Piña Colada is Still the Best

    The name Piña Colada is Spanish for 'strained pineapple.' Legend has it that a Caribbean pirate mixed coconut, pineapple and rum for his crew to drink in between raids. After his capture and death, the recipe was lost.

    With the invention of an easy way to extract the creamy syrup from coconuts in the early 1950's, the stage was set for this drink's (re)invention. In 1954, the Caribe Hilton in San Juan was looking for a signature cocktail, and tasked one it's barmen, Ramon 'Monchito' Marrero, to experiment with local ingredients. As a result, he created the drink we know today. And in 1978, It was declared the official drink of Puerto Rico!

    4 Simple Ingredients

    Like a lot of Tiki drinks, this is easy to make while looking very impressive. Aside from ice, all you need is:

    • Light rum
    • Coconut cream
    • Pineapple juice
    • Heavy whipping cream

    And that's it! (Although if you're serving it to guests, you may want to add a slice of pineapple and a cherry to the rim for a stunning presentation.)

    Bar tools needed

    This Tiki drink doesn't require many bar tools:

    • Jigger
    • Bar spoon
    • Knife
    • Cutting board
    • Lemon/lime Juicer
    • Blender (optional)

    How to Serve it

    I really like to use a Hurricane glass to show off the beautiful colors of this drink. You can always use a Tiki glass for some old-school-cool.

    Tips for a Successful Piña Colada

    Keep these things in mind for this frozen treat:

    • Use fresh juice whenever possible. The pineapple juice is naturally sweet and compliments the light rum nicely.
    • Mix with a white or light rum, because the naturally sweet finish helps balance the acidity in the pineapple juice.
    • If you prefer to skip the alcohol, leave out the rum and you'll have a Virgin Colada. So go ahead and try one any time of day -- there's no excuse not to, now!

    Frequently Asked Questions

    What alcohol is in a Piña Colada?

    Light rum is the main spirit used to make a Piña Colada.

    Where was the original Piña Colada made?

    There are a few origin stories for this drink, but most agree that it was made in San Juan, Puerto Rico at the Caribe Hilton in the early 1950's.

    Are Piña Coladas always frozen?

    Not necessarily. Many folks like to use a shaker rather than a blender, which is fine. Just remember to shake for at least 30 seconds to ensure it is properly chilled and aerated.

    This drink is so celebrated that has it's own holiday! The United States celebrates National Piña Colada Day on July 10, so mark your calendar. But you don't need to wait for a special occasion to have one!

    If you're having a Tiki themed night, you need to try this baked coconut shrimp which can be served as an appetizer or main course.

    E hele kāua!

    Before you go, did you try this cocktail? Why not leave a comment in the Comments section along with a rating? I always appreciate hearing from you and getting your feedback.

    a pina colada tiki cocktail in a hurricane glass.

    Original Piña Colada Recipe

    Kevin Mayfield
    This tropical 1950's original recipe never needed any 'improvements'. It is a perfect blend of rum and coconut sweetness without any of the syrup-y taste of the mixes.
    5 from 3 votes
    Print Recipe Pin Recipe
    Prep Time 5 minutes mins
    Total Time 5 minutes mins
    Course Classic Cocktails
    Cuisine American
    Servings 1 Cocktail
    Calories 412 kcal

    Ingredients


    • 2 cups fresh ice
    • 2 ounces white rum
    • 1 ounce coconut cream
    • 1 ounce heavy whipping cream
    • 6 ounces fresh pineapple juice

    Instructions
     

    • Place all ingredients in a blender and pulse or mix until evenly blended
    • Pour into a hurricane glass
    • Add a wedge of fresh pineapple and cherry for garnish

    Notes

    If you prefer to skip the alcohol, leave out the rum and serve as a Virgin Colada
    If you don't feel like blending, you can use a cocktail shaker to mix this drink--just remember to shake for at least 30 seconds to ensure it is properly chilled and aerated

    Nutrition

    Calories: 412kcalCarbohydrates: 25gProtein: 2gFat: 21gSaturated Fat: 15gPolyunsaturated Fat: 1gMonounsaturated Fat: 3gCholesterol: 39mgSodium: 16mgPotassium: 336mgFiber: 1gSugar: 17gVitamin A: 425IUVitamin C: 18mgCalcium: 44mgIron: 1mg
    Keyword 1950's cocktails, coconut cocktails, pina colada, pineapple cocktails, Puerto Rican drinks, rum drinks, Tiki cocktails, virgin colada
    Tried this recipe?Let us know how it was!

    Baked Coconut Shrimp with Apricot Dipping Sauce

    March 18, 2021

    Coconut shrimp on a plate, with a small bowl of apricot dipping sauce that has a shrimp dipped into it.

    Baked coconut shrimp has a lightly sweet flavor, and when served with an apricot dipping sauce containing a hint of spice, it's a tropical sensation! Perfect as an appetizer or main course.

    A plate of coconut shrimp with a bowl of  apricot dipping sauce in the center

    The Mid Century Tiki Craze

    Coconut shrimp is a much-loved island dish found in restaurants around the world. Although we can't pinpoint the exact origin, given the ingredients it likely came from somewhere in the South Pacific.

    The Tiki craze hit its height of popularity in the U.S. in the 1950's and '60's. Books and photos by adventure travelers regaled the public with tales of life on exotic tropical islands, and stirred the imagination of a public that rarely had the means or opportunity for such travel. Soon the decor, foods, and drinks of these lands became an obsession. It was a way to experience the tropics without actually being there.

    The obsession with Tiki began dying down in the 1970's, when by the end of the decade it virtually disappeared. It has recently made a comeback, and Tiki parties are once again on the top of everyone's favorite themed party list.

    Coconut Shrimp: A Taste of the Tropics

    Kevin and I honeymooned in Hawaii where virtually every restaurant featured some variation of coconut shrimp. Most restaurants in tropical destinations offer coconut shrimp on their menus. I believe one of the reasons this dish is so loved is because it brings back memories of relaxing getaways filled with palm trees and sand and warm ocean breezes!

    To Bake or Not to Bake, That is the Question

    Let's face it, most coconut shrimp from a restaurant is fried. Frying results in a very crunchy exterior texture with a tender cooked interior. The problem with frying is that it adds calories and fat that many of us are trying to avoid. Baking produces a healthier dish, but how does it taste?

    When I presented Kevin with a plate of this baked coconut shrimp, he took a few bites and thought they were fried. That's because the shrimp are dipped in an egg batter, then rolled in a mixture of Panko and coconut which provides a nice crunch leading to a tender interior when you bite into them. Just look at the photo -- you can actually see the crunch! When you're munching on these delicious bites while sipping a piña colada or mai tai, you're not going to notice the difference! However, both frying and air frying instructions are included on the recipe card if you prefer.

    Ingredients for Baked Coconut Shrimp With Apricot Dipping Sauce

    Ingredients for baked coconut shrimp

    Here's what you'll need to make this island treat:

    For the baked shrimp:

    • Large or extra large shrimp
    • Coconut, sweetened or unsweetened (I prefer sweetened)
    • Garlic, minced
    • Kosher salt
    • Paprika or Cayenne pepper
    • Eggs
    • Cornstarch
    • Panko

    For the apricot dipping sauce:

    • Apricot jam
    • Thai chili sauce

    Don't Make This Mistake When Preparing the Shrimp

    I used to take my shrimp from the freezer, place it in a colander, and rinse it in hot water until it was thawed. While this is not a problem from a food safety standpoint, it results in soggy shrimp.

    The best way to thaw your shrimp is to take it out of the freezer the day before, and place the unopened bag in the refrigerator overnight. If you forget to do this (I do every time!) then the next best way to thaw the shrimp is to put the unopened bag in a large bowl of cold water and let it sit for 30 - 45 minutes, until the shrimp has thawed. The larger the shrimp, the longer it will need to sit. When you remove the thawed shrimp from the bag, pat it dry using paper towels to remove excess moisture before you start preparing it. If you don't, the batter won't stay on properly.

    Adding a Pinch of Spice

    Some people like a hot and spicy bite to their coconut shrimp. We do not have a high tolerance for spicy heat, so I use ground paprika for a bit of spice in this dish. But if you want to notch up the heat, opt for ground cayenne. If you use cayenne, you may want to try a batch with ¼ teaspoon and increase the amount if you would like more heat.

    The Difference Between Paprika and Cayenne Pepper

    Cayenne is a narrow red chili pepper that is roughly ten times hotter than a jalapeño. It adds a significant amount of heat to food, and should be added with a light hand until you're sure how much you can tolerate.

    Paprika, on the other hand, is often a blend of peppers. It is usually on the mild side, containing low heat items such as pimento. However, since paprika is a blend, the heat will vary by brand. There are different types of paprika:

    • Hungarian Paprika - mild and slightly sweet; usually made from red bell peppers.
    • Spanish Paprika - a hot paprika made from ground chili peppers and often bell peppers, too. Occasionally a hint of cayenne may be mixed in. Generally not as hot as ground cayenne.
    • Smoked Paprika - Made from chili and/or bell peppers that have been smoked before grinding.

    If you're not sure what kind of paprika you have, check your ingredients label for the type of peppers inside. For more information about these ground pepper varieties, visit the experts at Pepperscale.

    Just Two Ingredients in the Dipping Sauce

    I chose to make apricot dipping sauce because I had apricot jam in the house. But mango and orange work well, too! You can pair virtually any jam with Thai chili sauce in equal amounts. Thai chili sauce is a flavorful sweet sauce with peppers in it, but it does not have much heat.

    I hope you enjoy your island treat!

    If you have a vintage recipe you'd like share with us for possible publication, please scan it and email it to [email protected]. We'd love to hear from you!

    Coconut shrimp on a plate, with a small bowl of apricot dipping sauce that has a shrimp dipped into it.

    Baked Coconut Shrimp with Apricot Dipping Sauce

    Nancy Blackstone
    Baked coconut shrimp has a lightly sweet flavor, and when served with an apricot dipping sauce containing a hint of spice, it's a tropical sensation!
    5 from 3 votes
    Print Recipe Pin Recipe
    Prep Time 20 minutes mins
    Cook Time 15 minutes mins
    Total Time 35 minutes mins
    Course Main Dish
    Cuisine Polynesian
    Servings 35 pieces
    Calories 56 kcal

    Ingredients


    Coconut Shrimp

    • 1 lb. large or extra large shrimp peeled and deveined
    • 1 ¼ cups cornstarch
    • ½ teaspoon paprika or ¼ teaspoon ground cayenne pepper
    • ½ teaspoon garlic powder
    • 2 large eggs
    • ¼ teaspoon kosher salt
    • 1 ½ cups coconut
    • ½ cup Panko bread crumbs

    Apricot Dipping Sauce

    • ¼ cup apricot jam
    • ¼ cup Thai chili sauce

    Instructions
     

    • Preheat oven to 400 degrees

    Coconut Shrimp

    • Thaw shrimp using one of the methods listed in the post above.
    • Mix cornstarch, paprika and garlic powder in one bowl.
    • Mix eggs and salt in another bowl.
    • Combine coconut and Panko bread crumbs in a third bowl.
    • Coat shrimp in cornstarch mixture, then dip in egg mixture, then roll in coconut crumb mixture. Place on a large, ungreased baking sheet.
    • Bake at 400 degrees for 15-20 minutes, until coconut and crumbs are lightly browned.

    Apricot Dipping Sauce

    • Mix together apricot jam and Thai dipping sauce.
    • Place in small serving bowl and serve with coconut shrimp.

    Notes

    To Fry shrimp: Fill a frying pan with ¼ - ½ inch coconut or canola oil and heat until oil is 350 degrees (or when small bubbles form around a wooden spoon.) Cook 2-3 minutes until shrimp is pink and coconut is golden. Remove and drain on paper towel.
    To Air Fry Shrimp: Place coated shrimp in air fryer basket, and fry at 400 degrees for 7 minutes, then turn the shrimp over and cook an additional 4 minutes or until  shrimp is pink and coconut is golden.
    Substitute apricot jam with mango or orange jam, if desired.

    Nutrition

    Serving: 1pieceCalories: 56kcalCarbohydrates: 7gProtein: 3gFat: 2gSaturated Fat: 1gPolyunsaturated Fat: 1gMonounsaturated Fat: 1gTrans Fat: 1gCholesterol: 31mgSodium: 62mgPotassium: 55mgFiber: 1gSugar: 2gVitamin A: 33IUVitamin C: 1mgCalcium: 12mgIron: 1mg
    Keyword Coconut shrimp in air fryer, Coconut Shrimp with dipping sauce, Fried Coconut Shrimp, Polynesian Shrimp, Tiki Party Shrimp, Tropical Shrimp
    Tried this recipe?Let us know how it was!

    How to Make the Best Classic Irish Coffee Recipe

    March 14, 2021

    A hot coffee glass with Irish Whisky and cream.

    Hot, black coffee mixed with smooth Irish Whiskey and topped with frothy whipped cream makes the Irish Coffee cocktail hard to resist at any time of year.

    A hot coffee glass with Irish Whisky and cream
    Irish coffee is delicious when served strong and piping hot with a shot of creamy Irish Whiskey.

    Irish Coffee remains a time-honored tradition and one of the iconic drink recipes. It's a delightful marriage of hot coffee, whiskey, and frothy cream that can turn chilly nights into a cozy, heartwarming experience. No need to wait for Saint Patrick's Day to enjoy this delicious hot drink. It'll make you forget all about hot chocolate!

    The Cocktail that Saved an Industry (Maybe)

    In the 1950's international flying was not nearly as comfortable or seamless as it is now. Especially at the Foynes airbase, with the bad weather off the northern Atlantic Ocean

    Legend has it that after a particularly bad winter storm and harrowing aborted flight, upon return to the terminal in the cold and wet weather, a lucky group of American passengers were rewarded with a hot coffee spiked with a shot of Irish whiskey from the base Irish chef, Joe Sheridan. The passengers loved the first Irish Coffee, and it became a staple for international passengers flying from the Emerald Isle to the United States. Joe's simple recipe is still the best Irish Coffee recipe you can make.

    A travel writer who enjoyed the drink brought the recipe to San Francisco where it really took off. Joe Sheridan later moved to San Francisco to work at the Buena Vista Café where he taught many others how to make this lovely cocktail.

    In the mid century, Irish Coffee became so popular that many claimed it was the only thing that kept the Irish distilleries going in the economically trying post-WWII Irish economy.

    What Type of Coffee Should You Use?

    My Irish Coffee drink is really an international affair. To brew coffee later in the day, I love using my Bialetti Moka Pot. This iconic aluminum stovetop coffee maker uses hot water from pressurized steam that passes over packed grounds to quickly brew up a thick, rich, dark coffee with a wonderful crema that is similar to what you'd get from an espresso machine. Avoid using an instant coffee, because it usually makes bitter coffee.

    True Irish Coffee Ingredients Are Pretty Simple

    ingredients needed for Irish Coffee include whiskey, coffee, cream and sugar shown against a black background

    Here's all you'll need to mix like a pro:

    • Fresh, strong black coffee
    • Classic Irish Whiskey
    • Demerara sugar (not white granulated sugar or sugar cubes)
    • Heavy cream

    Bar Tools Needed

    You just need the following basics to mix up this cocktail:

    • Bar spoon
    • Jigger

    How to make Classic Irish Coffee

    Start by making the soft-whipped cream for your coffee. Pour the heavy whipping cream into a chilled mixing bowl, and use either a hand whisk or an electric hand mixer to whip just until it starts to make soft peaks. Make sure you use a mixing bowl chilled in the freezer for at least 20 minutes to keep the cream cold.

    Making the drink is pretty straightforward and just requires a little pouring and stirring. Follow these simple steps and you'll be all set:

    1. Add the demerara sugar to a mug (some recipes suggest adding a tablespoon of brown sugar, but I recommend skipping that as it gives the coffee a very different, inauthentic taste.)
    2. Pour in the hot, black coffee.
    3. Stir vigorously until you see the sugar dissolve.
    4. Pour whiskey (one and a half ounces of irish whiskey) in the mug.
    5. Last, gently pour the soft-whipped cream using the back of the spoon to 'float' it into the drink for a nice thick layer of cream. If you like, you can add a dash of nutmeg as a garnish.
    A hot coffee glass with Irish Whisky and cream
    Note the upside down spoon that the cream is poured onto so that it 'floats' over the coffee.

    How to Serve the Perfect Irish Coffee

    You can use a regular coffee mug, heatproof glass, or even Irish coffee mugs. I prefer a glass mug I picked up during my travels years ago.

    Tips for a Successful Irish Coffee

    While this is a pretty straightforward cocktail to make, keep these things in mind:

    • Use fresh cream and not the spray-bottle whipped cream, because those are usually made from oils that will leave nothing but a greasy stain on your drink.
    • Whip the cream just enough so that it thickens, and stop before it forms hard 'peaks'. You want to be able to gently pour it into your drink and have the cream float on top of the liquid. Let's be honest, the whipped cream is everyone's favorite part of the drink--especially mixed with delicious Irish whiskey!
    • Use a good whiskey. Jameson's makes many great Irish whiskeys and you can usually find them at your local grocery store or liquor store for a reasonable price.
    • Use a dark roast coffee that tastes good by itself. Many people like to brew up a Brazilian coffee for a rich, strong coffee flavor. If you use an inferior, bitter-tasting coffee thinking that the sugar and whisky will cover it up, you'll be disappointed with a poor tasting drink.
    • A large spoon turned upside down should be used for the cream. Slowly pour the cream onto that and let it settle on top of the drink. This is a little tricky the first few times, but using the back of the spoon is the best way to make one of these delightful traditional Irish desserts.

    Frequently Asked Questions

    What alcohol is in an Irish coffee?

    Irish Whiskey is used for this drink. No need for an Irish cream liqueur like Baileys.

    Why does the cream sink in my Irish coffee?

    Make sure to use a heavy whipping cream that has been beaten to a froth but is still pourable. Use an upside down bar spoon to gently pour the cream onto the back of a spoon so that it sits on top of the coffee.

    Should you Stir Irish coffee?

    No, you should drink the coffee 'through' the cream.

    Do you have a favorite Irish Whiskey that you recommend?

    My go-to is Jameson whiskey, but there are many others to choose from.

    If you're like me, a shot of whiskey is just the right thing when you're trying to stay warm on a cold night. If you're a fan of hot whiskey drinks, also check out the Hot Toddy, Hot Buttered Bourbon or a B&B in a warmed snifter.

    Before you go, did you try this cocktail? Why not leave a comment in the Comments section along with a star rating? I always appreciate hearing from you and getting your feedback.

    • Clear mug of hot buttered bourbon
      How to Make The Best Hot Buttered Bourbon Cocktail
    • A closeup of a roll polly glass of eggnog
      Bourbon Eggnog Is a Holiday Tradition
    • Classic Whiskey Sour Cocktail with Egg White
    • An Old Fashioned Cocktail in a rocks glass on a white napkin
      The Classic Old Fashioned Cocktail


    A hot coffee glass with Irish Whisky and cream.

    How to Make the Best Classic Irish Coffee Whiskey

    Kevin Mayfield
    Hot, black coffee mixed with smooth Irish Whiskey and topped with frothy whipped cream makes the Irish Coffee cocktail hard to resist at any time of year.
    5 from 1 vote
    Print Recipe Pin Recipe
    Prep Time 5 minutes mins
    Total Time 5 minutes mins
    Course Classic Cocktail
    Cuisine American
    Servings 1 Cocktail
    Calories 316 kcal

    Ingredients


    • 3-4 ounces hot coffee freshly brewed
    • 1 ½ ounces Irish Whiskey
    • 1-2 teaspoons demerara sugar
    • 2 ounces heavy whipping cream

    Instructions
     

    • Add 1 to 2 teaspoons of demerara sugar to glass 
    • Pour fresh, hot coffee into glass until about ¾ full
    • Stir with a bar spoon to dissolve the sugar 
    • Add jigger of Irish Whiskey
    • Use a bar spoon turned upside down and gently pour whipped cream onto the spoon and let it 'float' on top of the coffee

    Notes

    You can pre-heat the glass by first rinsing the inside with hot water, but if you use freshly brewed hot coffee this step may not be necessary.
    Ensure that you do not over whip the heavy cream. You want to be able to pour it onto the drink.

    Nutrition

    Serving: 1cupCalories: 316kcalCarbohydrates: 6gProtein: 2gFat: 20gSaturated Fat: 13gPolyunsaturated Fat: 1gMonounsaturated Fat: 5gCholesterol: 64mgSodium: 17mgPotassium: 97mgSugar: 6gVitamin A: 833IUVitamin C: 0.3mgCalcium: 40mgIron: 0.1mg
    Keyword 1950's cocktails, coffee cocktail, cream cocktails, hot cocktails, Irish coffee, whiskey drink
    Tried this recipe?Let us know how it was!

    Old Fashioned Macaroni and Cheese Recipe

    March 10, 2021

    A spoonful of macaroni and cheese being taken from a blue bowl.

    This old fashioned macaroni and cheese from the 1950's is a creamy, cheesy homemade comfort food with a crunchy cracker crumb topping. Ready in just 25 minutes!

    A blue bowl filled with old fashioned macaroni and cheese

    Macaroni and Cheese was a Midcentury Staple

    The origin of macaroni and cheese dates back to 13th century Southern Italy. It is said that Thomas Jefferson brought the recipe from Italy to Virgina in 1787. But when Kraft Foods introduced boxed macaroni and cheese in 1937, it became a household staple in the U.S. It's still a favorite of kids everywhere, although today's parents frequently favor homemade alternatives. If you can use fresh cheese and easily avoid preservatives in about the same time, why wouldn't you?

    Original handwritten mid century recipe for macaroni and cheese
    Handwritten macaroni & cheese recipe from the 1950's

    While many people eat variations of macaroni and cheese as a main dish, in the mid century years it was usually served as an alternative to potatoes or rice along side a main course. This recipe, which calls for one cup of macaroni, served 6 as a side dish and would comfortably serve 2-3 as a main course. I baked it in a small 1-½ quart casserole dish. Need more? Double the recipe and bake in a 9 x 13 casserole!

    The Most Popular Cheese For Old Fashioned Macaroni and Cheese

    There is much debate over which cheese or combination of cheeses makes the best macaroni and cheese. It's truly a matter of personal taste. The original Italian recipe for macaroni and cheese called for parmesan, which is an Italian cow's milk cheese with a hard texture and a nutty flavor. Many people still use it for this dish.

    Since the recipe card didn't state a particular kind of cheese, I opted for the most popular cheese during the mid century era and beyond for this dish, which is cheddar. Cheddar is an English cow's milk cheese with varying degrees of sharpness, depending on its age. The longer the cheese is aged, the sharper it is. I chose a medium cheddar, although there are some purists who say sharp cheddar is the only way to go. I find it a bit too tangy for my taste, but that's just me. Mild, medium, and sharp cheddar would all work, and you should choose according to what you like best.

    More Cheese, Please!

    There are other options for cheese besides parmesan and yellow cheddar. Here are some others you might consider trying:

    • White cheddar - An English cow's milk cheese similar to yellow cheddar, but without the annatto food coloring which has a mild peppery flavor.
    • Pepper jack - A type of Monterey Jack, a California cow's milk cheese that contains sweet, jalapeño, and habañero peppers, plus rosemary and garlic.
    • Mozzarella - A soft white cow's milk or buffalo's milk Italian cheese with a mild flavor and creamy texture.
    • Gouda - A mild flavored, slightly sweet and creamy cow's milk cheese originating in The Netherlands.
    • Gruyère - A smooth-melting Alpine cow's milk cheese from Switzerland with a nutty, slightly sweet and salty flavor.
    • Colby - A firm Wisconsin cow's milk cheese with a buttery flavor similar to mild cheddar.

    Feel free to mix cheeses for different flavor combinations. As long as you use the total amount of cheese called for in the recipe, it can be reached using any combination you care to try.

    Don't Ever Use This Kind of Cheese

    While there are many options for the type of cheeses you can use, what you should never use is pre-shredded, packaged cheese. Pre-shredded cheeses are coated with cellulose, a waxy coating to prevent them from clumping and sticking together. They also contain preservatives such as natamycin, an anti fungal agent to prevent mold from growing. The additives in shredded cheese can turn gritty and/or clump when you attempt to melt it. Therefore, it is always best to buy a fresh block of cheese and grate it yourself.

    Grating Cheese Is Easy

    Don't let grating cheese scare you off! No need for complicated equipment...a simple box grater will easily get the job done in minutes.

    Wondering how to grate a soft cheese like mozzarella? Just place it in the freezer for a half an hour, then remove and grate with your grater.

    Ingredients for Old Fashioned Macaroni and Cheese

    Ingredients for old fashioned macaroni and cheese
    Ingredients for old fashioned macaroni and cheese

    You only need a few ingredients for this quick & easy recipe:

    • Macaroni noodles (small shells works well, too)
    • Block cheese (cheddar or another cheese or combination of your preference)
    • Milk (Whole or low-fat)
    • Salt/Pepper
    • Crackers (crushed, or Panko bread crumbs can be used)
    • Butter

    Steps To Make Old Fashioned Macaroni and Cheese

    • Grating cheese with a box grater
      Boil noodles, then grate cheese with box grater as shown above
    • All macaroni and cheese ingredients combined in a casserole dish
      Boil milk and add cheese; melt. Add salt/pepper. Put in casserole.
    • Butter crumbs on top of macaroni and cheese in casserole dish
      Melt butter; mix with crackers and add to top of casserole. Bake.

    Frequently Asked Questions

    How do I make macaroni and cheese creamier?

    It sounds decadent, but boil your noodles in milk instead of water. It will instantly add creaminess to the macaroni and cheese.

    Can I substitute evaporated milk for regular milk?

    Yes, evaporated milk will give you a creamy consistency without the fat of regular milk.

    How can I make macaroni and cheese more flavorful?

    You can add a dash or two of cayenne pepper sauce, ¼ teaspoon of onion and garlic powder, or ¼ cup cooked chopped broccoli.

    What is your favorite variation of homemade macaroni and cheese? Drop us a line and let us know!

    If you have a vintage recipe you'd like share with us for possible publication, please scan it and email it to [email protected]. We'd love to hear from you!

    A spoonful of macaroni and cheese being taken from a blue bowl.

    Old Fashioned Macaroni and Cheese Recipe

    Nancy Blackstone
    A smooth and creamy homemade baked macaroni and cheese that's ready in about 25 minutes!
    5 from 2 votes
    Print Recipe Pin Recipe
    Prep Time 10 minutes mins
    Cook Time 15 minutes mins
    Total Time 25 minutes mins
    Course Main Dish, Side Dish
    Cuisine American
    Servings 6 Side Dish servings, 2-3 Main Dish Servings
    Calories 309 kcal

    Ingredients


    • 1 cup elbow macaroni
    • ½ cup milk
    • ½ pound cheddar cheese grated
    • ¼ teaspoon salt
    • ⅛ teaspoon pepper
    • 2 tablespoons butter
    • ½ cup crushed Ritz crackers, or Panko bread crumbs 1 small sleeve

    Instructions
     

    • Preheat oven to 350 degrees Fahrenheit.
    • Cook macaroni to al dente; drain.
    • While macaroni is cooking, bring milk to a boil. Turn down heat to simmer and add cheese, stirring constantly until cheese is fully melted.
    • Mix in salt and pepper.
    • Put drained noodles in 1-½ quart greased casserole dish. Add cheese sauce on top. 
    • Melt butter and mix with crushed crackers. Sprinkle cracker crumbs over top of casserole.
    • Bake at 350 degrees for 15 minutes. Serve immediately.

    Notes

    You can double the recipe and bake in a 9 x 13 pan.
    Store tightly covered in refrigerator for up to 48 hours.
    To store in freezer, cool completely for 1 hour, then place in airtight container and store up to 2 months.

    Nutrition

    Calories: 309kcalCarbohydrates: 22gProtein: 14gFat: 18gSaturated Fat: 11gPolyunsaturated Fat: 1gMonounsaturated Fat: 5gTrans Fat: 1gCholesterol: 52mgSodium: 419mgPotassium: 124mgFiber: 1gSugar: 2gVitamin A: 529IUCalcium: 309mgIron: 1mg
    Keyword 1950's Mac and cheese, 1960's Mac and cheese, baked Mac and cheese, Mac and cheese, vintage Mac and cheese
    Tried this recipe?Let us know how it was!

    Easy Blue Hawaiian Cocktail

    March 5, 2021

    Blue Hawaiian cocktail with spirits and tiki mugs.

    The exotic Blue Hawaiian tiki cocktail tastes as good as it looks! Its fruity island flavor will instantly transport your tastebuds to the tropics.

    Blue Hawaiian cocktail with spirits and tiki mugs

    The Other Blue Tiki Cocktail

    It's easy to confuse this drink with the 1957 Harry Yee cocktail named Blue Hawaii. They have a similar color and just a slight variation on the name. That's what makes me think the Blue Hawaiian may have been 'invented' by one of the famous Tiki bars like Don the Beachcomber or Trader Vic's. Either way, this is a wonderful cocktail in its own right.

    I remember sipping these while sitting poolside in Maui when Nancy and I were on our honeymoon. That's where I'm instantly transported whenever I blend up a batch of these tropical beauties.

    The Blue Hawaiian Cocktail is Easy to Make

    Don't let the list of ingredients scare you away from making this easy drink at home. It only contains 3 spirits--the rest are fruit juices.

    Aside from fresh ice, you'll need the following:

    • Light rum
    • Blue Curaçao liqueur
    • Cream of coconut
    • Pineapple juice
    • Fresh squeezed lemon juice
    • Fruit to garnish -- I prefer a nice slice of pineapple topped with a cocktail cherry

    I prefer to mix up my Blue Hawaiian's in the blender. Just flip the switch and watch the ingredients mix together until they form a tropical beach colored blue!

    Have fun with this drink! Don't hesitate to add some fresh fruit for garnish, such as chunks of fresh pineapple. I like to spear a stemmed cherry and add that on top of the pineapple.

    Bar Tools Needed

    This Tiki drink uses only a few of your bar tools:

    • Jigger
    • Bar spoon
    • Knife
    • Cutting board
    • Lemon/lime Juicer

    Tips for Making an Easy Blue Hawaiian Tiki Cocktail

    This is an easy drink to whip up, but keep these things in mind:

    • Go easy on the lemon juice -- it can quickly overpower the taste of your cocktail
    • Use the Blue Curaçao sparingly; you're going for a light ocean blue. Nothing looks worse than a weird, neon-blue colored drink!

    How to Serve It

    Don't forget to pour this beauty into a Hurricane glass for maximum visual appeal. And of course, who doesn't like a colorful paper umbrella to give it just the right tropical feel?

    Frequently Asked Questions

    What's in a Blue Hawaiian alcoholic drink?

    The main spirits in a Blue Hawaiian are light rum and blue curaçao liqueur.

    What is a popular drink in Hawaii?

    There are several drinks that come to mind, and certainly they can be tiki related or not. While traveling there myself, I enjoyed the Blue Hawaii, Blue Hawaiian, Piña Colada, and of course, the Mai Tai.

    Where's the most exotic place you've enjoyed a Blue Hawaiian?

    Before you go, did you try this cocktail? Why not leave a comment in the Comments section along with a rating? I always appreciate hearing from you and getting your feedback.

    Blue Hawaiian cocktail with spirits and tiki mugs.

    Easy Blue Hawaiian Cocktail

    Kevin Mayfield
    This exotic Tiki cocktail is a fun and easy, rich and creamy taste of the tropics!
    5 from 2 votes
    Print Recipe Pin Recipe
    Prep Time 5 minutes mins
    Total Time 5 minutes mins
    Course Classic Cocktails
    Cuisine American
    Servings 1 Cocktail
    Calories 317 kcal

    Ingredients


    • 1 ½ ounces light rum
    • ¾ to 1 ounce blue curaçao liqueur it depends on how blue you want your drink to look
    • ¾ ounce cream of coconut
    • 3 ounces pineapple juice
    • ½ ounce fresh squeezed lemon juice
    • Pineapple chunks and stemmed cherries for garnish

    Instructions
     

    • Pour ½ cup of fresh ice into your blender.
    • Pour all liquid ingredients in together. Blend for about 30 seconds until creamy, and a consistent, appealing shade of blue.
    • Pour straight from the blender into a hurricane glass. Garnish with fruit and a paper umbrella.

    Notes

    If you don't want to blend the drink, you can mix it in a cocktail shaker instead. Make sure to shake long enough to ensure the ingredients are properly mixed.
    Paper umbrellas and tropical cocktail napkins can be purchased at most liquor stores or online. I color coordinate mine with the drink I'm serving.

    Nutrition

    Calories: 317kcalCarbohydrates: 35gProtein: 1gFat: 4gSaturated Fat: 3gPolyunsaturated Fat: 1gMonounsaturated Fat: 1gSodium: 13mgPotassium: 126mgFiber: 1gSugar: 31gVitamin A: 5IUVitamin C: 14mgCalcium: 12mgIron: 1mg
    Keyword 1950’s cocktail, Blue cocktail, Blue Hawaiian, Elvis cocktail, Hawaiian cocktail, madmen cocktail, mid century cocktail, movie cocktail, rat pack cocktail, Tiki cocktail, tropical cocktail
    Tried this recipe?Let us know how it was!

    Beef Gravy Recipe Without Drippings - Ready in 10 Minutes!

    March 3, 2021

    Beef gravy being labeled over a serving of mashed potatoes.

    This easy homemade beef gravy recipe is so much better than a powdered mix or jar! The perfect gravy to accompany virtually any beef dish or potatoes.

    Beef gravy being labeled over a serving of mashed potatoes

     Gravy is a sauce, often made from meat juices that remain in the pan after cooking, and usually thickened with flour or cornstarch. When I think of gravy, I think of holiday meals when my mom would take dripping from the pan, mix them up with flour, and create a gravy for our turkey or beef roast.

    But sometimes you want gravy for a sandwich, meatloaf, or mashed potatoes, and you don't have any drippings. Sure, you can grab a packet of powder mix or a jar of gravy at the store, but if you're like me, you try to avoid the preservatives that come with prepared foods or mixes as much as possible. I use a beef broth with no additives, add a few spices, and in 10 minutes I have a simple and delicious homemade gravy!

    Ingredients For Homemade Beef Gravy Without Drippings

    • Beef broth
    • Onion powder
    • Garlic powder
    • Dried Thyme
    • Kosher salt
    • Black pepper
    • Cornstarch
    • Butter
    • Cream

    Helpful Hints For Making Gravy

    • Taste the gravy before serving and adjust the salt and pepper if needed, taking into account the food it will be served with.
    • Use very cold water when mixing up the cornstarch, and mix it thoroughly, until no white powder is left. If there is any unmixed powder remaining when it is poured into the gravy, it will turn into tiny white lumps.
    • Increase cornstarch by up to one tablespoon if you want an even thicker gravy. Always fully dissolve the cornstarch in a small amount of cold water before adding.

    Beef Gravy Variations

    To make a lighter brown gravy, use 4 ounces of chicken broth and 12 ounces of beef broth. This variation has a lighter brown color and a savory taste that is less beefy.

    To make gravy with meat drippings, replace up to 4 ounces of beef broth with the beef drippings from the pan.

    Frequently Asked Questions About Beef Gravy Without Drippings

    Can I use flour instead of cornstarch to thicken the gravy?

    Yes! I like cornstarch because it is flavorless and gluten-free, but if you prefer to use flour, you need to use 4 tablespoons of flour dissolved in 5 tablespoons of cold water. Mix it fully, then add the slurry to the broth mixture. If you use flour as the thickener, add an additional 5-10 minutes to the cooking time after it is added to the saucepan to allow the flavors to blend, otherwise you will be able to taste the flour in the gravy.

    How can I thin gravy that is too thick?

    You can gradually add more broth to the gravy and stir until it reaches desired consistency.

    How long can I store beef gravy?

    Store in a covered container in the refrigerator for up to 2 days. Bring to a full boil when reheating. Throw away gravy that has been out at room temperature for longer than 2 hours.
    Store in the freezer in a freezer bag or air-tight container for up to 2 months.

    If you have a vintage recipe you'd like share with us for possible publication, please scan it and email it to [email protected]. We'd love to hear from you!

    Beef gravy being labeled over a serving of mashed potatoes.

    Beef Gravy Recipe Without Drippings

    Nancy Blackstone
    This easy homemade beef gravy recipe is so much better than a a powder mix or jar! A savory side to accompany virtually any beef dish or potatoes.
    5 from 4 votes
    Print Recipe Pin Recipe
    Cook Time 10 minutes mins
    Total Time 10 minutes mins
    Course Side Dish
    Cuisine American
    Servings 4 Servings
    Calories 87 kcal

    Ingredients


    • 14.5 oz. can low sodium beef broth
    • ½ teaspoon onion powder
    • ½ teaspoon garlic powder
    • ½ teaspoon kosher salt
    • ¼ teaspoon black pepper
    • ¼ teaspoon thyme
    • 2 tablespoons cornstarch
    • 3 tablespoons cold water
    • 2 tablespoons butter
    • 1 tablespoon cream

    Instructions
     

    • In a medium saucepan, stir together beef broth, onion powder, garlic powder, kosher salt, black pepper and thyme. Bring to a boil over medium heat, then turn down heat and simmer for 5 minutes. 
    • While broth mixture is simmering, mix together cornstarch and cold water until cornstarch has completely dissolved. 
    • Add cornstarch mixture to broth mixture, and stir until well combined. Bring to a boil then reduce and simmer for another 5 minutes, until broth has thickened.
    • Stir in butter and cream. Serve immediately.

    Notes

    Make sure to combine cornstarch into very cold water and mix it until no powder is left, otherwise the gravy will get tiny white lumps. 
    Store in an airtight container in the refrigerator for up to 2 days, or in a freezer bag for up to 2 months.

    Nutrition

    Calories: 87kcalCarbohydrates: 4gProtein: 2gFat: 7gSaturated Fat: 4gPolyunsaturated Fat: 1gMonounsaturated Fat: 2gTrans Fat: 1gCholesterol: 20mgSodium: 532mgPotassium: 220mgFiber: 1gSugar: 1gVitamin A: 237IUVitamin C: 1mgCalcium: 7mgIron: 1mg
    Keyword Brown Gravy, Chicken and Beef Gravy, how to make gravy, Meatloaf Gravy, Roast Beef Gravy
    Tried this recipe?Let us know how it was!

    Classic Mai Tai Cocktail Recipe

    February 26, 2021

    Mai Tai cocktail in highball glass.

    The Mai Tai is one of the most famous Tiki cocktails, and it was invented by Trader Vic himself!

    Mai Tai cocktail in highball glass
    The classic Mai Tai is Tiki cocktail royalty!

    The Mai Tai is King of the Tiki Cocktails

    This classic Tiki cocktail is claimed by none other than Trader Vic himself, Victor Bergeron. Vic said he invented it at his Oakland, CA restaurant in 1944. The name is derived from Tahitian, meaning 'good' or 'excellent.' The Tahitians got that right!

    This drink makes a brief appearance in my favorite Tiki movie, Elvis Presley's Blue Hawaii. It played a role in helping jump start the Tiki movement from the islands and the west coast to all around the country.

    So I remember being served my first Mai Tai at 35,000 feet on a United Airlines flight when Nancy and I were on our honeymoon. It was so strong it nearly ate through the plastic cup! In fact, it wasn't very good and put me off Mai Tai's until I learned it was most likely made from a mix.

    That's one of the few problems with Tiki drinks. Rather than taking the time to make it from scratch, many people just use a packaged mix and some rum. That's too bad, because rather than the overly sweet, artificially flavored drink a mix makes, taking your time to hand-craft one results in a clean, crisp cocktail.

    Here's What You'll Need to Make a Mai Tai

    I'm not sure why people think that Tiki drinks are more complicated than they are. Maybe because they are so exotic; but as you can see, there are just a few spirits and some fruit juice:

    • Light rum
    • Dark rum
    • Orange curacao
    • Fresh-squeezed lime juice
    • Orgeat syrup
    • Mint leaves and lime wheel garnish

    And don't forget the crushed ice! This drink is best served in a highball cocktail glass. The particular glass in these pictures is an original Dorothy Thorpe glass, as seen on Mad Men being used by Don Draper.

    Bar Tools Needed

    This Tiki drink uses only a few of your bar tools:

    • Jigger
    • Bar spoon
    • Lemon/lime Juicer

    Tips for Success

    While this is one of the classic Tiki drinks, it doesn't mean that you can't take a couple of liberties with the quantities of the ingredients to adjust it for your palate. This is one strong rum-forward cocktail, but if you want to sip something smooth on a warm afternoon the Mai Tai can come across a little too strong. So, here are a couple of tips to smooth out the rough edges of the rum:

    • Add a full one ounce of the almond flavored orgeat syrup
    • Use one full ounce of the orange curacao

    Frequently Asked Questions

    What can I use in place of orgeat syrup?

    Unless you are planning on mixing a lot of Mai Tai's, you may not have orgeat syrup in your home bar. Almond syrup is a good substitute. I've seen people use the Torani brand, which is often used as a flavor in coffee. That way, you've got both your morning and evening drinks covered!

    What is the best rum for a mai tai?

    There are plenty of different brands of rums available that run the gamut from bargain price to very expensive. When mixing a mai tai, I prefer to use a light rum as the base and pour my dark rum in at the end. I still prefer the sweetness of Bacardi rum for the light rum. For my dark rum, I use Brugal Ron Reserva XV from the Dominican Republic. However, you can use the dark rum you prefer.

    What is orgeat syrup made of?

    Orgeat syrup is made from sugar, almonds, and rose water. It is very sweet and can be used in a number of cocktails such as the Mai Tai and the Whiskey Daisy.

    What alcohol goes into a Mai Tai?

    The primary spirit for a Mai Tai is rum. It also contains orange curacao liqueur.

    Before you go, did you try this cocktail? Why not leave a comment in the Comments section along with a rating? I always appreciate hearing from you and getting your feedback.

    Mai Tai cocktail in highball glass.

    Classic Mai Tai Cocktail Recipe

    Kevin Mayfield
    This rum-forward classic Tiki cocktail has been a favorite since it was introduced by Trader Vic's because it tastes fantastic and packs a punch!
    5 from 2 votes
    Print Recipe Pin Recipe
    Prep Time 2 minutes mins
    Total Time 2 minutes mins
    Course Classic Cocktails
    Cuisine American
    Servings 1 Cocktail
    Calories 233 kcal

    Ingredients


    • 1 ½ ounces light rum
    • ½ to 1 ounce orange curaçao
    • ½ to 1 ounce orgeat syrup
    • ½ ounce fresh squeezed lime juice
    • ¾ ounce dark rum

    Instructions
     

    • Place a scoop of fresh ice in a cocktail shaker
    • Pour the light rum, orange curaçao and lime juice into the cocktail shaker and shake for 30 seconds
    • Fill a highball glass with crushed ice
    • Strain the ingredients from the shaker into the glass
    • Gently pour the dark rum onto the drink so it 'sits' on top
    • Rub a couple of sprigs of mint leaves around the rim of the glass to express the oils, then stick them directly into the cocktail
    • Garnish the rim of the glass with a lime wheel

    Notes

    You can stir this drink to mix the rums or just enjoy the strong dark rum on the first couple of sips
    Aside from going a little heavy on the sweet ingredients, I actually cut back a little on the lime juice because it can be very sour

    Nutrition

    Calories: 233kcalCarbohydrates: 16gProtein: 1gFat: 1gSaturated Fat: 1gPolyunsaturated Fat: 1gSodium: 10mgPotassium: 31mgFiber: 1gSugar: 15gVitamin A: 7IUVitamin C: 4mgCalcium: 4mgIron: 1mg
    Keyword 1950’s cocktail, Blue Hawaii movie, Hawaiian cocktail, madmen cocktail, mid century cocktail, movie cocktail, rat pack cocktail, rum cocktail, Tiki cocktail, tropical cocktail
    Tried this recipe?Let us know how it was!

    Simple Baked Spaghetti Recipe (Spaghetti al Forno)

    February 25, 2021

    Fork scooping some spaghetti from a slice of baked spaghetti on a plate.

    Simple baked spaghetti combines the ease of spaghetti with the complex flavors and gooey cheese layers of lasagna. It's a meal the whole family will love!

    Fork scooping some spaghetti from a slice of baked spaghetti on a plate

    Where Did Spaghetti and Meatballs Originate?

    Most Americans associate spaghetti and meatballs with Italy, but it is originated in the United States. Actually, it's not served at most restaurants in Italy unless the restaurant caters specifically to American tourists!

    Italian immigrants that settled in the U.S. in the early 20th century did not have access to the same ingredients that they had in Italy. Dried, packaged pasta was inexpensive and readily available. Marinara sauce was made from canned tomatoes because fresh tomatoes were hard to find. In the U.S. beef and pork were easier to obtain and less expensive than in Italy (where a variety of meats and seafoods were used), so meatballs were made from that. The meal's flavors were reminiscent of Italian foods, but the actual dish of spaghetti and meatballs originated in America.

    Baked Spaghetti: Where Italy Meets the U.S.

    Baked pasta, also called pasta al forno (meaning "pasta baked in the oven") has existed in Italy for centuries. Originally it was a way for chefs to use up whatever ingredients they had on hand, so it was different every time it was made.

    In Italy, baked pasta takes many forms including baked ziti, baked rigatoni, and lasagna to name a few. One form it doesn't take is baked spaghetti -- over there, baked pastas are made from large, hollow noodles such as ziti, mostaccioli and rigatoni. The U.S. adapted those recipes with the popular thin spaghetti noodle, incorporating all the wonderful flavors into a spaghetti and meat sauce dish that can be cut into slices.

    Steps to Make Simple Baked Spaghetti

    These easy-to-follow steps demonstrate how simple it is to make this luscious baked spaghetti!

    • Browning meats, onion and garlic
      1: Brown meats, onion and garlic
    • Add marinara sauce and Italian seasoning
      2: Add marinara sauce and Italian seasoning
    • Step 3: Put parmesan in a bowl and ricotta cheese mixture in a separate bowl
      3: Cheese mixture in one bowl, spaghetti mixture in another
    • 4: Layer half meat sauce on bottom of casserole
    • Add layer of spaghetti mixture on top
      5: Add half the spaghetti mixture
    • Add a layer of cream cheese mixture over the top
      6: Top with all the cottage cheese mixture
    • Add second half of spaghetti then second half of meat sauce
      7: Add remaining spaghetti then top with remaining meat sauce
    • Top with the mozzarella
      8: Sprinkle with Italian cheese, then cover with foil and bake
    • A slice of baked spaghetti on a plate with a piece of garlic bread next to it
      Enjoy your dinner!

    Baked Pasta FAQ

    How long do you cook pasta before baking?

    Cook noodles just until al dente -- the very minimum time indicated on the package. If you boil it longer and it gets too soft, it will turn to mush in your casserole.

    Do you bake pasta covered or uncovered?

    For the first 20 minutes bake it covered in aluminum foil, then remove foil and bake it uncovered for the remaining time. Baking it covered for the first 20 minutes will retain the moisture. If you bake it uncovered the entire time, the casserole will dry out.

    If you love pasta dishes, try our from-scratch Old World Authentic Italian Meatballs, Old World Authentic Italian Sunday Sauce, Old World Authentic Italian Lasagna, and Penne Pasta in Vodka Sauce, aka Penne Alla Vodka.

    If you have a vintage recipe you'd like share with us for possible publication, please scan it and email it to [email protected]. We'd love to hear from you!

    Fork scooping some spaghetti from a slice of baked spaghetti on a plate.

    Simple Baked Spaghetti Recipe (Spaghetti al Forno)

    Nancy Blackstone
    Simple baked spaghetti combines the ease of spaghetti with the complex flavors and gooey cheese layers of lasagna. It's a meal the whole family will love!
    5 from 2 votes
    Print Recipe Pin Recipe
    Prep Time 15 minutes mins
    Cook Time 50 minutes mins
    Total Time 1 hour hr 5 minutes mins
    Course Main Dish
    Cuisine Italian
    Servings 8 -10 Servings
    Calories 641 kcal

    Ingredients


    • ½ lb. lean ground beef
    • ½ lb. mild Italian sausage
    • 1 medium yellow onion diced
    • 2 cloves garlic minced
    • 32 oz. jar marinara sauce
    • ½ teaspoon Italian seasoning
    • 1 cup low-fat cottage cheese
    • 1 cup shredded fresh parmesan divided in half
    • 1 large egg
    • 1 lb. spaghetti cooked to al dente
    • 8 oz. cream cheese softened and cut into small squares
    • 2 cups Italian style shredded cheese

    Instructions
     

    • Preheat oven to 350 degrees.
    • Combine ground beef, Italian sausage, diced onion and minced garlic in a large skillet. Cook over medium heat until meats are browned. Drain fat. While meats are browning, cook spaghetti to al dente and drain in colander.
    • When meats are browned, mix in marinara sauce and Italian seasoning.
    • In a medium bowl, combine the cottage cheese, shredded parmesan, and egg. 
    • In a large bowl, combine hot spaghetti and cubed cream cheese. Mix with spatula until cream cheese has melted and coated the spaghetti.
    • Assemble in a 9 x 13 casserole as follows: On bottom of casserole, layer half of the meat sauce. Place half of the spaghetti evenly over the top. Put all of the cottage cheese mixture layered over the top of the spaghetti. Place the rest of the spaghetti on top of the cottage cheese mixture. Cover spaghetti with remaining meat sauce. Sprinkle Italian style shredded cheese over all. 
    • Cover with foil and bake 20 minutes. Remove foil and sprinkle with the last ½ cup of fresh parmesan. Return to oven and bake, uncovered, for 30 minutes, or until cheese is melted and beginning to turn golden.
    • Remove from oven and let stand 10 minutes. Cut into squares and serve. 

    Notes

    It is okay to use low fat cream cheese
    You can substitute 2 cups shredded mozzarella in place of 2 cups shredded Italian style cheese

    Nutrition

    Calories: 641kcalCarbohydrates: 53gProtein: 36gFat: 31gSaturated Fat: 16gPolyunsaturated Fat: 2gMonounsaturated Fat: 10gTrans Fat: 1gCholesterol: 125mgSodium: 1415mgPotassium: 801mgFiber: 4gSugar: 9gVitamin A: 1206IUVitamin C: 10mgCalcium: 379mgIron: 3mg
    Keyword Baked pasta, Baked spaghetti with cottage cheese, baked spaghetti with cream cheese, Pasta bake
    Tried this recipe?Let us know how it was!

    Simple Lentil Soup Recipe

    February 23, 2021

    Bowl of simple lentil soup served with French bread on the side.

    This simple lentil soup recipe is a heart healthy, naturally vegan dish that is high in protein, fiber, vitamins and minerals. Plus, it's budget friendly, filling and low-calorie!

    Bowl of Lentil soup with sliced bread
    Homemade lentil soup with French bread

    Vintage Recipes Can Be Healthy!

    There is a perception that vintage recipes are all casseroles and other comfort foods, but that's definitely not the case! While certainly there are many vintage comfort food recipes, there are also many healthy ones, too. Mid century cooks were looking for economical meals that were easy to stretch and could feed the whole family, perhaps for a couple of nights. Homemade soups certainly fit the bill for that.

    What Exactly Are Lentils?

    Lentils are legumes, a vegetable in the same family as peas and beans. They are low in calories (230 per cup) high in protein, and have a positive affect on cholesterol and blood sugar levels. They are filling and play a positive role in weight loss diets.

    Dried lentils come in different varieties, including green, brown, red, and yellow to name a few. Red and yellow lentils are mild and the fastest cooking, usually only taking 15-20 minutes. They are often found in Middle Eastern and Indian dishes. Red lentils turn smooth as they cook. Brown and green lentils need to cook longer, and will retain a good part of their shape and texture. Brown lentils are a common component of veggie burgers, and green lentils are most commonly used in soup. This soup recipe was made with dried, green lentils.

    Original Simple Lentil Soup Recipe

    This recipe came from a book of mid century recipes I purchased from someone in Salt Lake City. I like it because rather than having a broth base, it's made with water and a little tomato juice (I used organic tomato juice.) This means per serving it has a very low sodium content, except for what you add. I added a tablespoon of Diamond Crystal Kosher Salt. The total sodium per serving came out to 512 mg., or 22% of the U.S. recommended daily allowance. This is considerably lower than a canned soup, plus there are no preservatives.

    handwritten vintage lentil soup recipe
    Mid Century handwritten recipe for lentil soup

    What You Need to Make Simple Lentil Soup

    This is one of those recipes you can vary depending on what vegetables you have in your kitchen. I followed the handwritten recipe using an onion, carrot, spinach, and potatoes, and I also added a rib of celery. I found that it didn't need quite as much cooking time as the original recipe said, so I cut it down by a half an hour and it was definitely ready to eat.

    Ingredients for simple lentil soup
    Ingredients for simple lentil soup

    Hints for Making Simple Lentil Soup

    • Rinse lentils under running water, then sort through and remove any chipped or malformed lentils or other debris that might be mixed in.
    • Sauté the onion, garlic, carrot, celery for 8-10 minutes, allowing the vegetables to soften and flavors to meld for the soup base.
    • Simmer on low, covered, once liquids are added, and stir often. If you don't, the lentils will stick to the bottom of the pot.
    • Store in refrigerator for up to 3 days, or in an airtight container in the freezer for up to 3 months.
    Close up of lentil soup in a bowl

    If you love healthy soup recipes, check out our delicious Vegetable Barley Soup, Navy Bean Soup, and Split Pea and Ham Soup.

    If you have a vintage recipe you'd like share with us for possible publication, please scan it and email it to [email protected]. We'd love to hear from you!

    Bowl of simple lentil soup served with French bread on the side.

    Simple Lentil Soup Recipe

    Nancy Blackstone
    This simple lentil soup recipe is a heart healthy, naturally vegan dish that is high in protein, fiber, vitamins and minerals.
    5 from 4 votes
    Print Recipe Pin Recipe
    Prep Time 10 minutes mins
    Cook Time 2 hours hrs
    Total Time 2 hours hrs 10 minutes mins
    Course Main Dish
    Cuisine American
    Servings 10 Servings
    Calories 199 kcal

    Ingredients


    • 1 tablespoon vegetable oil
    • 1-½ cups diced yellow onion
    • 1 carrot diced
    • 1 celery rib sliced
    • 8 cups water
    • 2 cups tomato juice
    • 1 tablespoon basil
    • 2 cups lentils rinsed
    • 2 russet potatoes cubed
    • 1 tablespoon kosher salt
    • ¼ teaspoon black pepper
    • 1 cup fresh chopped spinach leaves

    Instructions
     

    • Heat oil in stock pot over medium-low heat. Sauté onion, carrot, and celery for 8-10 minutes, until vegetables are soft and onion is translucent.
    • Add water, tomato juice, basil, and lentils to pot. Bring to boil, then turn down heat, cover, and simmer for 45 minutes.
    • Add potatoes, kosher salt and pepper. Cover, and continue to simmer for an additional 45 minutes, stirring frequently. If soup has cooked down and is too thick, add water to desired consistency.
    • Add spinach, and cook, uncovered for 20 minutes. Serve and enjoy!

    Nutrition

    Serving: 1cupCalories: 199kcalCarbohydrates: 35gProtein: 12gFat: 2gSaturated Fat: 1gPolyunsaturated Fat: 1gMonounsaturated Fat: 1gTrans Fat: 1gSodium: 723mgPotassium: 715mgFiber: 13gSugar: 3gVitamin A: 1457IUVitamin C: 15mgCalcium: 54mgIron: 4mg
    Keyword Healthy Soup, Old fashioned lentil soup, Vegan Dish, Vegan Soup, Vegetarian Dish, Vegetarian Soup
    Tried this recipe?Let us know how it was!

    Simple Blue Hawaii Tiki Cocktail

    February 19, 2021

    A Blue Hawaii cocktail in a hurricane glass with fruit and umbrella.

    The Blue Hawaii is a tropical mid century favorite due to its sweet and tart flavor and ocean blue color.

    A Blue Hawaii cocktail in a hurricane glass with fruit and umbrella
    Drink a Blue Hawaii for a taste of the tropics no matter what time of year.

    Any Color as Long as its Blue...

    Many cocktails have a murky past and it is not certain who invented them or where they came from. The Blue Hawaii is different because we know exactly where and how it got its start.

    In 1957 an enterprising salesman for the Dutch distiller Bols, asked Honolulu's Hawaiian Village Hotel head bartender, Harry Yee, to invent a cocktail using their Blue Curaçao liqueur. Harry experimented for a while with various ingredients and eventually landed on this recipe, which incorporates different base spirits, fruit juices and the famous liqueur which gives it its color.

    The Blue Hawaii is Fit for The King

    Harry also gave the drink it's name, Blue Hawaii. Many people thought this was because of the Elvis Presley movie with the same name. But unfortunately, that is just another Island myth. Harry named it after a song from a much earlier Bing Crosby movie, but the same song was featured in both movies. So indirectly, Harry named Elvis' 1961 Technicolor tropical smash movie, Blue Hawaii.

    I'm not sure if it was the cocktails or the movies, but Hawaii soon became an exotic tourist destination, and in 1959 Hawaii became the 50th state in the union.

    The Booming Tiki Trend

    Harry went on to create many more tropical cocktails which caught on in Hawaii and soon spread to the mainland. The Tiki craze was based on a faux tropical culture and was soon featured in movies, songs and culture. Don the Beachcomber and Trader Vic's bars and restaurants became very popular destinations for their Tiki drinks and cartoon-like take on Polynesian life.

    Ingredients for a Blue Hawaii

    Like many tropical drinks, this cocktail may seem complicated but its really quite simple with only a few ingredients:

    • Vodka
    • White rum
    • Blue Curaçao -- this is a delicious orange-flavored liqueur made from fruit peels from the Caribbean
    • Pineapple juice
    • Sweet n Sour (this one is super easy--just use my simple syrup recipe and squeeze in fresh lime juice until it's a little tangy)
    • Maraschino cherries and pineapple slices for garnish

    The hurricane glass is nearly as important as the drink itself. If you like Tiki drinks or tropical cocktails, you may want to invest in a set. Be careful though, these are large glasses and you'll find yourself mixing up a larger batch of drinks just to fill it!

    And of course you need to top it off with fresh fruit and a paper umbrella to instantly transport you to the tropics.

    Tips for Success

    Even though this is a simple drink to mix, here's a few things to keep in mind:

    • Whip up a small batch of simple syrup with fresh-squeezed lime juice rather than buying Sweet n Sour mix. Homemade syrup gives the drink a very balanced taste and is not sickly sweet like the bottled syrups.
    • You can just shake this drink up; no blender is required. This keeps things easy,

    Frequently Asked Questions

    What is a popular drink in Hawaii?

    There are several drinks that come to mind and certainly they can be Tiki related or not. While traveling there myself, I enjoyed the Blue Hawaii, Blue Hawaiian and of course the Mai Tai.

    Is Blue Curaçao vodka?

    Blue curaçao is a Caribbean liqueur made from dried peels of the Laraha citrus fruit and is merely colored blue. The blue curaçao liqueur is said to have been created by the Dutch Bols distillery.

    Similar Cocktails:

    Classic Mai Tai Cocktail Recipe

    Easy Blue Hawaiian Cocktail

    Do you have a favorite Tiki drink? Which do you prefer, the Blue Hawaii, or maybe a Blue Hawaiian?

    A Blue Hawaii cocktail in a hurricane glass with fruit and umbrella.

    Simple Blue Hawaii Tiki Cocktail

    Kevin Mayfield
    This tropical tiki drink is beloved for its great sweet and sour taste and arresting blue color.
    5 from 8 votes
    Print Recipe Pin Recipe
    Prep Time 5 minutes mins
    Total Time 5 minutes mins
    Course Classic Cocktails
    Cuisine American
    Servings 1 Cocktail
    Calories 318 kcal

    Ingredients


    • 1 Ounce Vodka
    • 1 Ounce White Rum
    • ¾ Ounce Blue Curaçao
    • 3 Ounces Pineapple juice
    • 1 Ounce Sweet-n-Sour simple syrup
    • Pineapple wedge and maraschino cherries for garnish

    Instructions
     

    • Place one cup of fresh ice in a cocktail shaker
    • Add in wet ingredients and shake for at least 30 seconds
    • Pour drink and ice into a hurricane glass
    • Add pineapple wedge and cherries as garnish

    Notes

    Feel free to put your cocktail through a blender if you'd prefer a frozen version.
    A dash of spray whipped cream makes it more decadent!

    Nutrition

    Calories: 318kcalCarbohydrates: 39gProtein: 1gFat: 1gSaturated Fat: 1gPolyunsaturated Fat: 1gMonounsaturated Fat: 1gSodium: 20mgPotassium: 136mgFiber: 1gSugar: 36gVitamin A: 4IUVitamin C: 9mgCalcium: 15mgIron: 1mg
    Keyword 1950’s cocktail, Blue cocktail, Elvis cocktail, Hawaiian cocktail, madmen cocktail, mid century cocktail, movie cocktail, rat pack cocktail, Tiki cocktail, tropical cocktail
    Tried this recipe?Let us know how it was!

    Homemade Beef Stroganoff with Egg Noodles

    February 18, 2021

    Homemade beef stroganoff on a blue dinner plate.

    Homemade beef stroganoff is a flavorful one-dish comfort food consisting of lean beef sautéed in butter and served over noodles in a sour cream sauce.

    Homemade beef stroganoff in a skillet
    Skillet of homemade beef stroganoff sprinkled with fresh chopped parsley

    It is believed that beef stroganoff was invented in the 19th century by a French chef working for a Russian aristocrat with the last name of Stroganov. This dish combined elements of both Russian and French cooking, with a creamy sauce (a French tradition) made of sour cream rather than creme fraiche (a Russian tradition.)

    Beef stroganoff started to gain traction in the United States when the recipe was published in the 1943 edition of The Joy of Cooking, by Irma Rombauer. It enjoyed huge popularity with both home cooks and in restaurants from the 1950's through the 1970's. Today, it enjoys a reputation as a mid century comfort food.

    Beef stroganoff mid century handwritten recipe
    Handwritten mid century beef stroganoff recipe

    There have been many variations of the beef stroganoff recipe over the years. Some versions call for ground beef rather than beef strips, some for serving over rice or potatoes rather than egg noodles. I found this vintage handwritten recipe tucked inside of an old cookbook I bought. It calls for beef bouillon rather than a can of broth, and rice rather than pasta. To make it faster and easier, I just opted for canned broth and a bit of wine for added flavor. Also, I chose the more traditional route of serving it over egg noodles. But whatever starch you choose, the dish will be delicious!

    You Can Make It Gluten Free

    It's easy to convert this to a gluten free recipe:

    • Thicken the sauce with cornstarch rather than flour. I have done this, and it does not negatively impact the flavor. Cornstarch has greater thickening power, so you should substitute with half of the amount of flour called for. In this recipe, instead of using 3 tablespoons of flour, use 1-½ tablespoons of cornstarch.
    • Serve over gluten free noodles. My favorite are Manischewitz gluten free wide egg noodles, but there are several on the market to choose from.

    Tips for Making Homemade Beef Stroganoff

    • There are many cuts of beef you can use to make this dish, but the higher quality you buy, the more tender and delicious it will be. If this is a rare splurge, opt for beef tenderloin if you can. The most common recommended cut for this dish is top sirloin, which tenderizes nicely and has excellent flavor. If you opt for a tougher cut of beef, you may need to let it cook a little longer to make sure it is tender.
    • This recipe calls for a red or white cooking wine which adds a nice flavor to the gravy. If you're opening a bottle to enjoy with dinner, you can also use a dry red or white table wine. But if you prefer not to use wine at all, just substitute it with additional beef broth.
    • If you want to substitute the thicker and richer (and French preferred) creme fraiche for sour cream, you can do so in an equal amount. Creme fraiche can be found in the dairy section of most grocery stores.

    Because this is a one-dish meal that comes together quickly, there is little else you need to do except heat up some rolls to serve on the side and enjoy!

    If you have a vintage recipe you'd like share with us for possible publication, please scan it and email it to [email protected]. We'd love to hear from you!

    Homemade beef stroganoff on a blue dinner plate.

    Homemade Beef Stroganoff with Egg Noodles

    Nancy Blackstone
    Homemade beef stroganoff is a flavorful one-dish comfort food consisting of lean beef sautéed in butter and served over noodles in a sour cream sauce.
    5 from 2 votes
    Print Recipe Pin Recipe
    Prep Time 15 minutes mins
    Cook Time 30 minutes mins
    Total Time 45 minutes mins
    Course Main Dish
    Cuisine Russian
    Servings 6 Servings
    Calories 743 kcal

    Ingredients


    • ½ cup butter
    • kosher salt
    • black pepper
    • 2 pounds beef cut into thin strips beef tenderloin, top sirloin, or boneless rib eye
    • 1 medium yellow onion sliced into thin strips
    • 8 oz. sliced mushrooms
    • 2 cloves garlic minced
    • ¼ cup red or white cooking wine
    • 3 tablespoons flour
    • 1 cup beef broth
    • 1 tablespoon Worcestershire sauce
    • 3 tablespoons flour
    • 1 cup sour cream
    • 1 teaspoon dijon mustard
    • 1 lb. wide egg noodles cooked to al dente in salted water
    • freshly chopped parsley for garnish if desired

    Instructions
     

    • Melt butter in skillet; season steak with salt and pepper and brown about 4 minutes on each side. Remove from pan with slotted spoon and set aside, keeping warm.
    • Add onion and mushrooms to skillet and sauté until onion is translucent and mushrooms are soft, 8-10 minutes.
    • Add garlic and sauté 1 minute. 
    • Add red or white wine to pan, scraping bottom to deglaze. 
    • Mix flour, beef broth and Worcestershire sauce together until flour is dissolved, then pour into pan. Return beef to pan and cook on low, stirring constantly until sauce thickens.
    • Combine sour cream and dijon mustard, then add to pan and heat through.
    • Serve over hot cooked noodles. Garnish with fresh parsley if desired.

    Nutrition

    Calories: 743kcalCarbohydrates: 65gProtein: 47gFat: 32gSaturated Fat: 17gPolyunsaturated Fat: 2gMonounsaturated Fat: 9gTrans Fat: 1gCholesterol: 207mgSodium: 459mgPotassium: 967mgFiber: 3gSugar: 4gVitamin A: 762IUVitamin C: 3mgCalcium: 118mgIron: 5mg
    Keyword 1950's dinner, 1960's dinner, 1970's dinner, French dinner, Gluten free beef stroganoff, mid century dinner, Russian dinner
    Tried this recipe?Let us know how it was!

    Watergate Salad - So Good, it's Scandalous!

    February 15, 2021

    A dessert dish filled with Watergate salad, topped with whipped topping, with pistachios and a cherry on top.

    Watergate salad's retro combination of pudding, pistachios, and pineapple blended with whipped topping will transport your taste buds to the 1970's!

    Two servings of Watergate salad in decorative glass cups on a silver tray
    Watergate salad for two

    Is it a Salad or Dessert?

    In the mid century years it was common to have a sweet fruit dish served as a salad, either before or with the main course. Items like Waldorf salad, Ambrosia salad, and gelatin fruit molds were mainstays of mid century meals. My Midwestern mom and grandma almost always served a fruit salad with dinner. Kevin's Southern family served fruits exclusively as desserts, so when I make a fruit dish we argue about when to eat it!

    These days, it's rare to be served a fruit salad before or alongside the main course. And I have to admit, this sweet salad with pudding and whipped topping tastes much more like a treat than it does an appetizer or side dish! If I were serving it as a dessert, I would add a dollop of topping and a cherry on top. I would leave those off and just sprinkle the top with a few pistachios if serving as a salad.

    Where Did The Name Come From?

    While the exact origin isn't known, it is thought to have been inspired by Watergate cake. The first known published recipe for the frosted pistachio Watergate cake ran in the Washington, D.C. area in September of 1974, one month after Richard Nixon resigned as President of the United States. Various articles have said it was so named because of all the nuts that are in it, and it has a huge cover-up (a heavy layer of frosting on top.) In 1976 Jell-O Brand introduced instant pistachio pudding, and shortly thereafter Watergate salad recipes starting appearing. Its similar to Watergate cake with nuts in it and ingredients that are all covered up with whipped topping.

    Original hand written recipe for Watergate salad
    Original handwritten recipe for Watergate Salad

    This handwritten gem is part of my mid century recipe collection. I often have to make a few updates to the older recipes to make them easier to prepare and more appealing to the modern palate, but not this one. I made it exactly as written and it was fast, easy, and absolutely delicious!

    Watergate Salad: Five Ingredients + a Cherry

    Ingredients for Watergate salad

    Here's what you'll need to have on hand:

    • Instant pistachio pudding
    • Crushed pineapple
    • Chopped pistachios
    • Miniature marshmallows
    • Whipped topping
    • Cherry for garnish (optional)

    It only takes a couple of minutes to mix everything together. Though our handwritten recipe says it needs to chill for a few hours or overnight, after an hour in the refrigerator ours was firm, chilled, and ready to eat!

    Both Kevin and I were a little apprehensive when I began preparing this pale green concoction. We weren't at all sure about the pineapple, marshmallow and pistachio combination. But we quickly changed our minds after the first bite! I will definitely add it to my potluck rotation, as the cute retro appearance and sweet, creamy taste are absolutely irresistible! If you're throwing a vintage party, this dish is an absolute must-have!


    A dessert dish filled with Watergate salad, topped with whipped topping, with pistachios and a cherry on top.

    Watergate Salad - A 1970's Dessert That's So Good, It's Scandalous!

    Nancy Blackstone
    Watergate salad's retro combination of pudding, pistachios, and pineapple blended with whipped topping will instantly transport your taste buds to the 1970's!
    5 from 2 votes
    Print Recipe Pin Recipe
    Prep Time 10 minutes mins
    Cook Time 0 minutes mins
    Total Time 1 hour hr 10 minutes mins
    Course Dessert
    Cuisine American
    Servings 10 -12 Servings
    Calories 164 kcal

    Ingredients


    • 3.4 oz. box instant pistachio pudding
    • 20 oz. can crushed pineapple undrained
    • ½ cup miniature marshmallows
    • ½ cup chopped pistachios
    • 8 oz. carton whipped topping
    • dollop of whipped topping and cherry as garnish optional

    Instructions
     

    • Put the powdered pistachio pudding mix in a bowl and pour in the can of crushed pineapple. Mix with a spatula until thoroughly combined.
    • Stir in the marshmallows and pistachios.
    • Fold in the whipped topping.
    • Chill in refrigerator at least one hour.
    • Serve in dessert cups. Top with a dollop of whipped topping, a few crushed pistachios, and a cherry if desired. 

    Notes

    Light whipped topping can be used if you prefer
    If you don't have pistachios, you can substitute with your favorite nuts 

    Nutrition

    Calories: 164kcalCarbohydrates: 27gProtein: 2gFat: 6gSaturated Fat: 3gPolyunsaturated Fat: 1gMonounsaturated Fat: 2gCholesterol: 1mgSodium: 158mgPotassium: 158mgFiber: 1gSugar: 24gVitamin A: 71IUVitamin C: 6mgCalcium: 33mgIron: 1mg
    Keyword 1970's dessert, 1970's Salad, mid century dessert, Nixon dessert, Nixon salad, Washington DC dessert, Washington DC salad
    Tried this recipe?Let us know how it was!

    The Pink Squirrel Valentine's Day Cocktail

    February 13, 2021

    A frozen Pink Squirrel cocktail with two cherries and the bottles of liquor required.

    The Pink Squirrel is a fun fifties cocktail that is perfect for Valentines Day. Remember to make enough for two, though!

    A frozen Pink Squirrel cocktail with two cherries and the bottles of liquor required.
    This fun forties invention from Milwaukee is perfect for Valentines Day

    Fun Frozen Cocktails Hit the Big Time

    Americans fell in love with blender cocktails and ice cream drinks in the 1950's for good reason. They finally had a cheap and ready supply of ice, and many homes now sported modern conveniences like a blender.

    The Pink Squirrel comes to us from Wisconsin, the same region that created the Grasshopper. This cocktail was invented in the 1940's by John Dye of Bryant's Cocktail Lounge in Milwaukee.

    While this cocktail was a popular drink in the 50's, by the 60's it had already started to fade from view. Probably because the main ingredient was expensive and not used very often. By the 70's this drink was relegated to the memory banks. But proving that everything old is new again, it started popping up in television shows and movies such as Cocktail, starring Tom Cruise.

    It turns out there a few variations on the Squirrel cocktails depending on what color the ingredients turn when mixed together. There's a Black Squirrel made with Cynar, a Brown Squirrel made with amaretto, and a Chocolate Squirrel that features more chocolate liqueur. I'm guessing there are probably several others if you look hard enough. The recipes are very similar, featuring creme de cacao, another liqueur, and heavy cream or ice cream. Typically, these drinks are served with a dusting of nutmeg or a dash of whipped cream.

    You can make this drink a couple of different ways -- shaken, or blended with ice. Some folks prefer to use vanilla ice cream rather than heavy whipping cream for an even richer dessert drink.

    Ingredients for a Pink Squirrel

    I'm pretty sure you probably don't have the main ingredient for this drink, which is Creme de Noyaux. I know I didn't. In fact, I had never even heard of it. Knowing I probably wouldn't see a lot of demand for this specialized liqueur, I decided to improvise. I replaced it with one of my favorite cherry liqueurs that provides a nice shade of pink color and tastes delicious.

    Here's what you need:

    • Creme de Cacao
    • Creme de Noyaux--if you have it. This red liqueur is what gives the drink its pink coloring. It's an almond-flavored liqueur made from apricot kernels and probably a bunch of artificial red dye. If you don't have it sitting on your bar waiting to be used, I recommend something that you can use in several cocktails such as Luxardo Cherry liqueur. It tastes delicious and can be used in a variety of drinks such as the Martinez, and is also a wonderful addition to a Rye Manhattan. Using this liqueur gives the drink the perfect color and a tasty cherry flavor that blends well with the chocolatey Creme de Cacao.
    • Heavy whipping cream

    Tips for a Successful Pink Squirrel

    Since I'm already deviating from the recipe, let's go even more off-script.

    • Add a few Luxardo Maraschino cherries to the blender in addition to the cherry liquor for a stronger cherry flavor.
    • Swirl in some of the cherry syrup to the finished drink to give it the perfect shade of pink.
    • Top it with a spritz of whip cream and/or nutmeg, and garnish with a cherry or two.

    If you have had a traditional Pink Squirrel, let me know if you feel strongly about the Creme de Noyaux and I'll give it a go.

    A frozen Pink Squirrel cocktail with two cherries and the bottles of liquor required.

    The Pink Squirrel Valentine's Day Cocktail

    Kevin Mayfield
    This delicious frozen cocktail is perfect to celebrate Valentine's Day. Made with Cherry liqueur and cream it is a fun, tasty retro drink.
    5 from 1 vote
    Print Recipe Pin Recipe
    Prep Time 3 minutes mins
    Total Time 3 minutes mins
    Course Classic Cocktail
    Cuisine American
    Servings 1 Drink
    Calories 98 kcal

    Equipment

    • 1 Blender

    Ingredients


    • 1 ounce Creme de Cacao
    • 1 ounce Creme de Noyaux or Luxardo Cherry Liqueur 
    • 1 ounce Heavy Whipping Cream
    • 4 Cocktail cherries
    • Nutmeg (optional)

    Instructions
     

    • Place a cup of fresh ice in a blender
    • Pour the ingredients in and blend for approximately one minute
      1 ounce Creme de Cacao, 1 ounce Heavy Whipping Cream, 1 ounce Creme de Noyaux or Luxardo Cherry Liqueur 
    • Pour into a stemmed cocktail glass
    • Add a couple of Luxardo cherries into the drink with a splash of syrup from the jar, then lightly stir to mix
    • Dust with a garnish of ground nutmeg (optional)
    • Add a couple of stemmed cherries for garnish

    Notes

    You can replace the heavy whipping cream and ice with vanilla ice cream in the blender if you prefer. 

    Nutrition

    Calories: 98kcalCarbohydrates: 1gProtein: 1gFat: 10gSaturated Fat: 7gPolyunsaturated Fat: 1gMonounsaturated Fat: 3gCholesterol: 39mgSodium: 11mgPotassium: 21mgSugar: 1gVitamin A: 417IUVitamin C: 1mgCalcium: 18mgIron: 1mg
    Keyword ice cream drink, mid century cocktails
    Tried this recipe?Let us know how it was!

    Old Fashioned Vegetable Barley Soup

    February 11, 2021

    A close up image of vegetable barley soup in a white bowl

    This vegetable barley soup is filled with corn, beans, carrots, tomatoes and many more flavorful vegetables and savory herbs. It's a nutrient-packed, satisfying meal in a bowl!

    Vegetable barley soup on a bowl with a loaf of bread in the background

    What is Barley?

    Barley grows as a grass that produces a high fiber grain on its stalk. It's a very heart healthy food choice because it is known to lower blood pressure and help control cholesterol and blood sugar levels. It contains 8 essential amino acids, B vitamins, and minerals including phosphorus, magnesium, iron and zinc. It's recommended by the American Heart Association as part of a heart-healthy diet.

    Vegetable Soups Were Popular in Mid Century

    Soups were a popular mid century meal because they were cost effective and could be stretched to feed several people up to a few days. If it was available, beef or chicken could be added, but it wasn't necessary. A vegetable and grain packed soup like this one made for a healthy, filling, family pleasing meal that was extremely cost effective for the mid century cook.

    Use Your Favorite Veggies in Vegetable Barley Soup

    Chop and add whatever vegetables you have on hand -- there are no set rules for vegetable soup so use your favorites! My favorite recipe is on the recipe below, but you can add and subtract vegetables as you like. For instance, here are some other ingredients you might want to try:

    • Spinach
    • Cubed sweet potato
    • Chopped bell pepper
    • Kale
    • Butternut squash
    • Chopped broccoli
    • Zucchini
    • Chopped cauliflower
    • Frozen mixed vegetables

    Adding about ½ to 1 cup of three or four vegetables should be plenty for your soup.

    This Recipe Makes A Lot of Soup!

    You will end up with 8-10 cups of vegetable soup with this recipe. You can store it in the refrigerator for 3-4 days, but you can also freeze it to have later if you prefer. Place it in an airtight container or put individual portions in freezer bags, and when you need a quick meal cook it in a pot on the stovetop for a few minutes until hot. Meanwhile, pop some French bread or rolls in the oven and you'll be all set.

    Make it a Beef Barley Soup if You Prefer

    If you are not aiming for a vegetarian or vegan meal, you can easily convert this to a beef barley soup recipe. If you have leftover beef from a previous meal, such as pot roast or steak, feel free to chop that up and toss it in. But if you need to buy some beef, choose a pound of stewing beef such as short ribs or chuck. Then follow these steps to convert your recipe to beef barley soup:

    • First, cube the beef and brown it in the olive oil with the vegetables in step one.
    • Second, replace the vegetable broth with beef broth. However, you may want to use low sodium beef broth or eliminate the additional salt to cut down on the sodium.
    • Third, to tenderize the meat, increase the cooking time in step 3 from 30 to 50 minutes.

    Serve with a loaf of hot French bread, and you've got yourself a delicious, healthy and filling meal!

    If you have a vintage recipe you'd like share with us for possible publication, please scan it and email it to [email protected]. We'd love to hear from you!

    A close up image of vegetable barley soup in a white bowl

    Vegetable Barley Soup

    Nancy Blackstone
    This vegetable barley soup is filled with corn, beans, carrots, tomatoes and many more flavorful vegetables and savory herbs. It's a nutrient-packed, satisfying meal in a bowl!
    5 from 14 votes
    Print Recipe Pin Recipe
    Prep Time 15 minutes mins
    Cook Time 50 minutes mins
    Total Time 1 hour hr 5 minutes mins
    Course Soups and Stews
    Cuisine American
    Servings 8 Servings
    Calories 208 kcal

    Ingredients


    • 2 tablespoons olive oil
    • 2 cloves minced garlic
    • 1 medium yellow onion chopped
    • 2 carrots chopped
    • 1 stalk sliced celery
    • 28 oz. can diced tomatoes undrained
    • ½ teaspoon basil
    • ½ teaspoon oregano
    • ½ teaspoon fresh thyme
    • ½ teaspoon garlic powder
    • 1 tablespoon balsamic vinegar
    • 1 bay leaf
    • 8 cups low sodium vegetable broth 64 oz.
    • 1 cup pearl barley
    • 1 russet potato
    • 1 teaspoons kosher salt
    • ½ teaspoon black pepper
    • ½ cup frozen corn
    • ½ cup frozen cut green beans
    • ½ cup frozen peas

    Instructions
     

    • Heat olive oil over medium-low heat until warm. Add garlic, onion, carrots and celery. Sauté over low heat for 5 minutes or until onion is translucent. 
    • Add diced tomatoes, basil, oregano, thyme, garlic powder, balsamic vinegar and bay leaf. Continue cooking on low for 5 more minutes. 
    • Add vegetable broth, barley, potato, salt and pepper. Bring to a boil then turn heat down to a simmer, and cook for 30 minutes.
    • Add frozen corn, beans, and peas. Turn heat up to medium and bring to a boil, then turn down and simmer for another 10 minutes. 
    • Serve hot with a side of French bread. 

    Notes

    Feel free to switch vegetables to any you have on hand. 
    If soup gets too thick, add water by ¼ cup until it reaches the consistency you prefer.
    Vegetable soup can be stored in the refrigerator for 3 days, or in an airtight container in the freezer for 3 months.

    Nutrition

    Calories: 208kcalCarbohydrates: 39gProtein: 6gFat: 4gSaturated Fat: 1gPolyunsaturated Fat: 1gMonounsaturated Fat: 3gSodium: 453mgPotassium: 528mgFiber: 8gSugar: 6gVitamin A: 2819IUVitamin C: 18mgCalcium: 62mgIron: 2mg
    Keyword easy soups, old fashioned soups, vegan vegetable barley soup, vegetarian vegetable barley soup
    Tried this recipe?Let us know how it was!

    The White Russian Cocktail is Coffee-flavored Goodness

    February 5, 2021

    Closeup of a white russian cocktail

    The White Russian cocktail, with it's smooth and creamy taste, has had a long history of satisfying party goers.

    Two white russian cocktails with extra glasses
    Make sure you have enough to go around as this is a party favorite. I've used my vintage Federal Glass Harlequin roll poly glasses to serve these up.

    Coffee and Cream Just Go Together

    Being a very early riser, I like to come downstairs in the morning and grind fresh beans and brew up a pot of coffee to sip while playing guitar as the sun comes up over Southern California. So you could say that I am already a big fan of coffee and fresh cream, and I liked this cocktail as soon as I tasted it.

    The White Russian is said to have been created in 1949 at the Hotel Metropole in Brussels, when a Belgian bartender added cream to a Black Russian cocktail. So it's really not a Russian drink, but because it is named so and has vodka, that's close enough in most people's minds.

    A popular mid century cocktail, the White Russian appears in many drinks books, but its popularity started to fade by the 1970's. It took the 1998 cult classic comedy film The Big Lebowski, and Jeff Bridges' character The Dude, to bring it back and turn this cocktail into a cult classic, too. I'm sure The Dude would 'abide'.

    Ingredients Needed for a White Russian

    You need three ingredients to mix up this smooth and flavorful cocktail:

    • Coffee liqueur-- preferably Kahlua because it has a nice coffee taste without too much sweetness that some other liqueurs have.
    • Vodka-- for once I don't have a preference, since the cream and the liqueur are the stars of the show.
    • Heavy whipping cream-- just whatever I can steal from one of Nancy's baking projects.

    I've seen some bars add a maraschino cherry and a shot of the canned whipped cream, but I prefer the cocktail simply as-is without any sugary add-ons.

    Tips for Success

    This is a simple cocktail to mix since it requires equal parts of its three ingredients, but follow these suggestions for a winning cocktail every time:

    • Use fresh heavy whipping cream and not milk if you want a rich, thick drink that doesn't taste watery.
    • Mix with a quality liqueur like Kahlua for a consistently smooth taste that is never too sugary.

    What would you add to this drink? A Maraschino cherry? Whipped cream?

    Closeup of a white russian cocktail

    The White Russian Cocktail is Coffee-flavored Goodness

    Kevin Mayfield
    This vintage cocktail never goes out of style and is a crowd pleaser.
    5 from 1 vote
    Print Recipe Pin Recipe
    Prep Time 1 minute min
    Total Time 1 minute min
    Course Classic Cocktails
    Cuisine Russian
    Servings 1 Cocktail
    Calories 391 kcal

    Ingredients


    • 1 ½ ounces Kahlua coffee liqueur
    • 1 ½ ounces vodka
    • 1 ½ ounces heavy whipping cream

    Instructions
     

    • Fill a rocks glass with fresh ice cubes.
    • Pour in equal amounts of ingredients.
    • Give a slight stir to mix just a little.

    Notes

    Some people prefer to layer the ingredients rather than mix them.  For this method, add ingredients in the following order: first the vodka, then the coffee liqueur, then pour the heavy whipping cream on top. 

    Nutrition

    Calories: 391kcalCarbohydrates: 21gProtein: 1gFat: 16gSaturated Fat: 10gPolyunsaturated Fat: 1gMonounsaturated Fat: 5gCholesterol: 58mgSodium: 20mgPotassium: 32mgSugar: 20gVitamin A: 625IUVitamin C: 1mgCalcium: 28mgIron: 1mg
    Keyword coffee drinks, cream cocktails, kahlua, madmen cocktails, mid century cocktails, rat pack cocktails, vodka
    Tried this recipe?Let us know how it was!

    Old Fashioned Cherry Cobbler Recipe

    February 5, 2021

    Cherry cobbler in a white bowl with two scoops of vanilla ice cream on top

    Cherry cobbler made with tart cherries in a sweet, golden crust is a fresh taste of summer any time of year!

    Cherry cobbler in a bowl with ice cream on top, coffee cup and casserole dish in background
    Cherry cobbler served with French vanilla ice cream

    My sister Sue and I love cherries. There's something about them that is so cheerful! We eat cherries, decorate with cherries, and cook in cherry-covered dishes. So when she and my niece gave me my most coveted piece of vintage starburst Pyrex for Christmas (pictured above), I let her choose what I would bake in it first. It came as no surprise that she chose cherry cobbler!

    Cobbler is a fruit mixture poured into a baking dish, covered with a batter and baked until the dough turns golden and the fruit peeks through. It was first made in the 1800's by British settlers who were unable to get all of the ingredients to make a proper British suet pudding. Fruit cobbler became a favorite in the South, and is a popular Southern dish to this day.

    Close up view of cherry cobbler just out of the oven
    Cherry cobbler fresh out of the oven

    One of the things that makes cobblers so attractive is how easy they are to make. You simply add butter, a flour batter, and fruit to a baking pan and let the oven do the rest. Fresh fruit is always the best and most flavorful option when making a fruit cobbler. Fresh cherries are not available in my area year-round, so I opted for frozen. Frozen fruit has the closest flavor to fresh. Canned or jarred fruit can be used, but to me it just doesn't have the same flavor.

    A Word About Using Frozen Cherries

    If the fruit is not fully defrosted and dry, the cobbler will turn out wet and mushy rather than firmly baked. To defrost the berries, remove them from the package and rinse under cold water. Place them in a colander sitting in a larger bowl. Place the bowl, uncovered, in the refrigerator overnight. Discard juice and pat the cherries dry with a paper towel. Put the cherries in a mixing bowl, then mix in the flour and sugar. Your cherries will be juicy and ready for baking without being overly wet.

    Where to Find Frozen Cherries

    As I write this it is the beginning of February, and frozen sour cherries are nowhere to be found in the grocery stores in my area. During the summer I can find large bags at Costco, but in the winter they disappear. I have found a couple of places that supply excellent cherries straight from the orchard if you need to order them in the winter:

    • King Orchards in Kewadin, Michigan sells tart, delicious frozen Montmorency Michigan cherries and cherry products year round.
    • Northwest Wild Foods in Burlington, Washington sells frozen organic dark tart cherries as well as many other berries year round.

    Hints for the Best Cherry Cobbler

    • Use sour cherries for the best flavor complement to the sweet crust. If you only have sweet cherries, add a tablespoon of lemon juice to them before mixing in the filling ingredients.
    • Do not mix your ingredients together in the baking pan. Each layer (butter, batter, fruit mixture) should sit on top of the previous one without being mixed together.
    • Allow to cool completely if you'd like to serve it in neat slices. Otherwise scoop it into a bowl while warm. Ice cream and whipped cream make perfect toppings!

    Enjoy this delicious dessert any time of year. And mark your calendar for May 17 -- National Cherry Cobbler Day!

    Cherry cobbler in a white bowl with two scoops of vanilla ice cream on top

    Old Fashioned Cherry Cobbler Recipe

    Nancy Blackstone
    Cherry cobbler made with tart cherries in a sweet, golden crust is a fresh taste of summer any time of year!
    4.84 from 12 votes
    Print Recipe Pin Recipe
    Prep Time 10 minutes mins
    Cook Time 35 minutes mins
    Total Time 45 minutes mins
    Course Dessert
    Cuisine American
    Servings 10 -12 Servings
    Calories 288 kcal

    Ingredients


    Filling

    • 6 cups sour cherries pitted
    • ¼ cup flour
    • ¾ cup sugar

    Batter

    • ½ cup butter
    • 1 cup flour
    • ¼ cup sugar
    • 2 teaspoons baking powder
    • ¼ teaspoon salt
    • 1 cup milk

    Topping

    • 1 tablespoon sugar

    Instructions
     

    • Preheat oven to 350 degrees.

    Filling

    • Wash, dry, and pit the cherries or prepare frozen cherries. 
    • Place cherries in a mixing bowl and mix with flour and sugar. Set aside.

    Batter

    • Place butter in a 9 x 13 baking dish and set in preheated oven just until melted.
    • Mix flour, sugar, baking powder and salt. Add milk and stir until fully combined.
    • Pour the batter into the baking pan with the butter, but do not mix.
    • Distribute cherries evenly over the batter mixture, but do not mix.
    • If desired, sprinkle top with a tablespoon of sugar.
    • Bake 35-40 minutes until crust has risen and is golden brown.
    • Serve cooled and sliced, or warm with ice cream or whipped cream on top.

    Nutrition

    Calories: 288kcalCarbohydrates: 48gProtein: 3gFat: 10gSaturated Fat: 6gPolyunsaturated Fat: 1gMonounsaturated Fat: 3gTrans Fat: 1gCholesterol: 27mgSodium: 235mgPotassium: 236mgFiber: 2gSugar: 33gVitamin A: 376IUVitamin C: 6mgCalcium: 91mgIron: 1mg
    Keyword Cherry Pie, cobbler desserts, Easy desserts, fast desserts, mid century desserts, Southern desserts, summer desserts
    Tried this recipe?Let us know how it was!

    Old Fashioned Stuffed Bell Peppers Recipe

    February 2, 2021

    A red and a green stuffed bell pepper on a white plate next to a fork

    Colorful bell peppers stuffed with seasoned ground beef in tomato sauce and rice make this a comforting old fashioned dinner worth revisiting!

    A red and green stuffed bell pepper next to each other on a white plate

    Stuffed pepper recipes first started popping up in cookbooks in the 1890's. Virtually every country has their own unique version of this recipe.

    In the U.S., stuffed peppers were at peak popularity in the 1950's. Like many recipes of the mid century era, it contained meat stretched with a starch like crackers, bread crumbs or rice. Add a few vegetables and tomato sauce, cook them inside the peppers, and you had a filling and budget-friendly family meal.

    Mid century cooks did not have easy access to the many spices we have in our kitchens today. Modern recipes for stuffed peppers often include a variety of seasonings and even cheese toppings.

    Origin of This Recipe

    • Original handwritten recipe for stuffed peppers
      Mama Leigh's original handwritten recipe
    • Photo of woman who wrote this recipe
      Family cookbook of Mama Leigh's recipes

    This mid century handwritten recipe was given to me by my friend, Anne. It was written by her maternal grandmother, "Mama Leigh," who was from Bedford, Virginia. Mama Leigh lived to the ripe old age of 100, and in honor of her 100th birthday a family cookbook was made to preserve her recipes. I highly recommend doing this for your family -- there are so many recipes of my grandma's I wish I had. I cherish the few that I do have!

    What is the Difference Between the Colors of Bell Peppers?

    Green yellow, orange and red bell peppers are all the same variety of pepper in different stages of ripeness. Green is the least ripe, and red is the most ripe. The color does affect the flavor, with green being the most bitter, and red being the most sweet. I like to use a variety of colors because it makes a beautiful presentation on the table!

    Ingredients

    To make this recipe, you will need:

    • bell peppers, any color
    • ground beef
    • onion
    • garlic
    • long grain white rice
    • tomato sauce
    • Worcestershire sauce
    • salt/pepper

    Preparing The Peppers

    A pepper cut open with insides removed

    To prepare a pepper, wash and dry it, then cut the top off. Using a spoon, remove the center seed pod and shake out any remaining seeds. Use a knife to cut any protruding inside ribs.

    Hints For Preparing Stuffed Bell Peppers

    • Choose peppers that are even in size for uniform cooking and serving portions.
    • Boil peppers for no longer than 5 minutes to ensure they don't break down.
    • Chop some green pepper (most flavorful) from the cut-off pepper tops to add to the ground beef mixture.
    • Use long grain, long cooking rice rather than instant rice for the best flavor and texture.
    • Soak rice in water for 30 minutes before cooking for maximum tenderness.

    Mama's Leigh's recipe feeds a crowd, as it calls for 2 pounds of beef and 12-15 peppers. I cut it in half which perfectly filled 6 peppers. I also added some garlic and Worcestershire sauce for added flavor. In an effort to keep it gluten free I used rice, but as her recipe indicates you can use cracker crumbs, or even bread crumbs or Panko.

    • Step 1 brown beef with onion, garlic and peppers
      Brown beef, onion, garlic, green pepper
    • Step 2 Mix in bowl with remaining ingredients
      Mix in bowl with rice and seasonings
    • Step 3 bake in casserole dish
      Bake in casserole dish
    • Green and red stuffed peppers sitting side by side on a plate
      Remove from oven, baste and serve

    Some modern stuffed pepper recipes call for a lot more tomato sauce, seasonings, and as mentioned earlier, cheese on top. I like this recipe because it stays true to the original vintage taste without overpowering it with a lot of other ingredients. It's true 1950's comfort food!

    If you have a vintage recipe you'd like share with us for possible publication, please scan it and email it to [email protected]. We'd love to hear from you!

    Green and red stuffed peppers sitting side by side on a plate

    Stuffed Bell Peppers

    Nancy Blackstone
    Colorful bell peppers stuffed with seasoned ground beef in tomato sauce and rice make this a comforting old fashioned dinner worth revisiting!
    5 from 14 votes
    Print Recipe Pin Recipe
    Prep Time 1 hour hr
    Cook Time 45 minutes mins
    Total Time 1 hour hr 45 minutes mins
    Course Main Dish
    Cuisine American
    Servings 6 Servings
    Calories 328 kcal

    Ingredients


    • 6 bell peppers any color
    • 2 lbs. lean ground beef
    • ½ cup long grain white rice
    • 1 cup water
    • ½ cup chopped onion
    • 2 cloves minced garlic
    • 15 oz. tomato sauce, divided in half
    • 1 tablespoon Worcestershire sauce
    • ½ teaspoon kosher salt
    • ¼ teaspoon pepper
    • ¼ cup chopped green pepper

    Instructions
     

    • Soak rice in 1 cup of water for 30 minutes, then place rice and water in a pot. Bring to a boil, then turn down heat and simmer on low for 20 minutes or until all liquid is absorbed. Remove from heat.
    • While rice is cooking, bring a large stock pot of water to a boil. Wash peppers; cut off tops, remove seeds and hollow out the inside.
    • When water begins boiling, place peppers inside and boil for 5 minutes. Remove them from the pot and place them open side down on paper towels to allow them to drain and cool. 
    • In a skillet, combine ground beef, onion, garlic and chopped green pepper over medium heat. Cook until beef is browned and onion and pepper are soft, 8-10 minutes. When finished, drain excess liquid from pan.
    • In a mixing bowl combine ground beef mixture, rice, salt, pepper, Worcestershire sauce, and half of the tomato sauce. Using your hands or a wooden spoon, mix ingredients well. 
    • Using kosher salt, generously salt the inside of each pepper, then spoon the beef mixture inside until full. Top with remaining tomato sauce.
    • Spray a 13 x 9 inch pan with oil, then place peppers inside standing up. Cover tightly with foil and bake at 350 degrees for 45 minutes until peppers are tender and filling is hot. 
    • Remove peppers from oven and baste tops with juices from bottom of pan. Serve immediately.

    Notes

    For some added texture, add ½ cup of celery to the ground beef, onion and garlic while browning.
    In place of rice you can substitute cracker crumbs, bread crumbs or Panko.

    Nutrition

    Calories: 328kcalCarbohydrates: 26gProtein: 36gFat: 8gSaturated Fat: 3gPolyunsaturated Fat: 1gMonounsaturated Fat: 3gTrans Fat: 1gCholesterol: 94mgSodium: 701mgPotassium: 1085mgFiber: 4gSugar: 9gVitamin A: 4059IUVitamin C: 164mgCalcium: 46mgIron: 5mg
    Keyword beef, peppers, rice, stuffed peppers
    Tried this recipe?Let us know how it was!

    How to Make the Best Cuba Libre Drink (Rum and Coke)

    January 29, 2021

    A Cuba Libre cocktail in a tall collins glass with a lime wedge and straw

    The name Cuba Libre was created to celebrate a Free Cuba, but the official recipe is made with one important ingredient from the United States.

    A Cuba Libre (the slogan of the cuban independence movement) cocktail in a tall collins glass with a lime wedge and straw is a favorite of people of all ages in just about any American bar.

    The Revolution May Not be Televised, but it will be Delicious!

    There's just something exotic about the island nation of Cuba. Hemingway loved it, and he lived there for 20 years. It was America's playground in the 1950's and it knew how to have a good time. I can't speak about Cuba today, but it seems there will always be a desire to travel somewhere with sun and white beaches.

    Legend has it that this Cuban cocktail was invented in the early 1900s by a U.S. Army Captain to celebrate the independence of Cuba from Spanish rule after the Spanish-American war. It was simply a combination of local white rum and good old US of A Coca-Cola, along with fresh local fruit juice. Everyone agreed that this cocktail was a winner as they drank and shouted, "Por Cuba Libre," meaning "To a free Cuba!" Soon it became a favorite at the American Club in Havana as well as at the Havana Club itself, and was thought of as the national drink of Cuba by the Cuban people.

    The drink migrated north to America during Prohibition. It became popular because the sweet Coca-Cola was easy to mix with and covered up lesser, cheap rums. American servicemen stationed in the Caribbean brought this drink home with them, and it became a favorite -- especially in the US South.

    The Cuban Revolution of the late '50's and the political strife of the early '60's brought the party to a close. It also ushered in an era of mutual suspicion and near-war between the US and Cuba. Soon, trade embargoes were enacted by both countries, and one another's products were no longer allowed. The Bacardi company had to flee to Puerto Rico and later moved to America, but they managed to save their secret recipe and continue to make delicious rum in the process. They tell a very interesting story of their company and family history here. Cubans were no longer able to get Coca-Cola syrup, but they made do with local tuKola and other local rums.

    Basic Ingredients for the Authentic Cuba Libre Recipe

    Ingredients for a Cuba Libre classic cocktail such as Coca Cola, bacardí rum and limes. The classic cuba libre cocktail recipe is super easy and can be made with simple rum (or basic rum) and a squeeze of fresh lime juice and a lime garnish make for a perfect cocktail. This coke cocktail will be be on the main menu of and is the best way to experience old Havana even from New York City. This simple drink will become your favorite drink at your local bar for good times.

    It may sound easy, but the quality of the ingredients you use has a huge impact on the flavor of this cocktail. That's why I like a nice classic rum like Bacardi for this simple cocktail. It just seems to make the best Cuba Libre because it is a little sweet with hints of vanilla and mixes with the sweetness of the cola so well. First thing, start with fresh ice cubes and fresh-squeezed lime juice.

    • Coca-cola
    • White rum, like Bacardi Light rum, works great and is easy to find at most grocery stores and local liquor stores (if you can find it, Cuban rum is great, too. Or just about any of the rums from the various Caribbean islands work. But do stay away from the dark rum.)
    • A generous squeeze of lime juice and a lime wedge

    A Word About Coca-Cola

    The Coca-Cola you use will determine whether you get an authentic-tasting drink. The year 1980 not only brought an end to what most people consider to be mid century modern, it was also when Coca-Cola switched from using cane sugar to high fructose corn syrup (HFCS) in their soft drinks. Other soda makers soon followed suit. Their thinking was that it would be cheaper to use home grown corn rather than expensive and labor-intensive sugar cane. Besides, people couldn't really taste the difference, right?

    But our south-of-the-border neighbors in Mexico did not make that changeover, and have continued to use cane sugar to make their Coca-Cola. Fortunately it is available in most U.S. grocery stores.

    The cane sugar flavor of the cola along with the sweet finish of the white rum make this drink delicious from start to finish.

    Bar Tools Needed for a Cuba Libre Cocktail

    Mixing up a Cuba Libre is pretty easy. You'll need the following tools:

    • Bar spoon
    • Jigger
    • Bar knife
    • Cutting board

    How to Make This Easy Cuba Libre Drink

    Pour in the light rum
    Add the Coca-Cola
    Add the lime juice
    Process photos on how to mix a Cuba Libre cocktail will help out any war effort and be sure to include lots of ice lumps.
    Stir to mix

    This is is so easy, you don't even need any real recipe. Just do the following:

    1. Pour the white rum into a large glass, like a highball glass or a Tom Collins glass, filled with fresh ice.
    2. Add in the Coca-Cola.
    3. Squeeze in the fresh lime juice or pour directly into the glass.
    4. Give it a few stirs with the bar spoon.
    5. Add some lime peel or a wedge of lime for garnish.

    Tips for Success

    It's easy to mix up a Cuba Libre. Keep these things in mind and you'll have a fun, refreshing cocktail:

    • Always squeeze fresh lime juice rather than use something sweet that comes from a bottle, or worse yet, a plastic lime. The drink will have a more crisp, natural flavor. First time mixing one up, you may want to go easy on the lime juice, as it can be a bit tart.
    • Use a white rum like Bacardi rum because it stands up to the Coca-Cola and creates a more balanced drink than a gold rum. While I like to mix with Bacardi, you can choose another Caribbean rum, but it may not have the consistency of this ever popular brand. Also, some American distillers are making good rums such as Wicked Dolphin brand from Florida.
    • Use Mexican Coke made with sugar cane rather than American Coke made with high fructose corn syrup for the authentic sweetness of the original drink. American drinkers will notice the difference.

    Frequently Asked Questions

    What is the best rum for a Cubre Libre drink?

    A quality light rum like Bacardi is always a go-to for me when I mix this popular drink. I've read that some people think that a Cuban rum like Havana Club will take this cocktail to the next level, but for me it was hard to find so I stuck to the basics. I've also seen on the distiller's site that they recommend using their Carta de Oro Bacardi rum for an improved Cuba Libre. Having tried it a few times with aged rum, I will stick with the light rum since I prefer the taste of the original version.

    Do you have to use Coke?

    There are different colas you could use. In fact, any of the soft drinks made from kola nuts will work just fine. I know that some people looking for healthy recipes will substitute Diet Coke, which is fine. Keep in mind that it will change the taste of the cocktail from the classic combination of rum and Coke. I've even seen people substitute ginger ale in their cocktail recipes. To me that is not a Cuba Libre, but to each their own.

    I really love a properly mixed Cuba Libre or a classic Daiquiri on a hot day. If you like classic Cuban cocktails, don't forget about the Mojito or the El Presidente. Have you tried either of these drinks recipes? Any thoughts on the ingredients that you prefer?

      Before you go, did you try this cocktail? Why not leave a comment in the comments section along with a rating? I always appreciate hearing from you and getting your feedback.

    A Cuba Libre cocktail in a tall collins glass with a lime wedge and straw

    The Cuba Libre Cocktail is a Revolution in Good Taste

    Kevin Mayfield
    This Cuban cocktail is perfect on a hot, sunny day to really quench your thirst and experience a taste of the tropics.
    5 from 1 vote
    Print Recipe Pin Recipe
    Prep Time 3 minutes mins
    Total Time 3 minutes mins
    Course Classic Cocktails
    Cuisine Cuban
    Servings 1 Cocktail
    Calories 199 kcal

    Ingredients


    • 2 Ounces White Rum
    • ¼ - ½ Ounce fresh-squeezed lime juice
    • 6-8 Ounces Mexican Coca-Cola
    • Lime garnishes

    Instructions
     

    • Place a scoop of fresh ice in a mug or highball glass.
    • Pour in all ingredients and stir until mixed.
    • Add lime wheels or wedges for garnish.

    Notes

    You can 'muddle' the lime in the glass for a more intense lime flavor from the oils of the lime.
    Feel free to experiment with different rums to make this drink, but stick with a white rum for an authentic taste.
    Use the leftover lime pieces in the drink for garnish and flavor.

    Nutrition

    Calories: 199kcalCarbohydrates: 18gProtein: 1gFat: 1gSodium: 8mgPotassium: 29mgFiber: 1gSugar: 16gVitamin A: 11IUVitamin C: 6mgCalcium: 6mgIron: 1mg
    Keyword Coca-Cola Cocktails, Cuba Libre, Hemingway Cocktails, Lime Cocktails, Mad Men Cocktails, mid century cocktails, rat pack cocktails, rum cocktails
    Tried this recipe?Let us know how it was!

    Chicago Style Chicken Vesuvio - A Delicious Italian Dish

    January 28, 2021

    Chicken vesuvio in a serving dish sitting on top of a red checkered tablecloth

    Chicken vesuvio's garlic chicken, potato wedges, and peas in a flavorful wine sauce make this native Chicago recipe a delicious one-dish meal.

    A white serving dish filled with chicken vesuvio sitting on a red checkered tablecloth

    If you think Chicago-style pizza and hot dogs are the only foods that Chicago is famous for, think again. Chicken Vesuvio is on the menu of virtually every Italian restaurant in the city, and is rarely found anywhere else.

    The story goes that the illustrious 1930's restaurant, Vesuvio's on Chicago's Wacker Drive, invented the dish. If you would like to read a quick paragraph about the restaurant from the 1931 book Dining in Chicago, visit this link at Chicago Ancestors. (Spoiler alert: wait until you see the meal prices!)

    What is Chicken Vesuvio?

    Chicken vesuvio is a dish historically made with dark portions of skin-on, bone-in chicken. It is first pan roasted and then oven-baked with potato wedges in a garlic, Italian-seasoned white wine sauce. Peas are added toward the end of cooking so they don't get too mushy.

    This recipe was given to me by a Chicago-native friend that Kevin went to high school with, Tom, who said it has been in his family for years. He told me he uses whatever potatoes he has in the pantry, and that he interchanges shallots and onions, too. You can also choose virtually any dry white wine. You have a lot of leeway to vary the ingredients in this recipe and still have it turn out great! I love easy-to-make one dish meals, and this fits the bill. I served it with a piece of garlic bread on the side and we were all set.

    Here's What You'll Need

    • Chicken, bone-in, skin-on
    • Salt
    • Pepper
    • Olive oil
    • Yukon Gold potatoes
    • Onion
    • Garlic
    • Marsala wine or dry white wine
    • Chicken stock
    • Parsley
    • Italian seasoning
    • Butter
    • Peas

    Notes on Key Ingredients

    • Chicken - If you want to make this dish historically correct, you will need to use skin-on, bone-in chicken thighs, or chicken thighs and drumsticks (dark meat.) However, given todays health-conscious lifestyles and many peoples' preference for white meat, you can make this with boneless, skinless chicken breasts. It is absolutely delicious, but it lacks the beautiful golden color of the pan roasted skin-on chicken.
    • Potatoes - My friend recommends Yukon Gold potatoes with the skin on when making this dish. My grocery store was out of Yukon Gold, so I could have used red potatoes or russet. I chose russet potatoes and they worked perfectly. When I use russet potatoes I prefer to remove the skin, but it is not required.
    • Wine - Many recipes for this dish specify white wine or dry white wine. I used Marsala cooking wine, which is a golden Sicilian wine that contains brandy. A restaurant we frequented when we lived in Chicago uses Marsala wine in this dish, and it was always excellent.
    Chicken vesuvio ingredients
    Chicken vesuvio ingredients

    Let's make some dinner!

    If you have a vintage recipe you'd like share with us for possible publication, please scan it and email it to [email protected]. We'd love to hear from you!

    Chicken vesuvio in a serving dish sitting on top of a red checkered tablecloth

    Chicago Style Chicken Vesuvio

    Nancy Blackstone
    Chicken vesuvio's garlic chicken, potato wedges, and peas in a flavorful wine sauce make this native Chicago recipe a delicious one-dish meal.
    5 from 3 votes
    Print Recipe Pin Recipe
    Prep Time 25 minutes mins
    Cook Time 1 hour hr 15 minutes mins
    Course Main Dish
    Cuisine Italian
    Servings 4 Servings
    Calories 630 kcal

    Ingredients


    • 2 pounds bone-in skin-on chicken
    • kosher salt
    • freshly ground black pepper
    • ¼ cup olive oil
    • 4 Yukon Gold potatoes cut into wedges
    • ½ cup yellow onion chopped
    • 5 cloves garlic sliced
    • ⅔ cup Marsala wine or dry white wine
    • 1 can chicken broth 14.5 oz.
    • 2 tablespoons chopped fresh parsley
    • 1 tablespoon Italian seasoning
    • 1 tablespoon butter
    • ½ cup frozen peas

    Instructions
     

    • Preheat oven to 400 degrees.
    • Dry chicken pieces well and season liberally with salt and pepper. 
    • Warm olive oil in an oven-safe skillet or dutch oven over medium heat. Add chicken, skin side down, and cook 5-7 minutes until chicken is browned and skin is crisp. 
    • Turn chicken pieces over and cook an additional 4-5 minutes, until golden brown. Remove chicken and set aside.
    • Add potatoes, onion, and garlic to the skillet and cook on medium-low 5-7 minutes, until the onion is translucent and the potato wedges start to brown. Remove the vegetables from skillet and set aside.
    • Pour wine into the skillet and cook until reduced in half, 4-5 minutes. Deglaze the pan by scraping the chicken and brown bits from the bottom and sides. 
    • When wine is reduced in half, return potatoes, onion and garlic to the skillet. Add chicken stock, chopped parsley, and Italian seasoning, stirring to combine. Add the chicken pieces on top.
    • Cover and transfer to the preheated oven. Roast until chicken is cooked through and no longer pink at the bone, about 45 minutes. An instant-read thermometer inserted near the bone should read 165 degrees. 
    • Return the skillet to the stove and remove chicken and vegetables, leaving the liquid. Bring liquid to a simmer; add butter and stir until smooth, about 5 minutes. Add salt and pepper to taste.
    • Add peas to the sauce and cook 1-2 minutes longer. Serve chicken on top of potato wedges and garnish with pan sauce and peas. 

    Notes

    If you want to make a larger portion, cook chicken in two separate batches and double the sauce ingredients.
    You can substitute red or russet potatoes for the Yukon Gold.
    You can substitute shallots for the yellow onion.
    You can use boneless, skinless chicken breasts, but they are larger and may need to bake up to one hour in the oven to reach the proper temperature.

    Nutrition

    Calories: 630kcalCarbohydrates: 37gProtein: 40gFat: 32gSaturated Fat: 9gPolyunsaturated Fat: 4gMonounsaturated Fat: 17gTrans Fat: 1gCholesterol: 125mgSodium: 135mgPotassium: 1444mgFiber: 6gSugar: 4gVitamin A: 430IUVitamin C: 46mgCalcium: 96mgIron: 4mg
    Keyword Chicago chicken recipe, Chicago foods, garlic chicken, Italian chicken recipe, Italian recipes, vesuvio restaurant Chicago
    Tried this recipe?Let us know how it was!

    Coconut Pound Cake is a Tropical Tasting Treat

    January 25, 2021

    Two slices of coconut poundcake in front of the whole poundcake, with coconut sprinkled on top

    This coconut pound cake has a crispy exterior crust and moist, fluffy interior coconut cake. A fast and easy recipe brings a taste of the tropics you can enjoy anytime!

    A slice of coconut poundcake in front of the whole poundcake, with coconut sprinkled over the top
    Coconut pound cake

    Kevin and I fell in love with all things coconut many years ago when we honeymooned in Hawaii. So when I came across this mid century recipe for coconut pound cake, I knew I had to give it a try. And I was not disappointed!

    • Original handwritten recipe for coconut pound cake, page 1
    • Original handwritten recipe for coconut poundcake, page 2
    Original handwritten recipe

    Butter vs. Shortening

    One of the things that struck me about this recipe is that it calls for shortening (such as Crisco) rather than butter. Crisco shortening was invented by Procter and Gamble in 1910, and rose in popularity during WWII when butter and lard were rationed and hard to find.

    According to the Crisco website, butter and Crisco are interchangeable in most recipes. Baked goods such as cakes and pie crusts tend to come out fluffier and flakier with shortening. I like the flavor that butter provides, but butter flavored shortening is an option, too. Crisco's website says it has 50% less saturated fat than butter, and no trans fat, sodium or cholesterol in it's product, so if you're watching your fat intake, you may want to take that into consideration.

    You can use either shortening or butter in this recipe. I like the flavor that butter provides and the flakiness that shortening provides, so I recommend using half butter and half shortening, which is also what I do when I make pie crusts.

    Ingredients For Coconut Pound Cake

    Ingredients for coconut poundcake
    Coconut Poundcake Ingredients

    Here's what you'll need to have on hand:

    • Shortening and/or butter
    • Granulated sugar
    • Eggs
    • Flour
    • Baking powder
    • Salt
    • Coconut extract
    • Milk
    • Sweetened shredded coconut

    This recipe yields two 1-pound loaves of coconut pound cake. I used two loaf pans measuring 8.5 x 4.5 x 2.8 inches. I prefer the top quality bakeware from USA Pan, all made in the USA!

    Hints For Making Coconut Pound Cake

    • If you are using any butter in the recipe, let it stand at room temperature for 15 minutes before mixing. It should still be cold but slightly pliable for mixing.
    • If you are using all shortening, after adding eggs beat 10 minutes, ensuring a fluffy cake texture.
    • If you are using all butter, after adding eggs beat only 1-2 minutes, until eggs are fully blended.
    • If you are using half butter and half shortening, cream the shortening and sugar first, then add the butter and mix 1 minute until fully blended, then add eggs and mix another 1-2 minutes until eggs are fully incorporated. You want to avoid over-beating the butter and causing it to melt.
    Two slices of coconut poundcake in front of the whole poundcake, with coconut sprinkled on top

    Coconut Pound cake is a Tropical Tasting Treat

    Nancy Blackstone
    This coconut pound cake has a crispy exterior crust and moist, fluffy interior coconut cake. A fast and easy recipe brings a taste of the tropics you can enjoy anytime!
    5 from 2 votes
    Print Recipe Pin Recipe
    Prep Time 20 minutes mins
    Cook Time 1 hour hr 25 minutes mins
    Total Time 1 hour hr 45 minutes mins
    Course Dessert
    Cuisine American
    Servings 24 slices
    Calories 301 kcal

    Ingredients


    • 3 cups flour
    • 1 teaspoon baking powder
    • ¼ teaspoon salt
    • ¾ cups shortening
    • 2 ¼ cups granulated sugar
    • ¾ cups cold butter which has been out at room temperature for 15 minutes
    • 5 large eggs
    • 2 teaspoons coconut extract
    • 1 cup milk
    • 7 oz. sweetened shredded coconut

    Instructions
     

    • Mix flour, baking soda, and salt in a bowl. Set aside.
    • In a large mixing bowl, cream shortening and sugar using an electric mixer. 
    • Add butter and beat 1-2 minutes until creamy.
    • Add 5 eggs and beat on medium-low 1-2 minutes until well blended, scraping down the sides of the bowl as needed.
    • Add flour mixture, coconut extract and milk, and mix on low just until fully combined.
    • Fold in shredded coconut. Pour batter into two 1-pound loaf pans. 
    • Place in cold oven, turn it on to 325 degrees, and bake 1 hour 25 minutes or until golden and wooden toothpick inserted in center comes out clean.

    Nutrition

    Serving: 1sliceCalories: 301kcalCarbohydrates: 35gProtein: 4gFat: 17gSaturated Fat: 8gPolyunsaturated Fat: 2gMonounsaturated Fat: 5gTrans Fat: 1gCholesterol: 55mgSodium: 134mgPotassium: 75mgFiber: 1gSugar: 23gVitamin A: 250IUVitamin C: 1mgCalcium: 33mgIron: 1mg
    Keyword coconut, pound cake
    Tried this recipe?Let us know how it was!

    The Daiquiri Cocktail is a Sweet Taste of the Tropics

    January 22, 2021

    A lime Daiquiri cocktail in a couple glass

    This Daiquiri cocktail has been a refreshing favorite for generations for good reason. It is a tart and thirst-quenching drink with a taste of the tropics.

    A lime Daiquiri cocktail in a couple glass
    This classic Daiquiri cocktail is refreshing and packs a punch

    Where is Daiquiri?

    That's right, Daiquiri is not only a fun cocktail, but also a remote beach town located 14 miles east of Santiago de Cuba. It is there that an American mining engineer is said to have invented this drink in the late 1800's. The Daiquiri kept the name of its hometown as it slowly made its way north to America, and took off in popularity during World War II. Rum was cheap and easily available from Latin America, while other spirits such as whiskey and vodka were often rationed. It was the drink of choice of both Ernest Hemingway and John F. Kennedy, and soared in popularity in the 50's and 60's as the trend toward exotic tropical drinks exploded.

    One of my favorite scenes in the movie Godfather 2 was when brothers Michael and Fredo Corleone are in Havana, Cuba shortly before the revolution. You can feel the tension between the two brothers as they sit outside the Hotel National and order drinks. Michael, always in control, asks for a club soda. But nutty Fredo orders a Daiquiri, and a banana Daiquiri at that! It's a personal moment between two interesting characters using cocktails as a metaphor to describe each brother.

    Mid Century Impact on the Daiquiri

    The optimism and exuberance of mid century America touched nearly everything in our daily lives, and cocktails are no exception. Suddenly, the average American home contained appliances like ice makers and blenders. This allowed people to create blended cocktails right in their own home rather than having to go to a bar or restaurant.

    The Daiquiri was a prime candidate to take advantage of that convenience because it is best served ice cold. It's also good straight from the blender. Before we had reliable, affordable international shipping, the average person didn't have easy access to fruits like limes, bananas and even strawberries. Thanks to President Eisenhower, new interstate highways allowed the new national supermarket chains to stock up on produce that could easily be trucked in. Now that they had so many options, Americans experimented and drank like never before.

    Ingredients for a Classic Daiquiri Cocktail

    This cocktail consists of the 'holy trinity' of classic cocktails: spirit, fruit juice and sugar. The trick to a good Daiquiri is to find the right balance between the three so that one doesn't overpower the others. Here's specifically what you'll need to whip one up:

    • White rum
    • Fresh-squeezed lime juice
    • Powdered sugar

    Depending on the cocktail I'm mixing, I usually use a gold rum. Gold rum has been aged in a charred oak barrel and is smooth tasting. But for this drink I really like the sweetness that a white rum offers.

    If you like this drink blended, you can have fun by adding other fruits such as bananas and strawberries. The base of the cocktail stays the same.

    Tips for Success

    To make a classic Daiquiri cocktail keep these things in mind:

    • Use a quality rum that blends nicely with the other ingredients and doesn't overpower the drink. I've heard people say that since they're mixing it with sugar it doesn't matter. I think it does matter -- a white rum will have a certain sweetness that can help take some of the tartness out of the lime juice.
    • Use freshly squeezed lime juice. You will need to experiment a little to ensure you get the right balance between too tart and too sweet, but you'll never want to go back to the bottled lime juice again. I recommend going easy on it and using between a ¼ and a ½ ounce. Start with a little and add more, tasting as you go, until you find a balance you like.

    What is your favorite flavor of Daiquiri? What kind of rum do you prefer?

    A lime Daiquiri cocktail in a couple glass

    The Daiquiri Cocktail is a Sweet Taste of the Tropics

    Kevin Mayfield
    The classic Daiquiri cocktail is a tropical treat.
    5 from 2 votes
    Print Recipe Pin Recipe
    Prep Time 3 minutes mins
    Total Time 3 minutes mins
    Course Classic Cocktails
    Cuisine American
    Servings 1 Cocktail
    Calories 142 kcal

    Ingredients


    • 2 ounces white rum
    • ½ ounce fresh squeezed lime juice
    • 1 bar spoon powdered sugar
    • Lime round for garnish

    Instructions
     

    • Add one scoop of ice, preferably crushed, to a cocktail shaker
    • Pour in ingredients and add the rounded bar spoon of powdered sugar
    • Shake for about 30 seconds 
    • Strain into a coupe glass and add the lime round for garnish

    Notes

    Many people like to enjoy this cocktail as a blended drink. Instead of pouring into a cocktail shaker, just add the same ingredients to a blender, cover and let it go until blended smooth.
    If you prefer your Daiquiri blended, feel free to experiment with sweet fruits such as a banana or some strawberries. Keep the base recipe above and just add a few pieces of your chosen fruit to the blender.

    Nutrition

    Calories: 142kcalCarbohydrates: 3gProtein: 1gFat: 1gSodium: 1mgPotassium: 18mgFiber: 1gSugar: 2gVitamin A: 7IUVitamin C: 4mgCalcium: 2mgIron: 1mg
    Keyword 1950's cocktails, 1960's cocktails, blended cocktails, cuban cocktails, daiquiri, godfather cocktails, Hemingway Cocktails, John F Kennedy Cocktails, madmen cocktails, mid century cocktails, rum drinks, tropical cocktails
    Tried this recipe?Let us know how it was!

    Best Super Bowl Chili Recipe - Perfect Football Food

    January 19, 2021

    This Super Bowl Chili's rich flavor comes from a combination of course ground meat, chopped veggies, diced peppers and a flavorful tomato sauce with just the right amount of spice. Add your favorite toppings, and It's the perfect item for your game day menu!

    Bowl of chili topped with cheese, onions, and sour cream

    Beginning with the first Super Bowl in 1967, a tradition was born for celebrating this event with delicious foods and snacks. Chili consistently ranks as one of the most popular Super Bowl party meals.

    Chili Cook Off Winning Recipe

    This is an easy recipe to make - it only takes one pot and some time to let all the flavors simmer together. I've been making this chili recipe for years; we used to have an annual chili cook-off in our office, and this one was always the blue ribbon winner! I like it because it's easy to adapt ingredients to different preferences for heat/spiciness. This recipe has a medium heat, but it is easily made more spicy or more mild with just a few tweaks. If you're looking for a super flavorful chili without much spice, try this recipe for Elizabeth Taylor's favorite -- Chasen's Chili Recipe.

    Expert Advice on Chili Peppers

    You can adjust the recipe according to the heat level you prefer. I make my chili with one jalapeño pepper (placenta and seeds removed), because I just like a little bit of heat. You can add a second pepper if you want more. If you like very spicy chili you can use a serrano pepper instead, which has a medium-high heat to it. If you really want it hot use an habanero pepper, which is the hottest of the three.

    Peppers get their heat from capsaicin, which is retained in the placenta of the fruit. The placenta runs down the inside center of the pepper and holds the seeds. The more of that you leave in, the hotter your dish will be. The seeds actually have no heat except for any that has rubbed off on them from the placenta. To learn more about the anatomy of a pepper, check out this informative page at PepperScale.

    Capsaicin originated to deter animals from eating the fruit before it matured. Humans were determined to overcome this deterrent, and over time many of us have acquired a taste for the hot and spicy would-be obstruction.

    I have learned my lesson and I only handle peppers when I'm wearing latex food prep gloves and eye glasses. Just one touch to a sensitive area such as your eyes or a cut on your hand can launch you into serious pain or even cause a trip to the emergency room. I urge extreme caution when handling peppers, particularly if you are inexperienced.

    Chili Ingredients

    Following are the ingredients that create the robust flavor of this chili:

    • Vegetable Oil or Light Olive Oil
    • Ground Beef (I use ground chuck, 85% lean for best flavor)
    • Ground Pork
    • Onion Powder
    • Garlic Powder
    • Kosher Salt
    • Beef Broth
    • Tomato Paste
    • Tomato Sauce
    • Diced Tomatoes
    • Yellow Onion
    • Chili Powder
    • Water
    • Jalapeño Pepper (or pepper of your choice as discussed above)
    • Ground Cumin
    • Paprika
    • Dried Oregano
    • Cayenne Pepper (hot sauce)
    • Red Kidney Beans

    Optional Toppings

    • Cornbread
    • Shredded Sharp Cheddar Cheese
    • Chopped Sweet Onions or Green Onions
    • Sour Cream
    • Oyster Crackers
    • Tortilla Chips

    Steps For Making Super Bowl Chili

    This chili is made in 2 steps: browning the meat and doing a first seasoning, then cooking and adding a second seasoning.

    Step 1: Browning the Meat and Adding Spices

    Browning beef and pork with seasonings in a large pot
    1. Brown meat with seasonings
    Adding spices to browned beef and pork
    2. Add tomatoes and spices
    Beef, pork and seasonings mixed together in a large pot
    3. Mix it and simmer 1 hour

    Step 2: Preparing the pepper

    Cut jalapeño in half
    1. Cut pepper in half lengthwise
    Remove the seeds from the jalapeño and discard
    2. Remove and discard placenta and seeds
    Chop the jalapeño skin
    3. Finely chop the pepper skin

    Step 3: The second seasoning

    Adding the second seasoning of spices to the pot of chili
    1. Add the second spice seasoning
    Chili after simmering one hour
    2. Mix and simmer 30 minutes
    3. Add beans; serve w/toppings

    I recommend frequently tasting the chili as you add the spices so you get it to your exact liking. Just remember that if you are serving it with dairy based toppings such as cheese and sour cream, that will impact the flavor and cut down a bit on the heat. The protein in milk and milk products, casein, breaks down the capsaicin from the pepper and helps wash away the burning sensation.

    I like creating a little buffet of toppings and sides to serve along with the main dish, which some people think is the best part! I highly recommend whipping up a quick pan of homemade cornbread while the chili is cooking. It is wonderful on the side or crumbled up in the bowl!

    Whether you make this for the big game or just make it to enjoy on a cold day, this Super Bowl Chili Recipe will make a satisfying meal!

    Have a comment or a vintage recipe you'd like to share? We'd love to hear from you! Please rate, comment, or send me an email at [email protected].

    Can ground turkey be substituted for beef and pork?

    Yes, absolutely. The flavor will not be as rich as it is with beef and pork, but it will still be delicious and will save you some fat and calories.

    Can this recipe be made ahead of time?

    Definitely! Like most soups and stews, chili tastes better the next day, after sitting in the refrigerator and marinating. Chili will keep in the refrigerator in an air tight container for 3-4 days, or in the freezer for 3-4 months.

    Is this something that can be made in the slow cooker?

    Sure, no problem. Simply brown the meat in a large skillet first, then put it in the crock pot and add the rest of the ingredients (skip the two seasonings and add it all at once.) Cook on low 6-8 hours, stirring occasionally so the meat doesn't stick to the bottom of the pan.

    Super Bowl Chili

    Nancy Blackstone
    Super Bowl Chili has chunky meats in a flavorful tomato sauce with just the right amount of spice that makes this the perfect hearty game day meal!
    4.92 from 12 votes
    Print Recipe Pin Recipe
    Prep Time 30 minutes mins
    Cook Time 1 hour hr 30 minutes mins
    Total Time 2 hours hrs
    Course Main Dish
    Cuisine American
    Servings 8 Servings
    Calories 520 kcal

    Ingredients


    • 1 tablespoon vegetable oil
    • 2 lbs coarse ground beef
    • 1 lb coarse ground pork

    First Seasoning

    • 1 tablespoon onion powder
    • 1 tablespoon garlic powder
    • ½ teaspoon kosher salt
    • 14.5 oz beef broth
    • 6 oz. tomato paste
    • 8 oz. tomato sauce
    • 14.5 oz. diced tomatoes
    • 1 medium yellow onion chopped
    • 2 tablespoons chili powder
    • 1 cup water

    Second Seasoning

    • 1 jalapeño chili pepper minced with placenta and seeds removed
    • 3 tablespoons chili powder
    • 1 tablespoon ground cumin
    • 1 tablespoon paprika
    • 1 tablespoon kosher salt
    • 1 teaspoon garlic powder
    • 1 teaspoon dried oregano
    • cayenne pepper to taste optional
    • 1 can red kidney or chili beans optional

    Toppings (optional)

    • cornbread
    • torilla chips
    • oyster crackers
    • shredded sharp cheddar cheese
    • chopped sweet onion
    • sour cream

    Instructions
     

    • Heat oil in a large pot or dutch oven. Add meat, onion powder, garlic powder and salt. Brown well.
    • First seasoning: Add beef broth, tomato paste, tomato sauce, diced tomatoes, chopped onion, chili powder and water. Bring to a boil, then reduce heat, cover and simmer for 1 hour.
    • Second seasoning: Add the jalapeño pepper, chili powder, cumin, paprika, salt, garlic powder, oregano, and cayenne pepper (if using.) Cook over low heat, uncovered for 30 more minutes.
    • Before serving, add kidney (or chili) beans if desired, and mix in until hot. 
    • Serve with desired toppings.

    Notes

    • For safety, always wear gloves when handling peppers.
    • For additional heat, use a serrano or an habanero pepper in place of a jalapeño. 

    Nutrition

    Calories: 520kcalCarbohydrates: 14gProtein: 33gFat: 38gSaturated Fat: 14gPolyunsaturated Fat: 3gMonounsaturated Fat: 16gTrans Fat: 1gCholesterol: 121mgSodium: 1725mgPotassium: 1066mgFiber: 4gSugar: 6gVitamin A: 2059IUVitamin C: 17mgCalcium: 92mgIron: 6mg
    Keyword chili con carne, football chili, football food, red bowl chili, super bowl foods, Texas style chili
    Tried this recipe?Let us know how it was!
    • « Go to Previous Page
    • Page 1
    • Page 2
    • Page 3
    • Page 4
    • Page 5
    • Go to Next Page »

    Primary Sidebar

    Nancy and Bentley

    Hi, I'm Nancy! Welcome to Flourchild where I share classic mid-century recipes from the 1940's - 1970's. I feature many vintage handwritten recipes, and provide modern shortcuts and a variety of healthy and special diet-friendly versions whenever possible. Join me in exploring the delicious flavors and from-scratch cooking techniques of our past!

    More about me →

      Favorites

      • Tuna Noodle Casserole With Buttered Cracker Topping
      • Close up of a sloppy Joe on a bun
        World's Best Sloppy Joes From Scratch
      • Kentucky Style Biscuits and Gravy - A Southern breakfast favorite
      • Two large cinnamon apple pancakes on a black plate with apple topping and maple syrup running down the sides.
        Cinnamon Apple Pancakes with Apple & Brown Sugar Topping
      • Hot Toddy cocktail in a clear mug with a lemon wheel and 2 small cranberries for garnish
        How to Make an Easy Bourbon and Honey Hot Toddy
      • An apple butter old fashioned cocktail in a tumbler with apples and fall-related items in the background
        Sip into Fall: How to Make the Perfect Apple Butter Old-Fashioned Cocktail

      Popular Recipes

      • A blue serving bowl filled with deviled egg salad garnished with paprika and green onions on a red background.
        Fast and Easy Deviled Egg Salad Recipe with Macaroni
      • Rock Hudson's chicken casserole in a white serving bowl.
        Rock Hudson's Favorite Chicken Casserole Recipe
      • Two gingerbread squares stacked on a Christmas dessert plate.
        Frank Sinatra's Favorite Gingerbread Cake Squares
      • A slice of Sinatra spicy pumpkin pie with a dollop of whipped cream, on a white dessert plate.
        Frank Sinatra's Favorite Spicy Pumpkin Pie Recipe

      • Email
      • Instagram
      • Pinterest

      Footer

      ↑ back to top

      About

      • Privacy Policy
      • Accessibility Policy

      Newsletter

      • Sign Up! for emails and updates

      Contact

      • Contact

      As an Amazon Associate I earn from qualifying purchases.

      Copyright © 2025 Brunch Pro on the Brunch Pro Theme

      Rate This Recipe

      Your vote:


      Let us know what you thought of this recipe:

      This worked exactly as written, thanks!
      My family loved this!
      Thank you for sharing this recipe

      Or write in your own words:

      A rating is required
      A name is required
      An email is required