• Skip to primary navigation
  • Skip to main content
  • Skip to primary sidebar

Flour Child logo

  • About Us
  • Recipes
  • Privacy
menu icon
go to homepage
search icon
Homepage link
  • Home
  • Recipes
  • Classic Cocktails
  • Dinners
  • About Us
    • Email
    • Instagram
    • Pinterest
  • ×
    Home » Mid Century Recipes

    Mid Century Recipes

    The Best Easy Recipe for the Rum Collins Cocktail

    January 15, 2021

    A Rum Collins cocktail on a white background with limes and lemons and two red cherries in a slim glass.

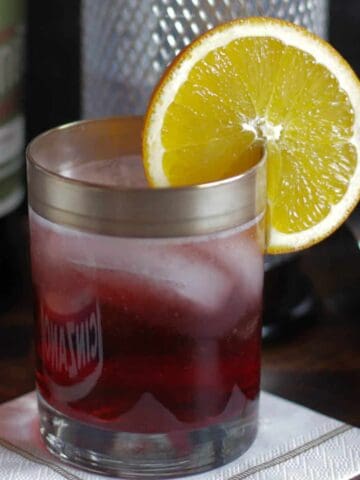
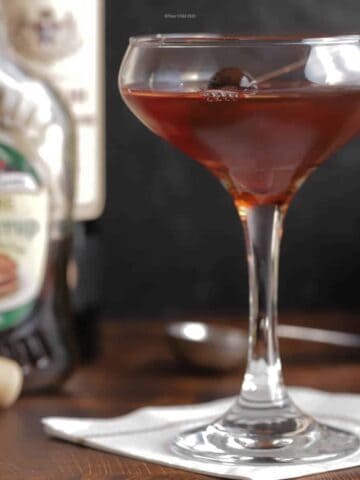
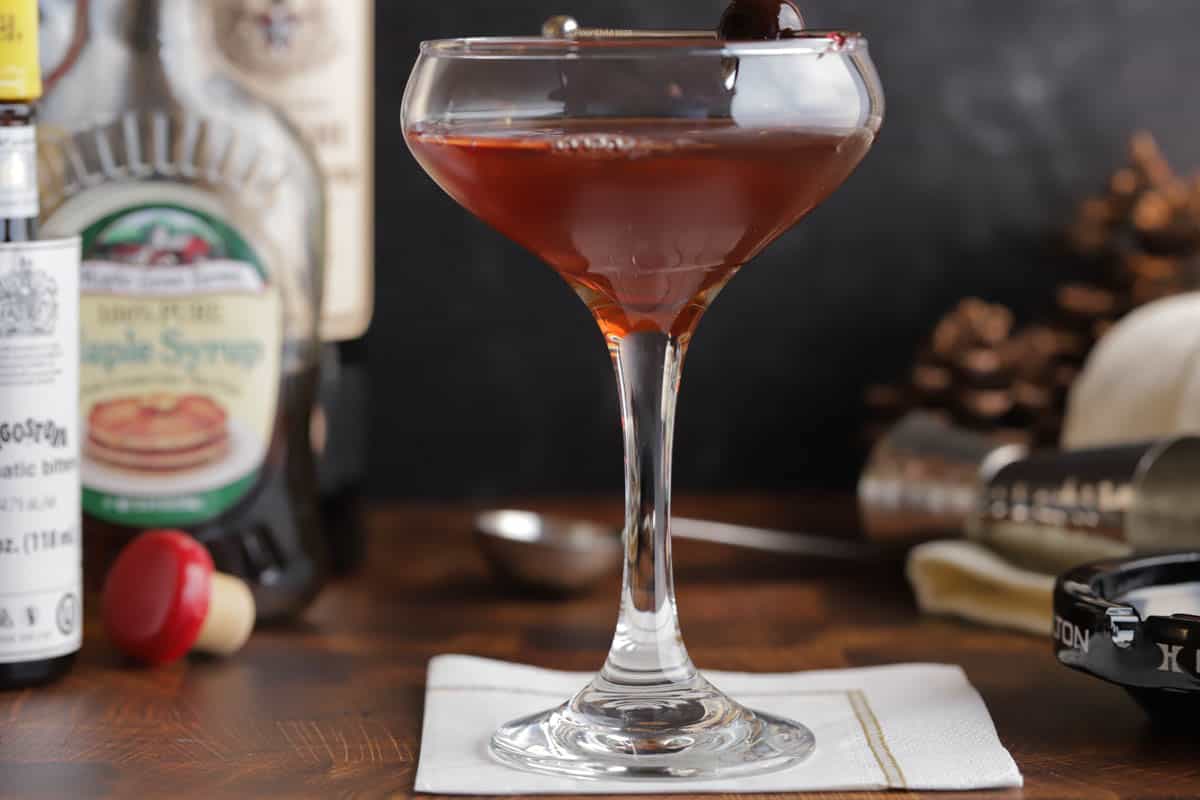
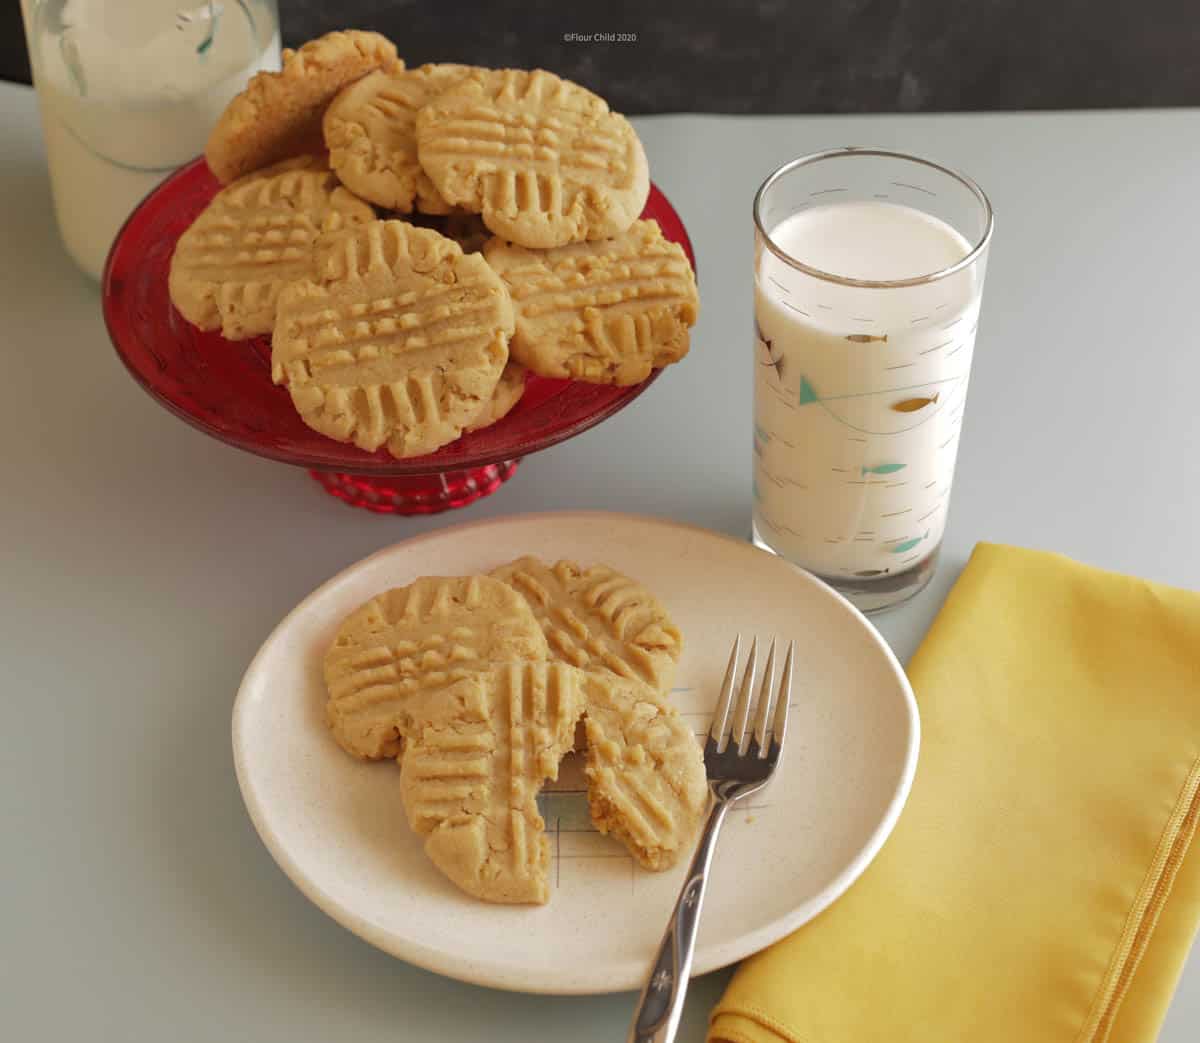
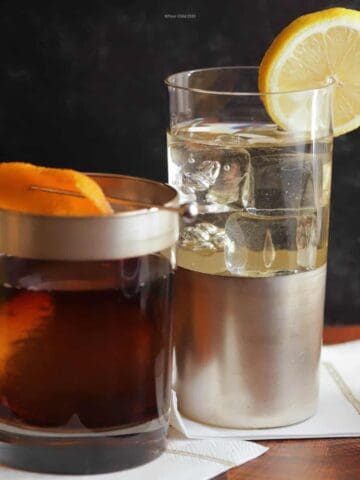
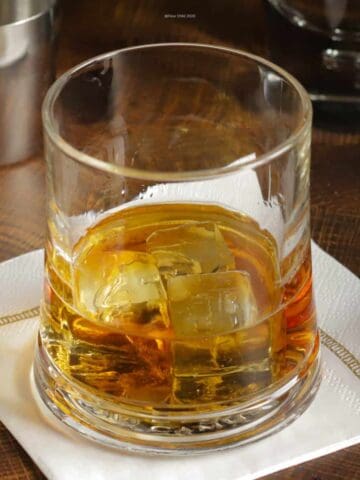
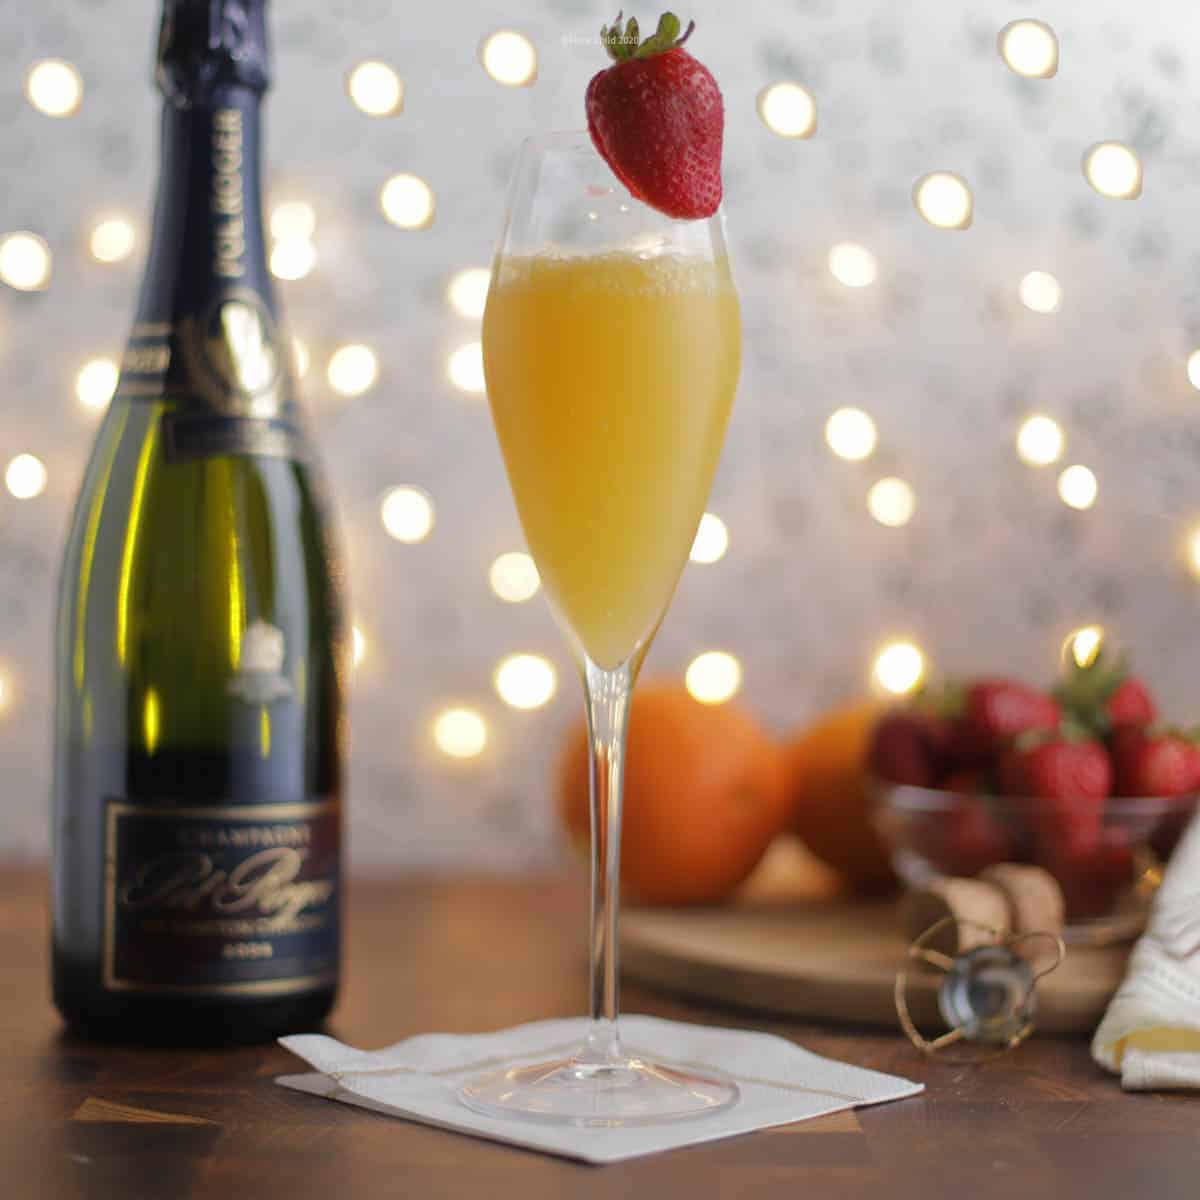
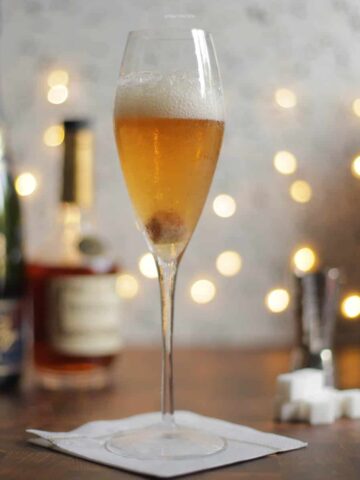
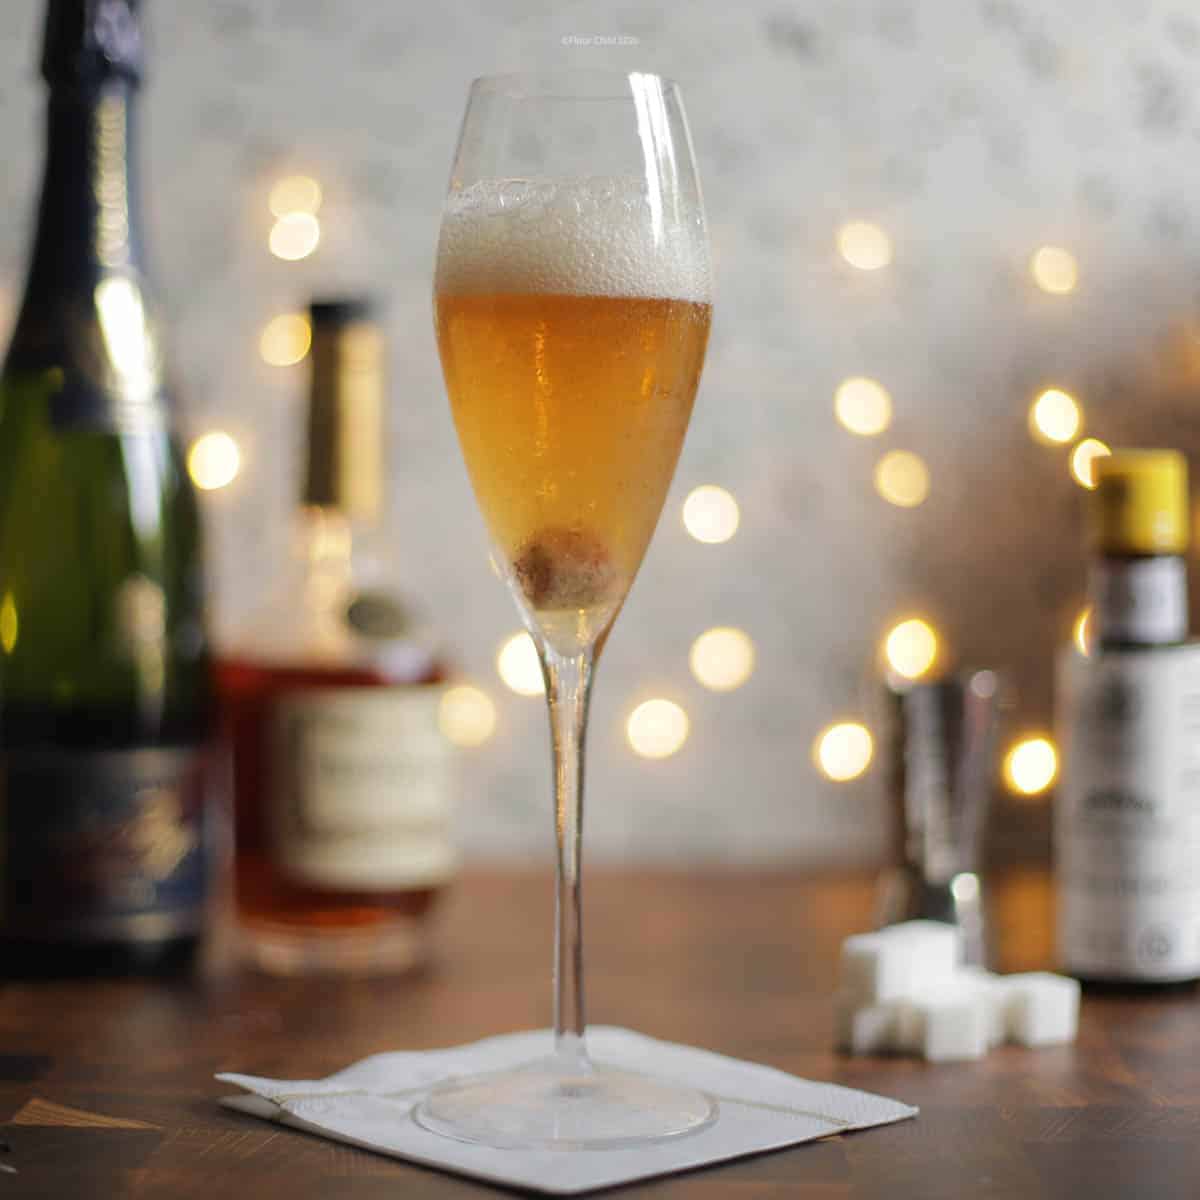
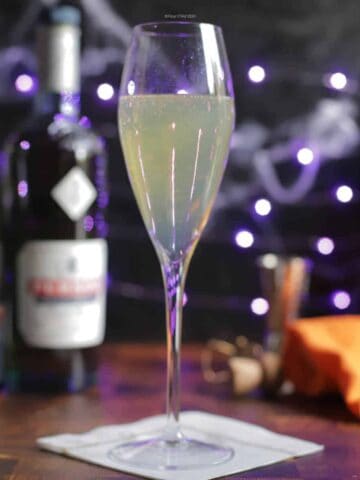
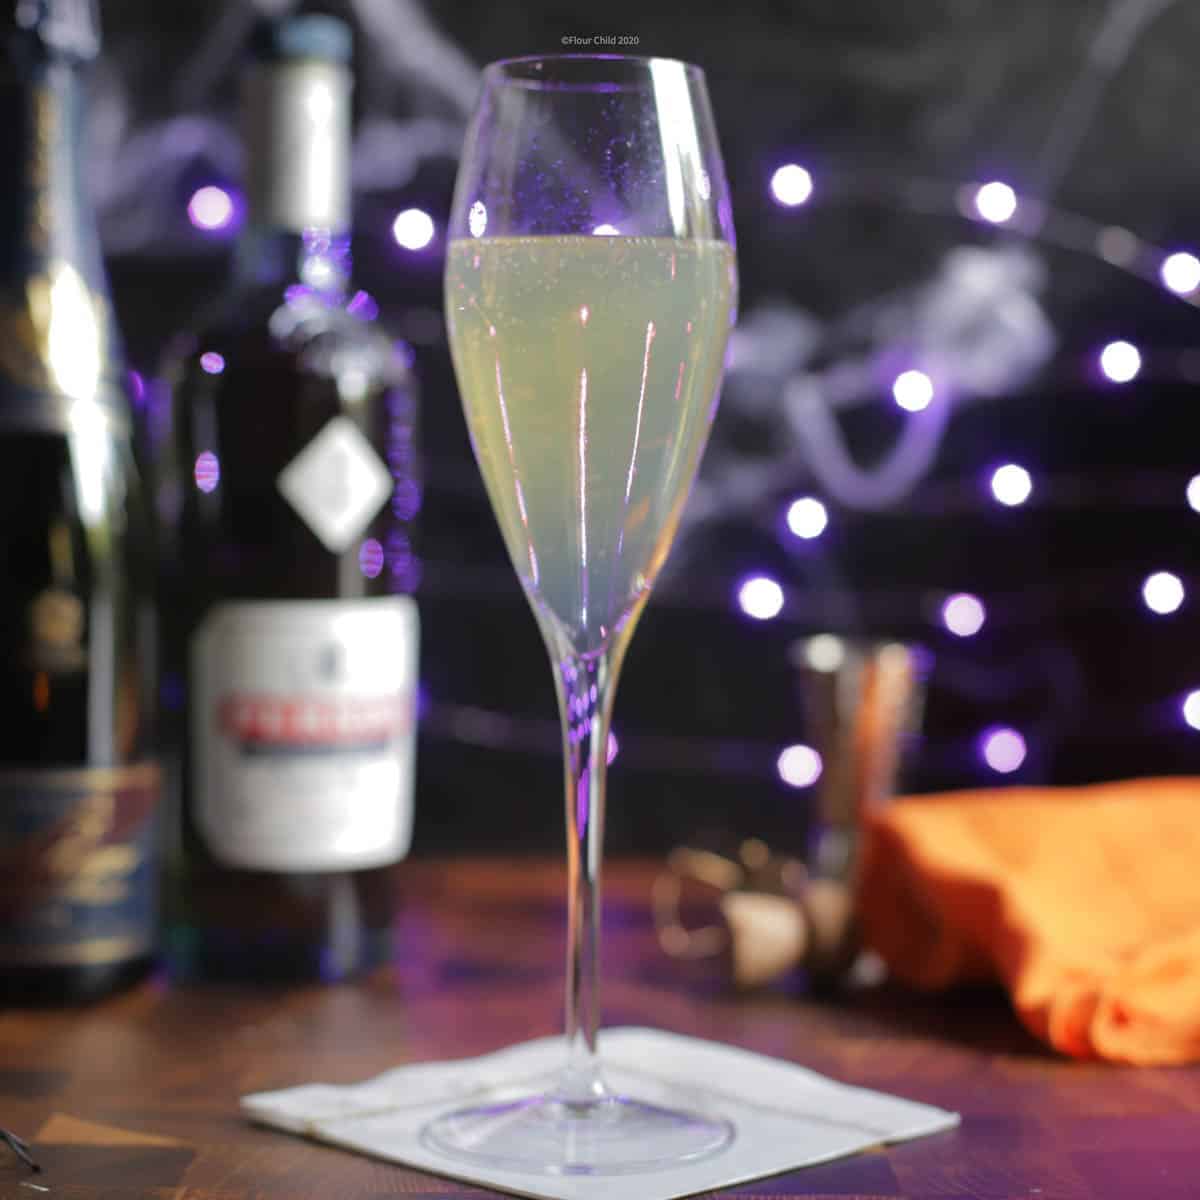
    You don't need to be an Ian Fleming international spy to enjoy a refreshing Rum Collins! Enjoy this exotic, tropical twist on a traditional cocktail favorite. 

    A Rum Collins cocktail on a white background with limes and lemons and two red cherries in a slim glass.
    A tropical-looking Rum Collins cocktail with two cherries added for garnish that makes it look like a pink lemonade, but careful, it packs a delicious punch!

    Rum is the Star in this Collins

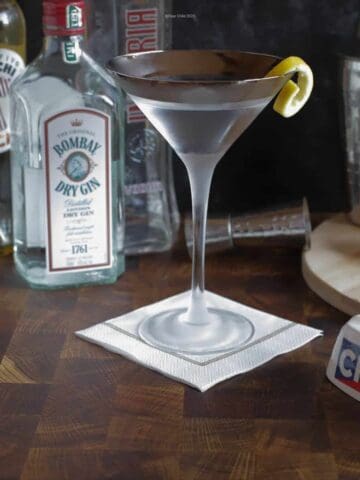
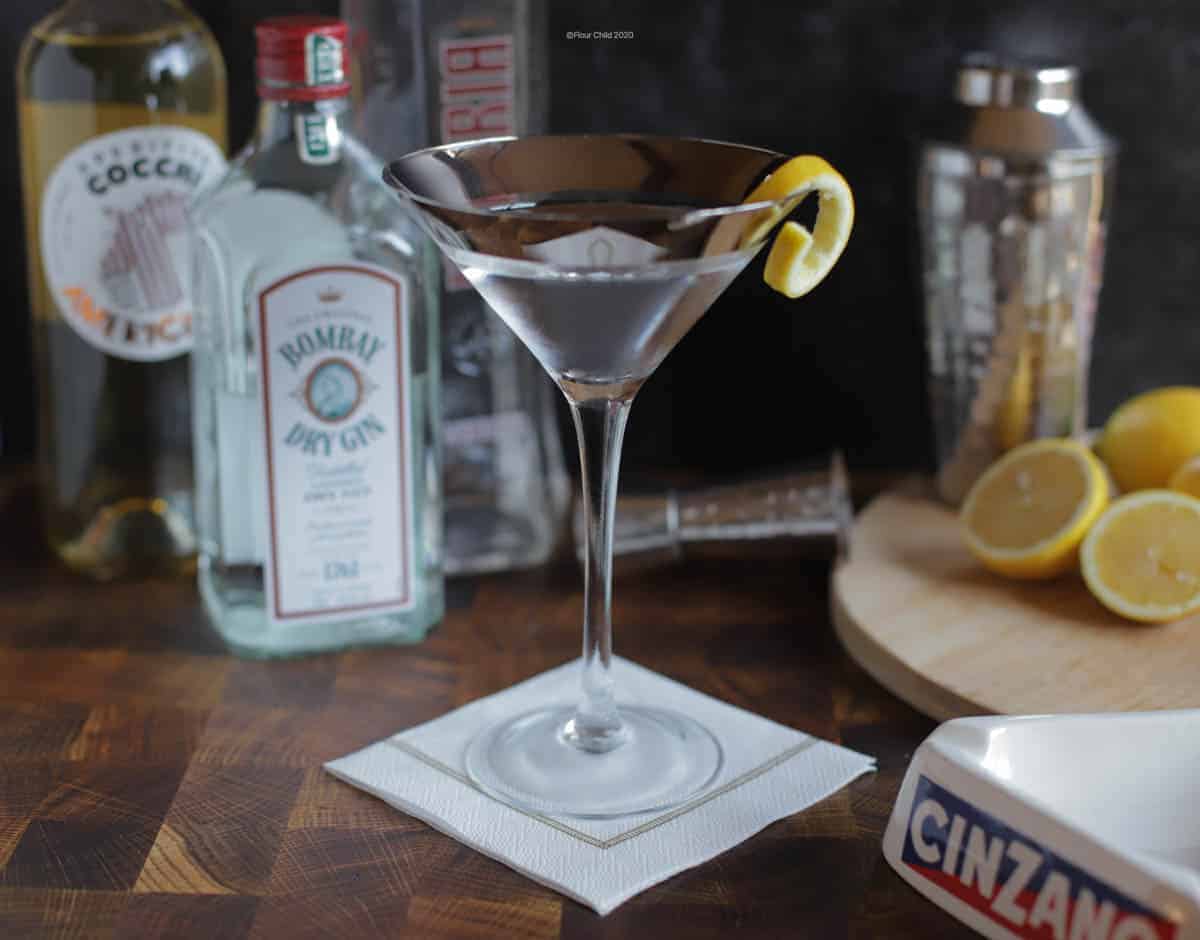
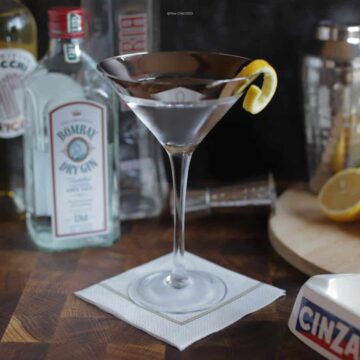
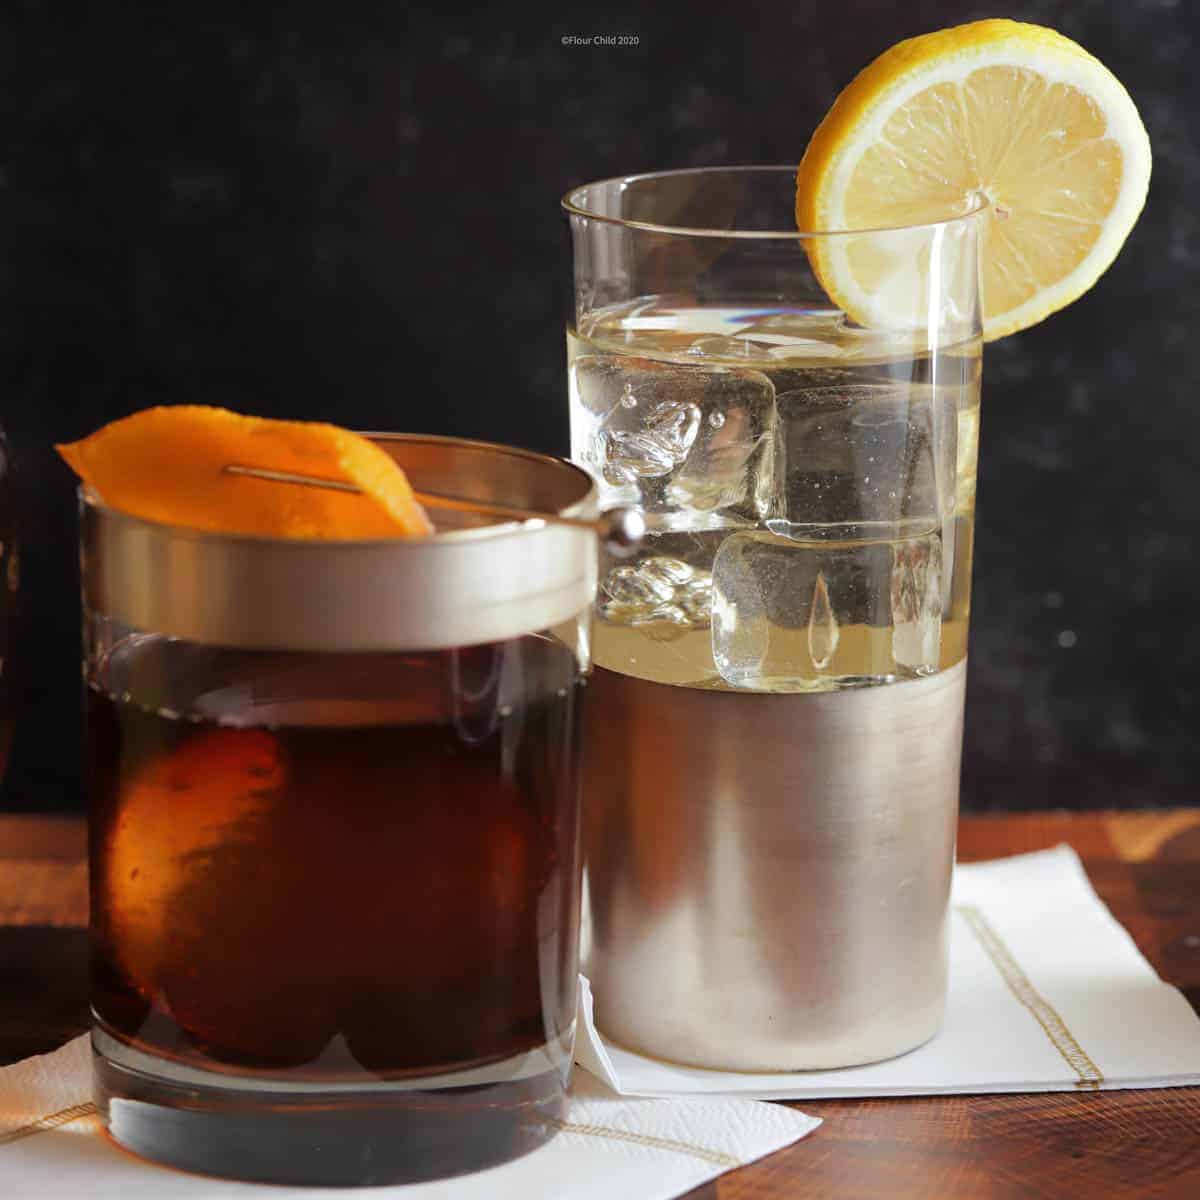
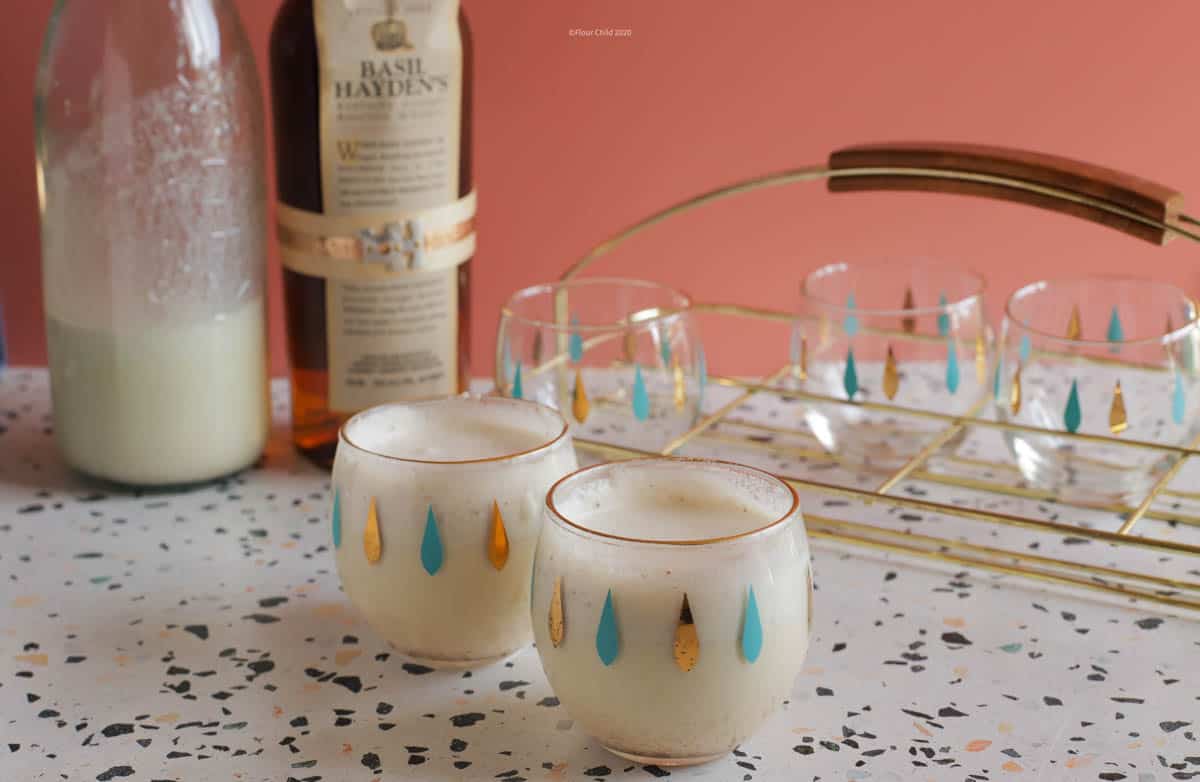
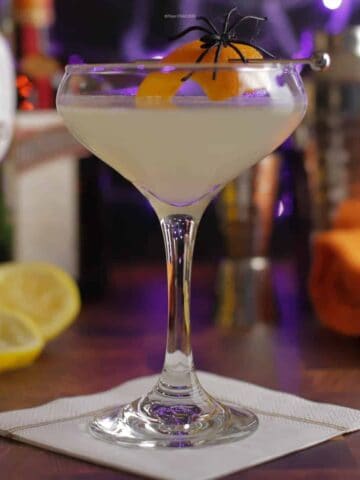
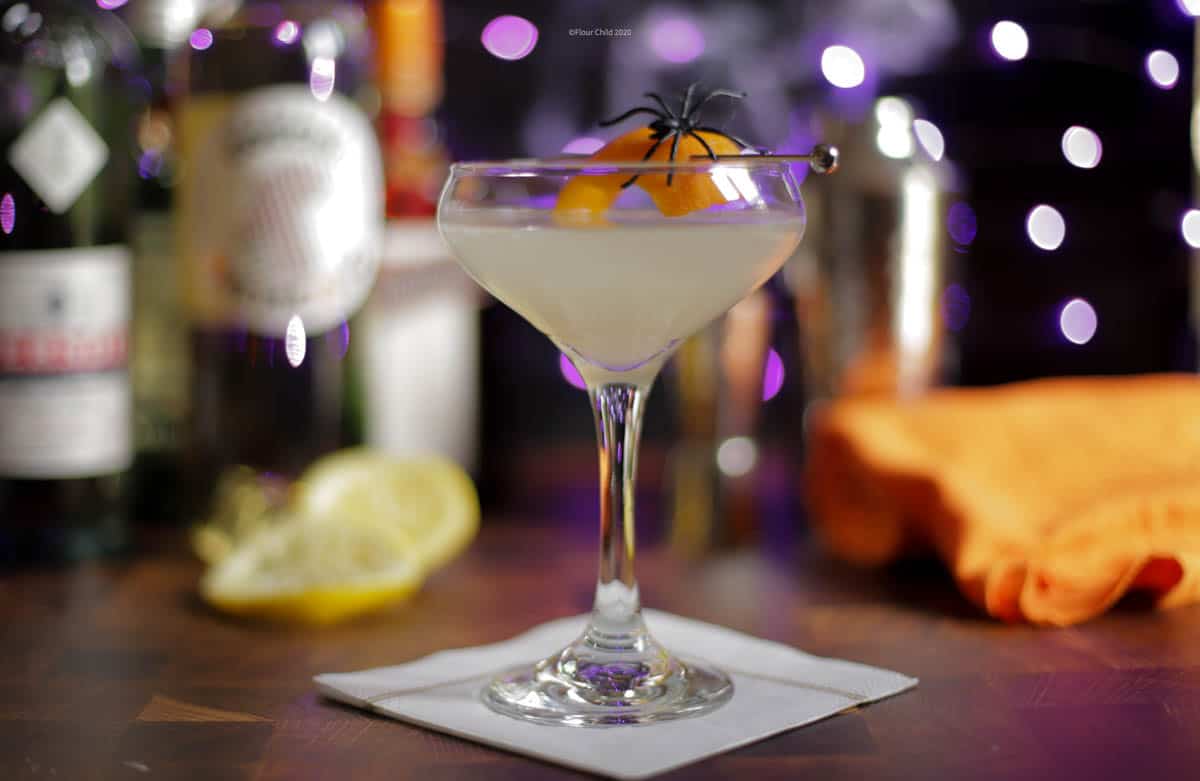
    When it comes to classic cocktails, almost anything that James Bond drank in the early, iconic spy movies is a perfect example of mid century style. This drink made its Bond debut in 1965's Thunderball starring Sean Connery. The Rum Collins is similar to a Tom Collins, but instead of dry gin, this one uses rum and citrus juice and a slice of lemon. The combination really gives the drink the feel of a Caribbean happy hour.

    Meet the Collins Family of Cocktail Recipes

    There are a number of drinks in the Collins family, all utilizing different base spirits (with a few other tweaks to each recipe):

    • Tom Collins: Gin (such as Old Tom Gin) is the base spirit.
    • Ron Collins: Spiced rum (such as Captain Morgan) is the base spirit.
    • Michael Collins: Irish Whiskey (such as Jameson) is the base spirit.
    • John Collins: Bourbon (such as Maker's Mark) is the base spirit.
    • Juan Collins: Tequila (such as Patron) is the base spirit.
    • Phil Collins: Vodka (such as Belvedere) is the base spirit.
    • Bootsy Collins: Vodka is the base spirit, topped with Prosecco (such as Mionetto.)

    The Collins drinks craze started in the late 1800's with the Tom Collins cocktail. It continued to be popular in New York during Prohibition because bootlegged gin was readily available, but tasted awful. Because the Tom Collins used sugar and soda water, it masked the poor-tasting gin and was one of the best cocktails available at that time. Over the years, there have been a number of Collins cocktails made with Old Tom gin, Bourbon and even tequila as the base spirit. Some people experiment with orange juice or add a dry vermouth, but I've never found them necessary. The simple Rum Collins cocktail recipe is the best one and is always at the top of every bartender's guide of standard drinks.

    Just a few simple ingredients are all that's needed for a Rum Collins. This easy recipe includes:

    ingredients needed for a Rum Collins cocktail include rum, sugar, lemon, lime and seltzer water shown against a black background

    This tasty take on a Collins is pretty straightforward, and requires just a few ingredients:

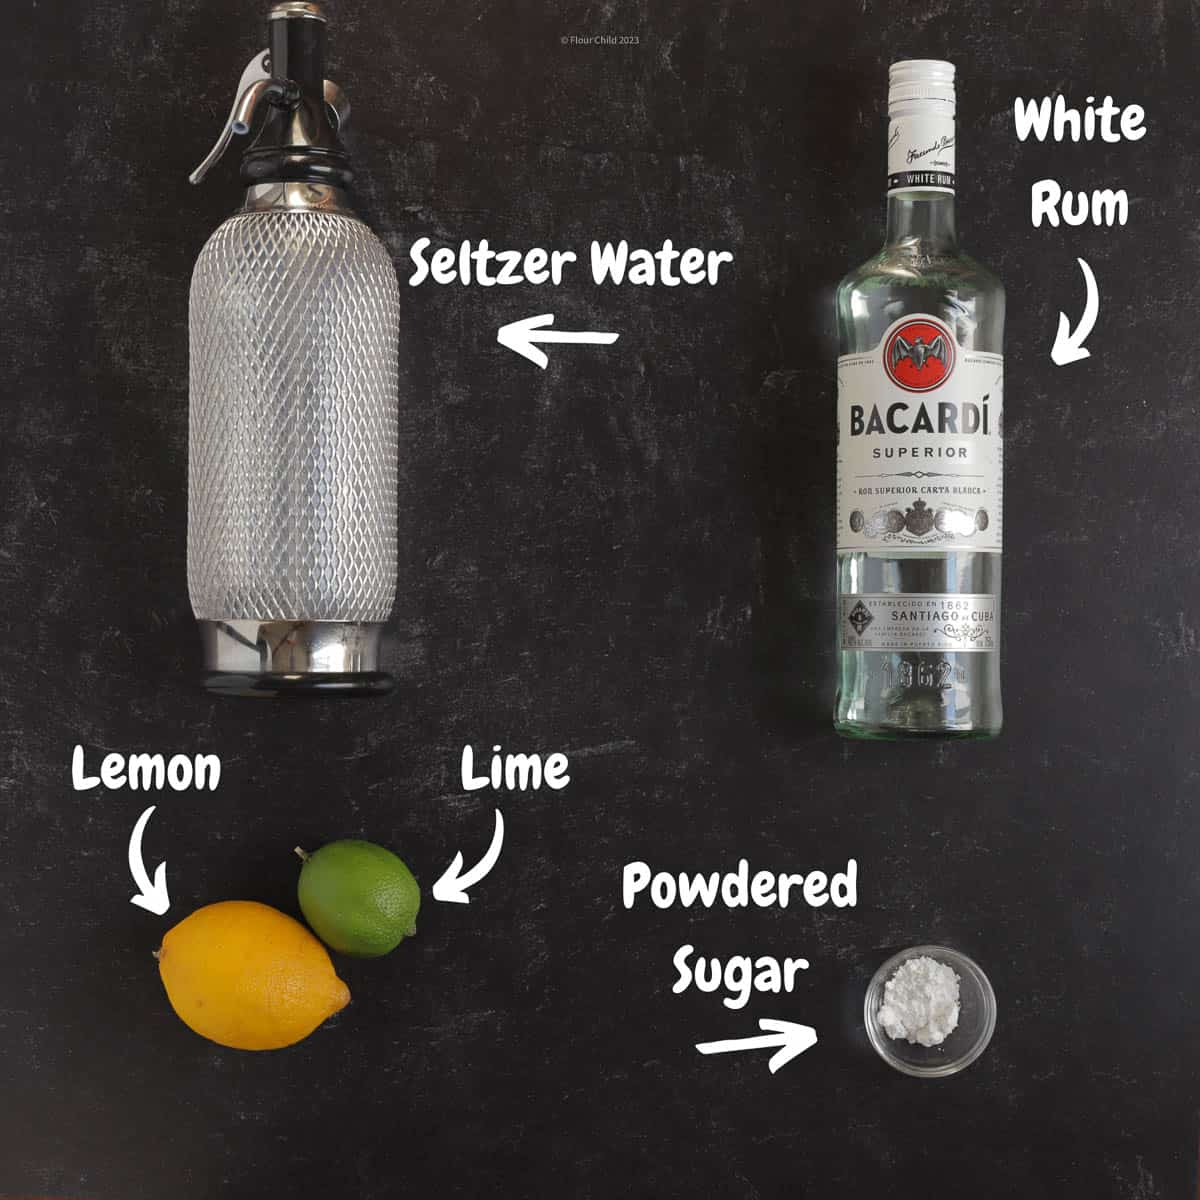
    • Light White Rum (or you can substitute 2 fl oz. light golden rum for more flavor.)
    • Fresh lime juice (remember juice of lime for Rum Collins; fresh lemon juice for Tom Collins.)
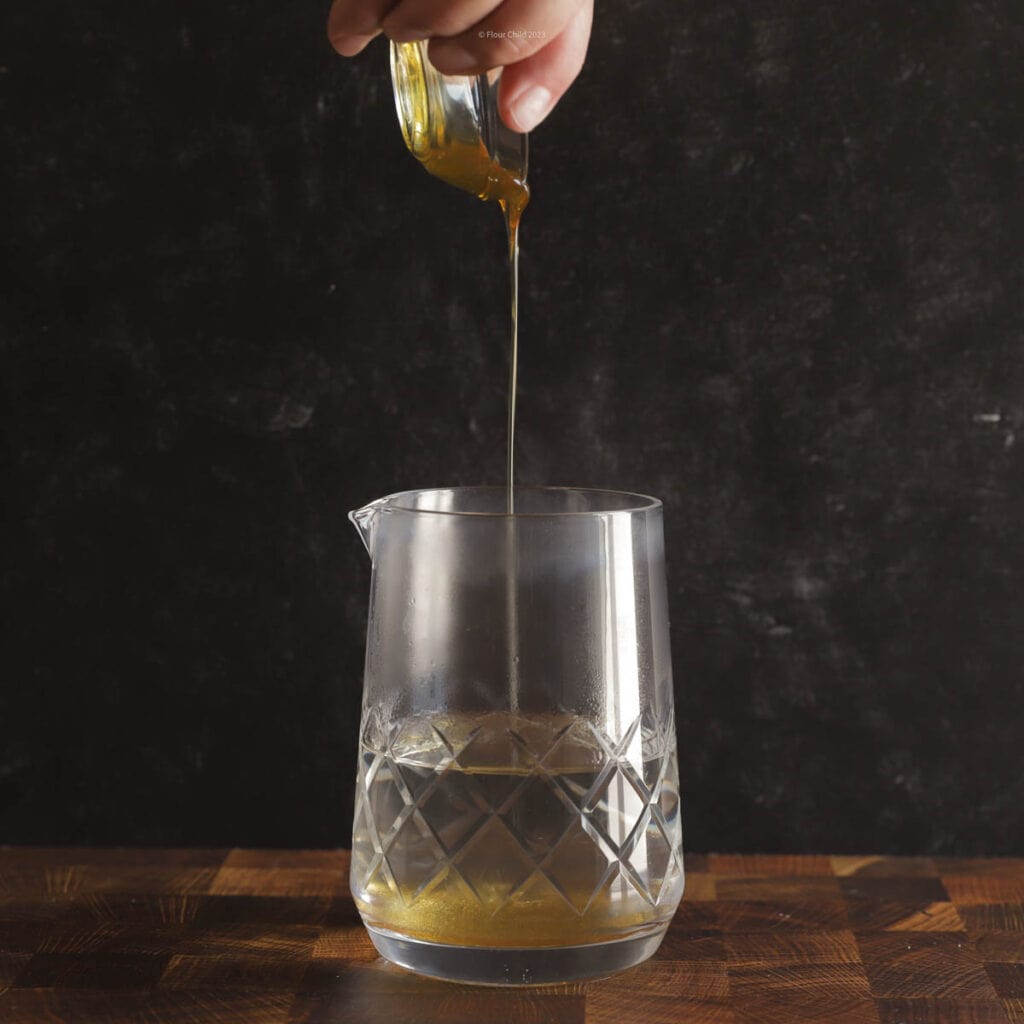
    • Powdered sugar (so no need for simple syrup) keeps this from being a sour cocktail.
    • Club Soda or Soda water for a splash of carbonated water.
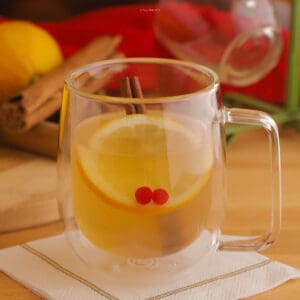
    • Lemon slice or a lemon wedge (or a lime wedge in a pinch.)
    • Maraschino cherry for garnish is purely optional.
    • And don't forget the ice cubes -- this drink is best when it is served ice cold in a tall glass such as a Collins glass or Highball glass.

    Bar Tools Needed

    This classic cocktail stays popular because it is so easy to make. It doesn't 'require' any special tools, but here are a few basics your bar most likely already has that will make a good drink every time out:

    • Cutting board
    • Bar knife (I like this one by Hammer Stahl)
    • Bar spoon
    • Mixing glass or cocktail shaker
    • Strainer

    How to Make this Rum Collins Cocktail

    Add the lime juice
    Pour in White Rum
    Add powdered sugar
    The process steps of pouring lime juice, rum and sugar into a cocktail shaker and straining into a collins glass.
    Strain into Collins glass

    This refreshing taste of the tropics is very easy to make. Just follow these steps:

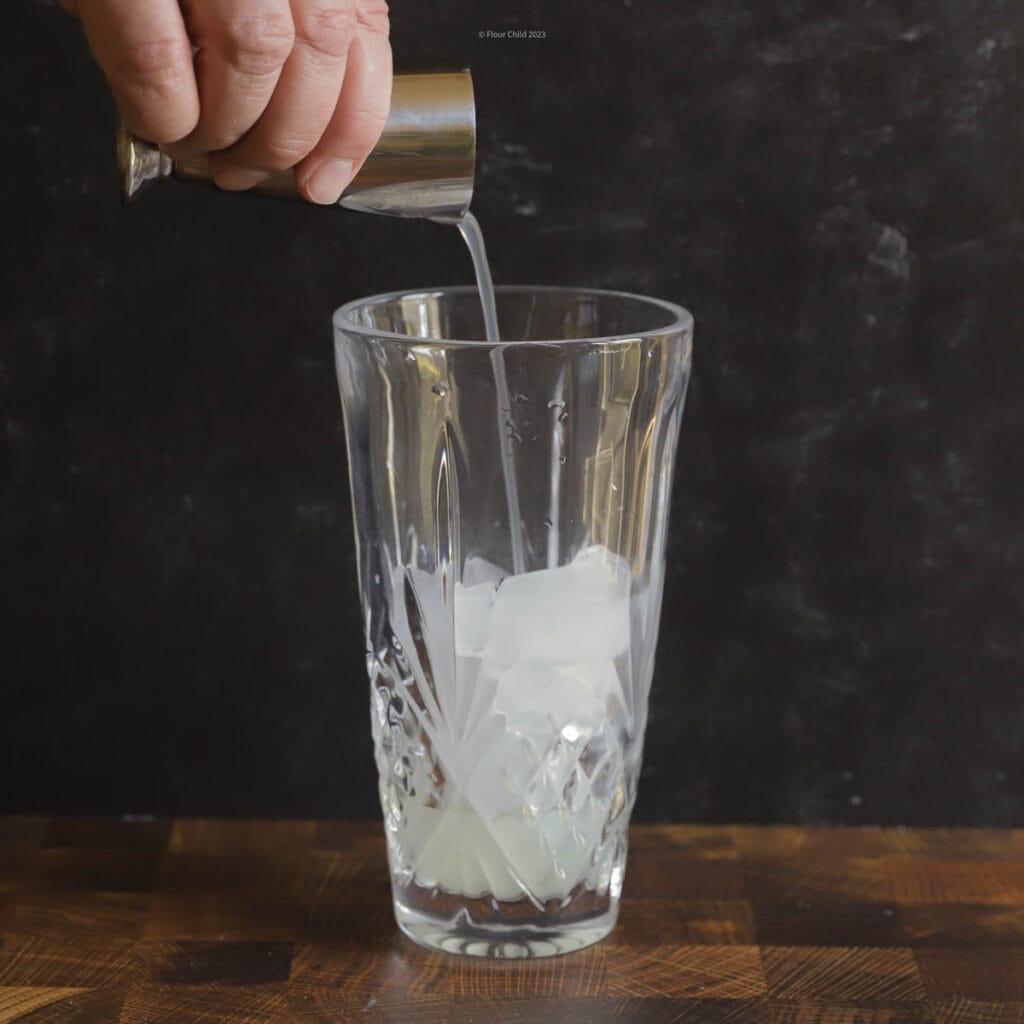
    1. Place a handful of fresh ice cubes in a tall, thin Collins glass and set aside
    2. Place another handful of fresh ice in a cocktail shaker
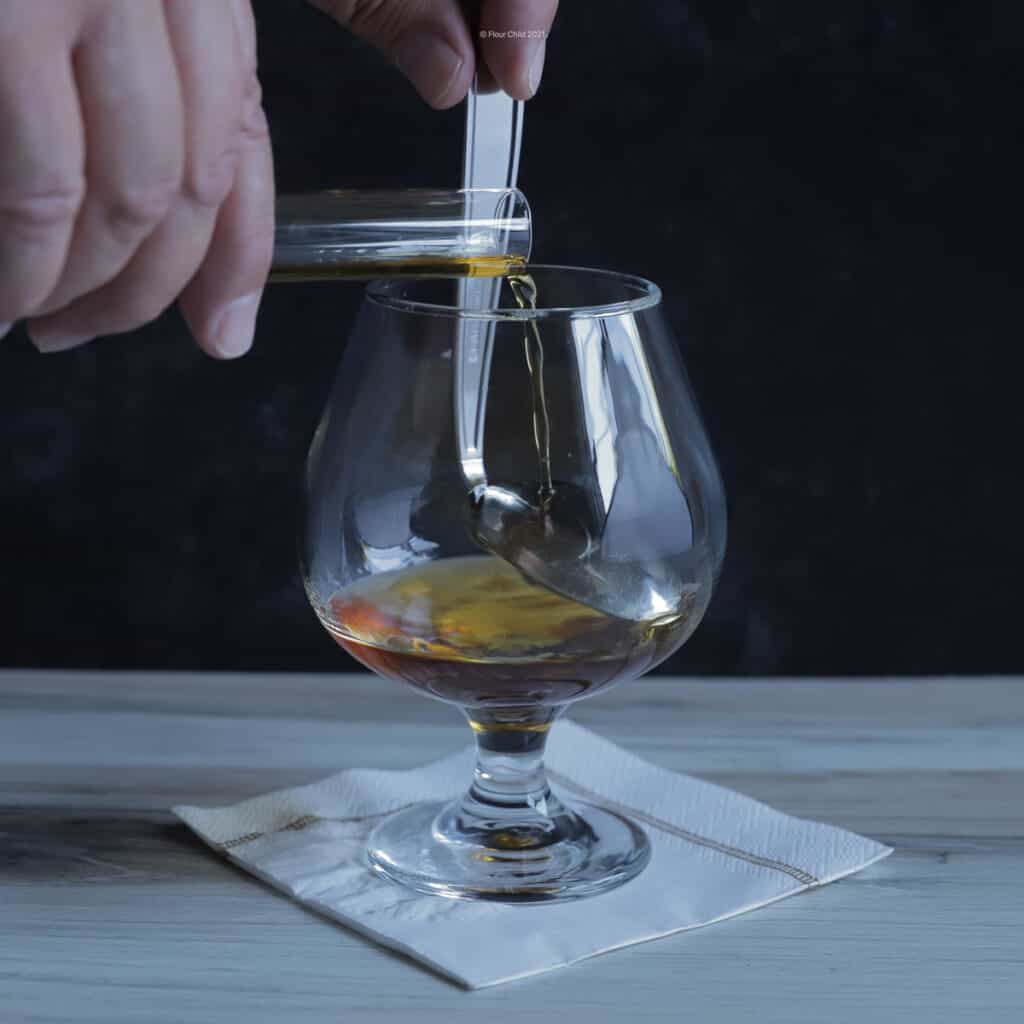
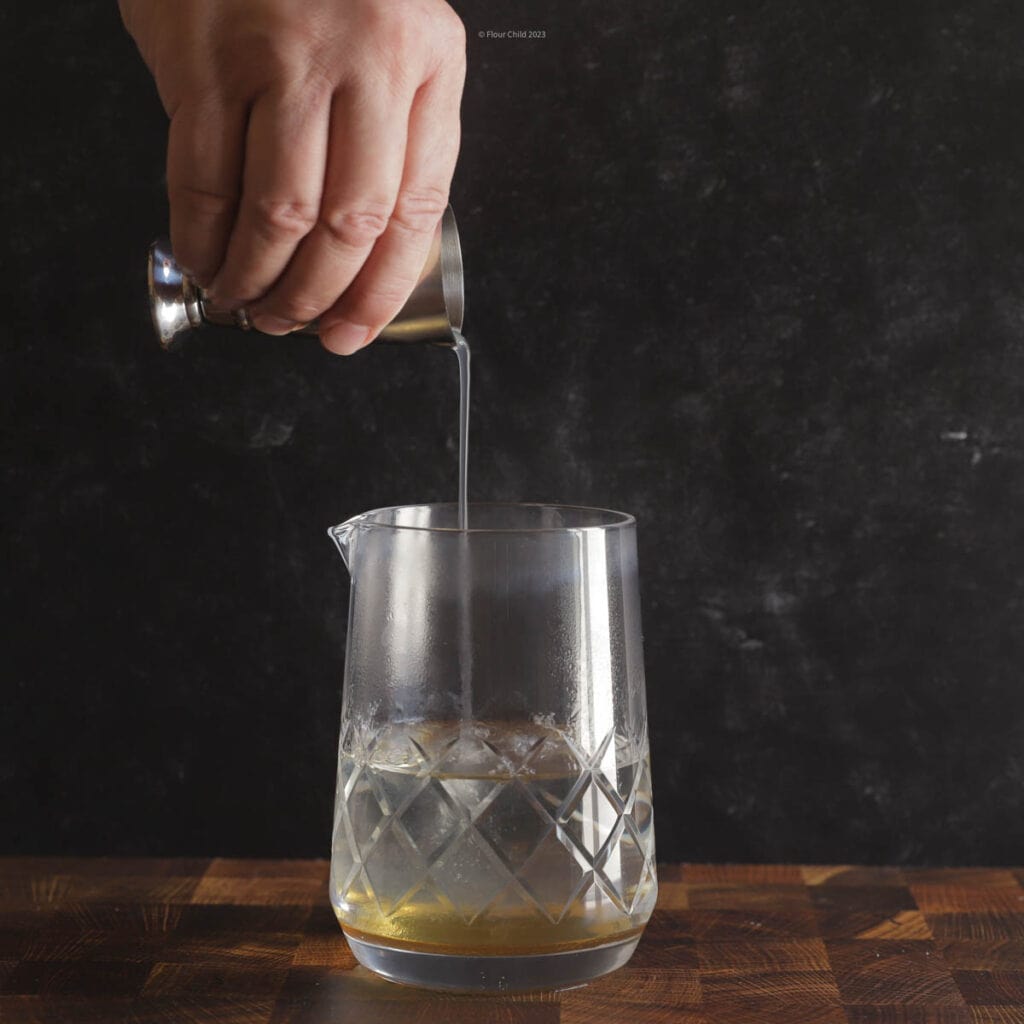
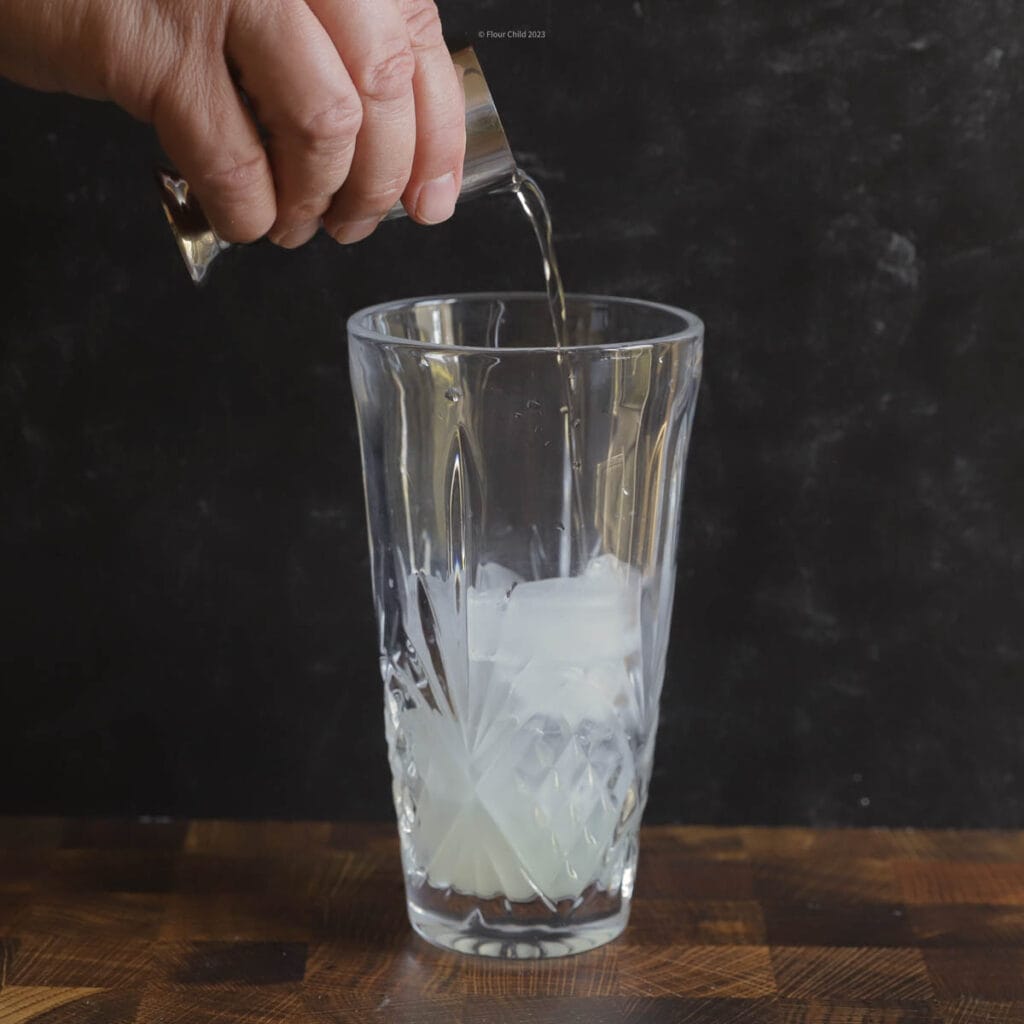
    3. Pour in the fresh-squeezed lime juice
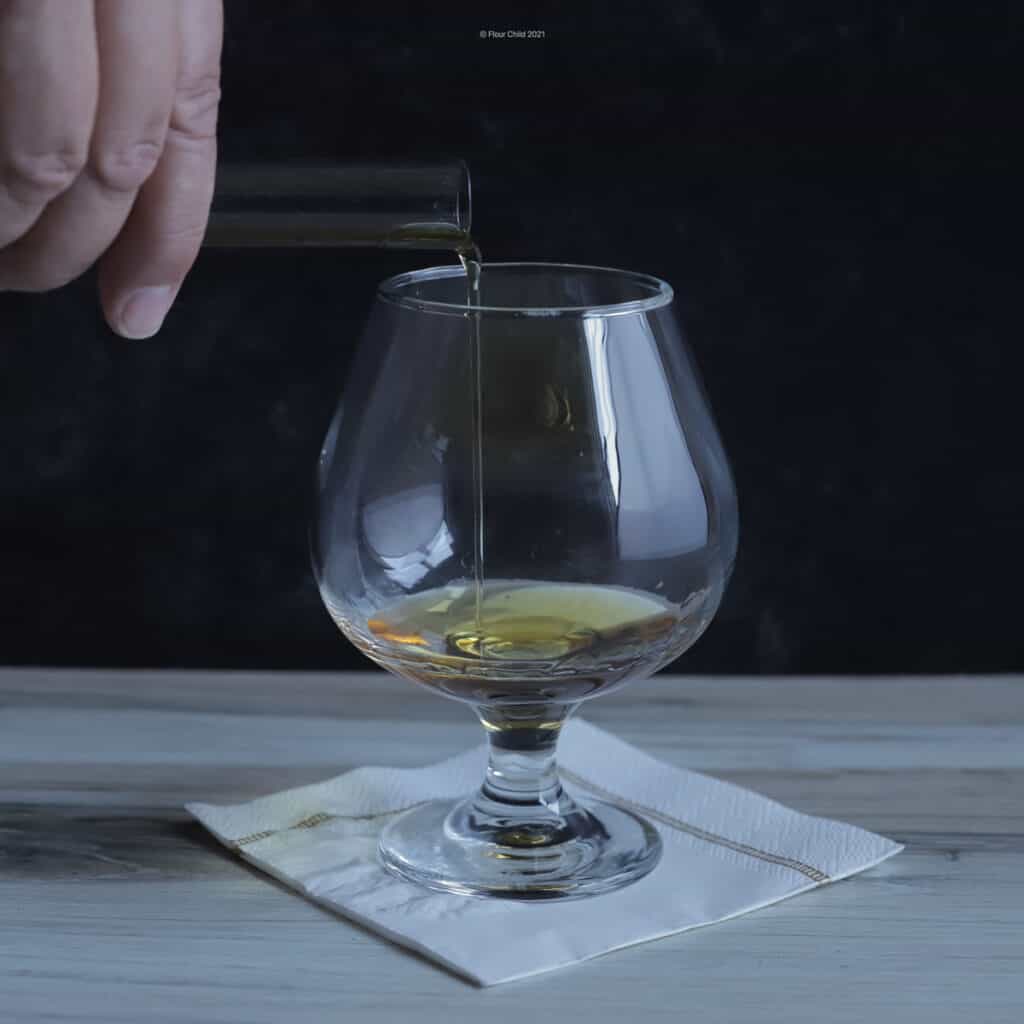
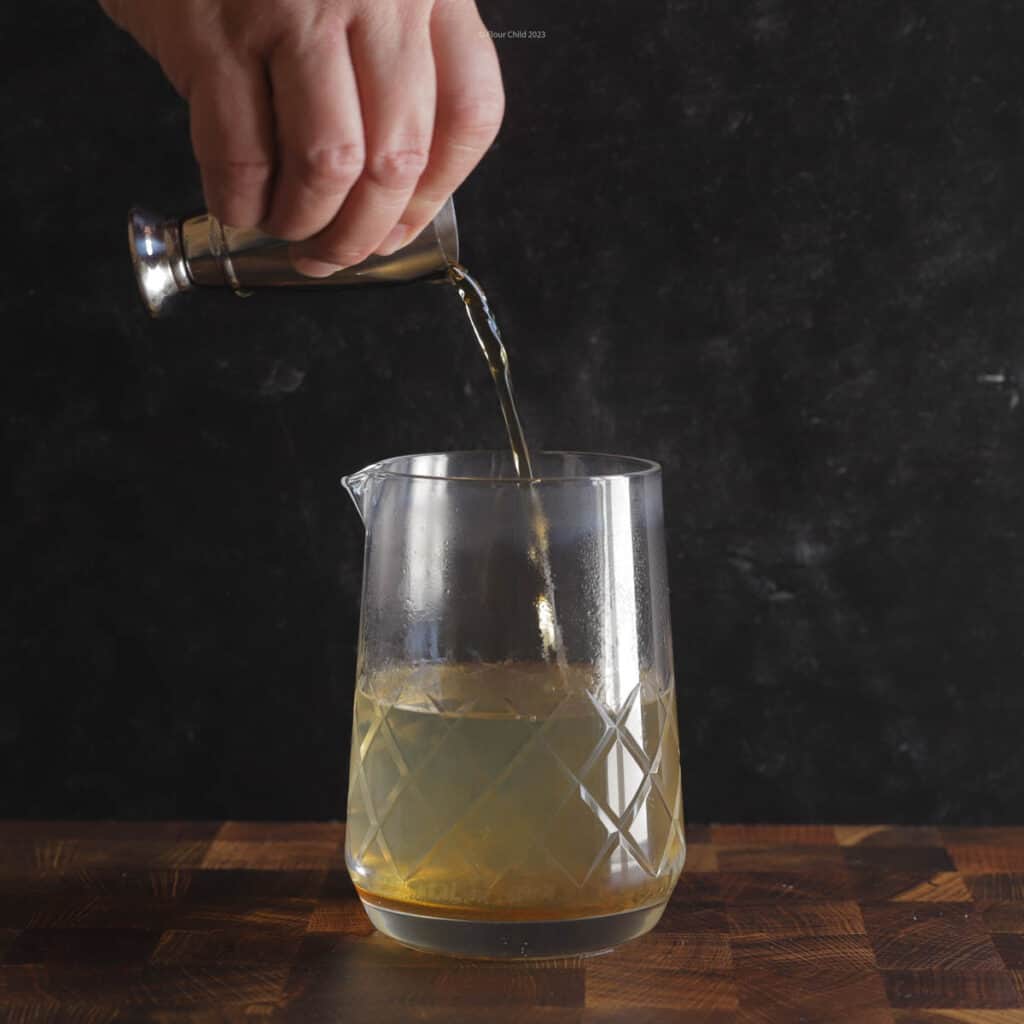
    4. Add the two ounces of rum--the recipe calls for white rum
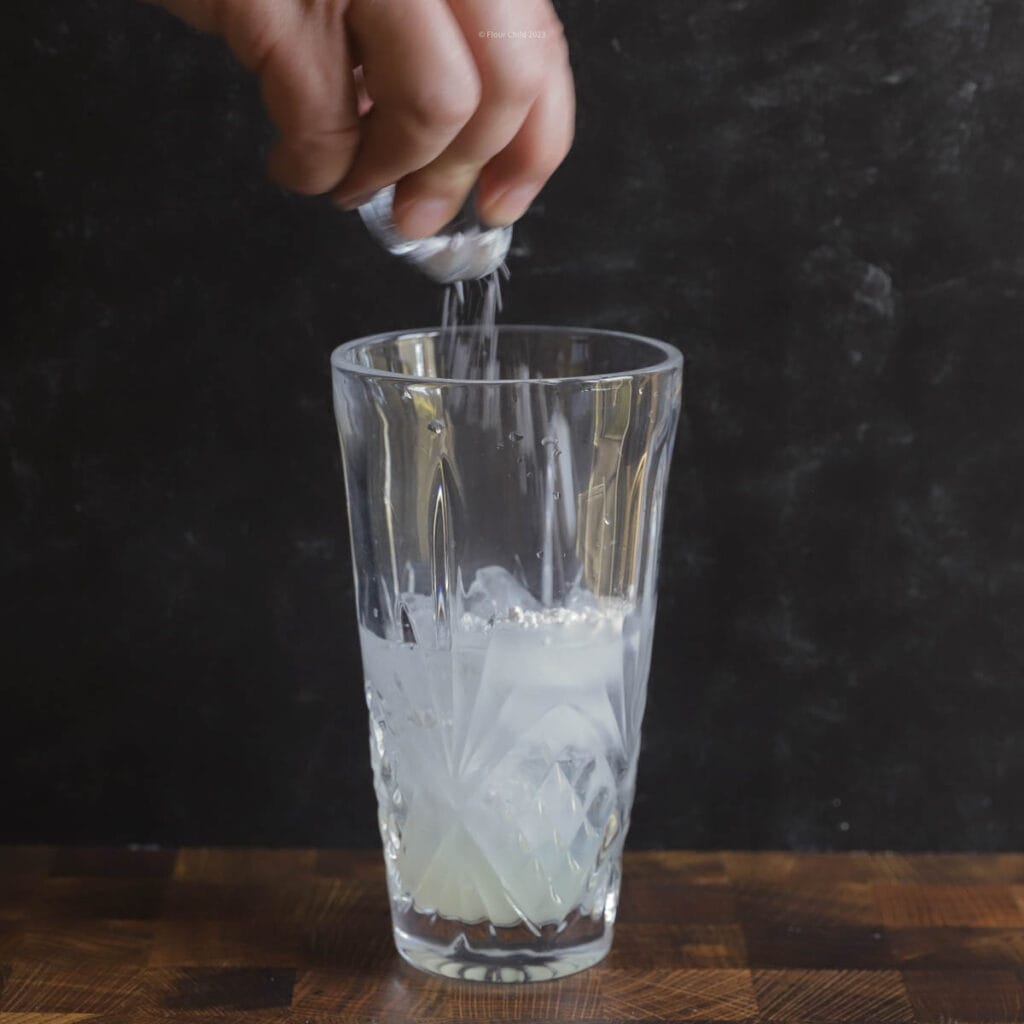
    5. Pour in the powdered sugar
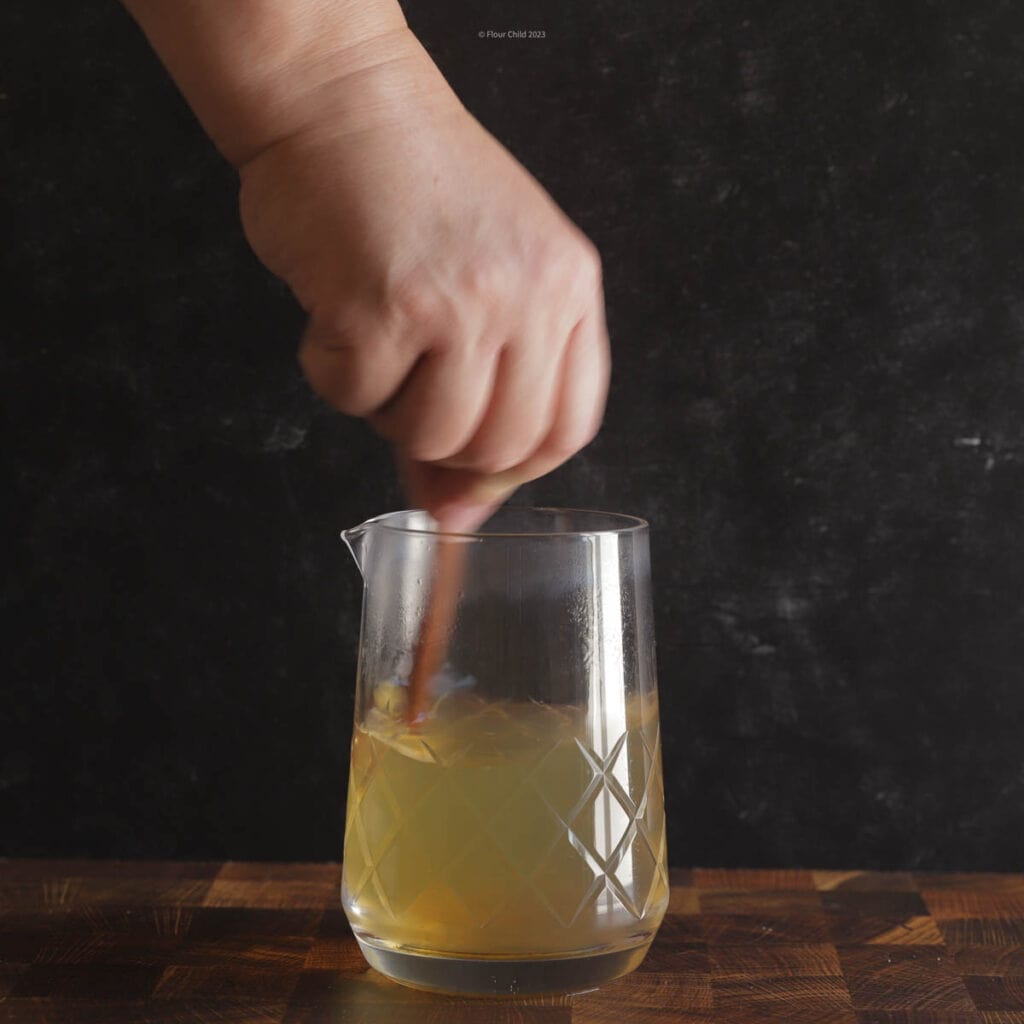
    6. Shake vigorously for 30 seconds to mix up the sugar
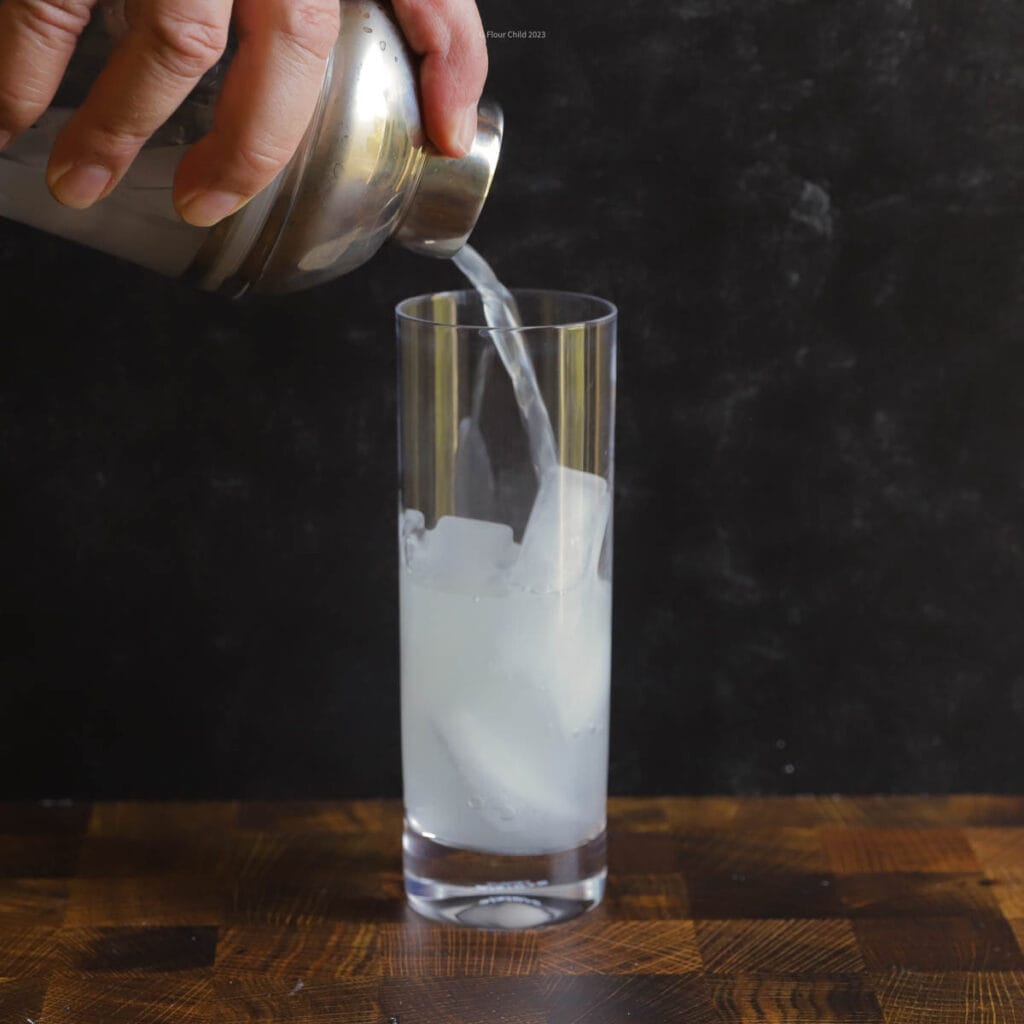
    7. Strain into a Collins glass and add some seltzer or club soda on top
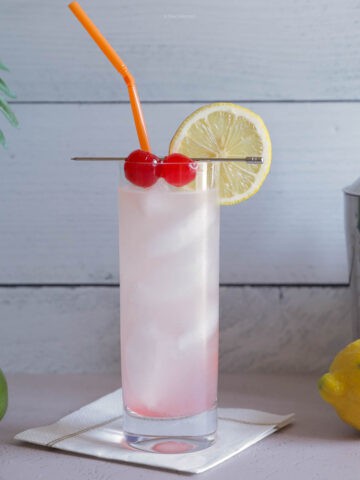
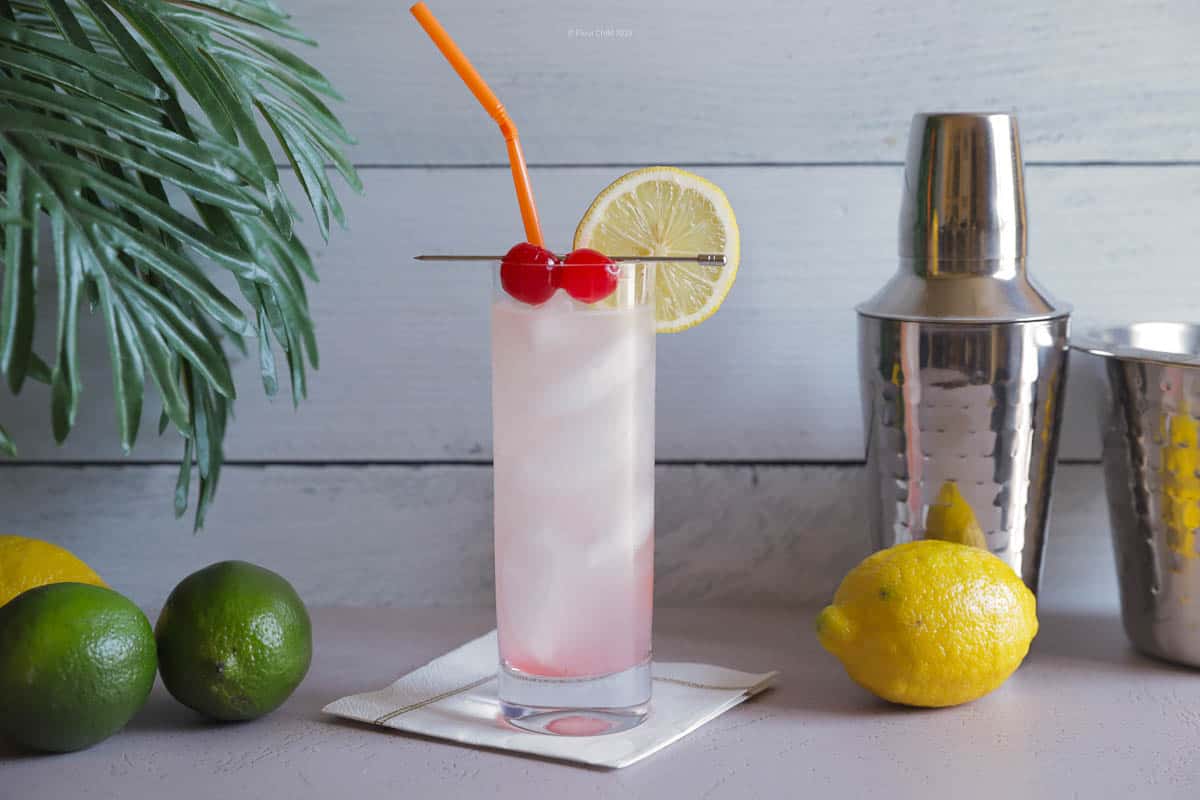
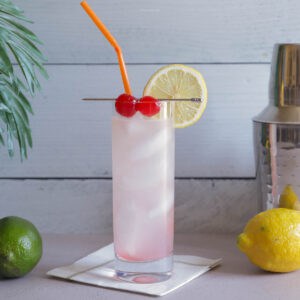
    8. Garnish with lemon wedges (cherries if desired)

    Tips for Success

    Here's a few pointers for how to serve up a tasty Rum Collins:

    • Take the time to fresh squeeze your lime juice. The pre-bottled lime juices often contain added sugars and preservatives that can ruin the taste of a cocktail.
    • Go easy on the lime juice as it is very strong and can overpower the drink. I start by using only a half ounce and adding more if desired.
    • Use a quality light rum for mixing. Inferior-tasting rum will impact the flavor of your drink. I prefer to drink a gold rum rather than a white rum. A gold rum has been aged in a charred oak barrel. My personal preference is for the aged rum with a smoother and less harsh taste than some white rums. These are much more enjoyable than a drink made with a high alcohol content like an overproof rum.

    Frequently Asked Questions

    What is a Collins glass?

    A tall, thin glass is usually referred to as a Collins glass. They typically hold between 10 and 14 ounces of liquid.

    What's the difference between a Collins cocktail and a Highball?

    Though both cocktails are served in similar-looking glasses, the Highball glass will tend to be larger and hold more liquid since a Highball usually consists of only two ingredients, a mixer and a spirit.

    Next time you're looking to beat the heat, be like James Bond and reach for a Rum Collins. What's your favorite 007 cocktail?

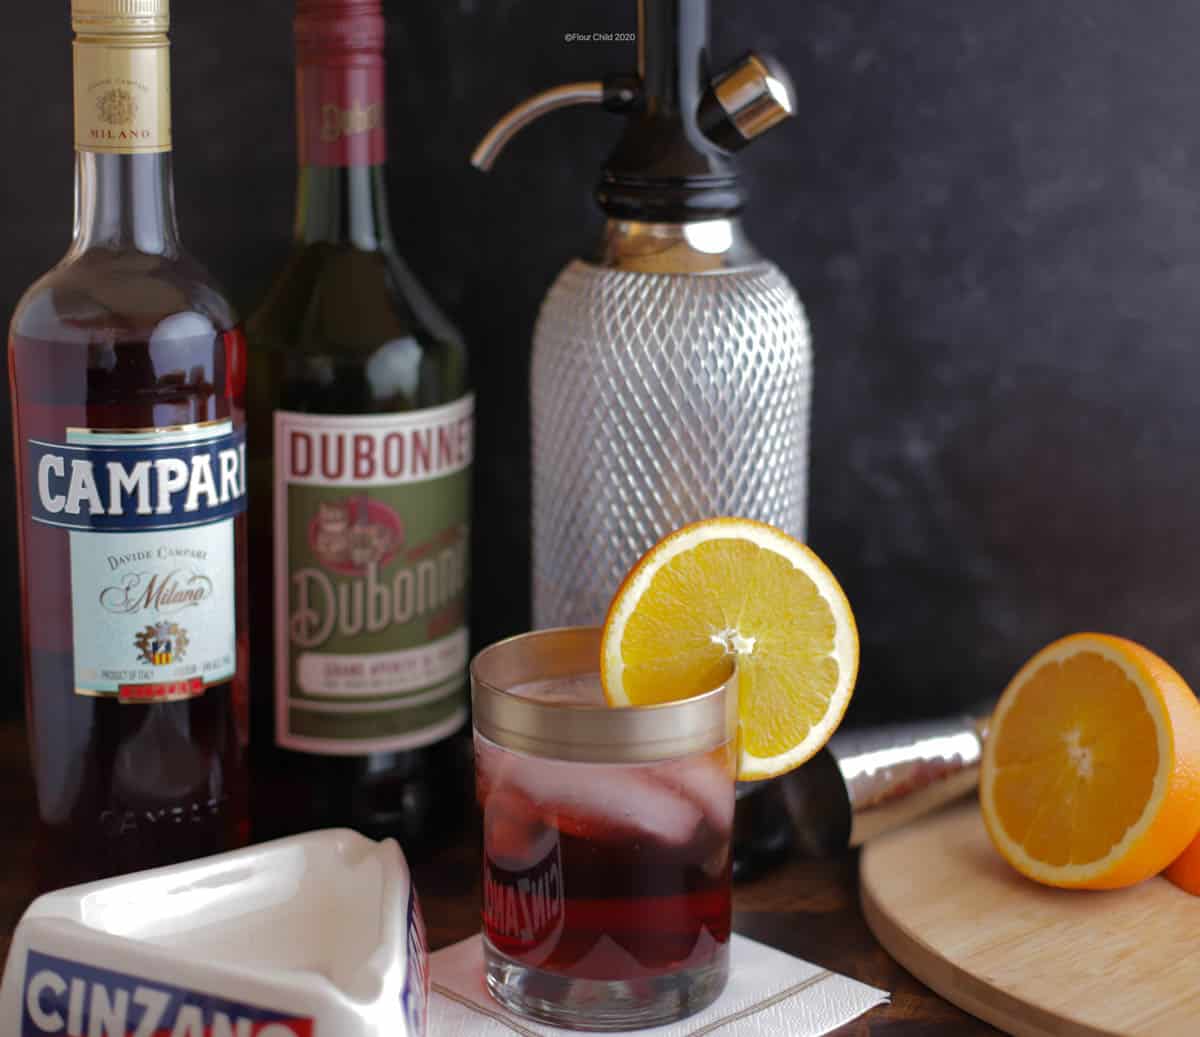
    If you're looking for some refreshing classic cocktails, try our recipes for The Daisy, The Americano, and the original Screwdriver.


    Before you go, did you try this cocktail? Why not leave a comment in the Comments section along with a rating? I always appreciate hearing from you and getting your feedback.

    A Rum Collins cocktail on a white background with limes and lemons and two red cherries in a slim glass.

    The Rum Collins is Good Enough to Die For

    Kevin Mayfield
    This Caribbean take on a Tom Collins is perfect on a hot day.
    5 from 3 votes
    Print Recipe Pin Recipe
    Prep Time 3 minutes mins
    Total Time 3 minutes mins
    Course Classic Cocktails
    Cuisine American
    Servings 1 Cocktail
    Calories 146 kcal

    Ingredients


    • 2 ounces white or gold rum
    • 1 ounce fresh squeezed lime juice
    • 1 teaspoon powdered sugar
    • Splash of seltzer
    • Lemon wheel and cherry for garnish

    Instructions
     

    • Add two scoops of ice to a cocktail shaker.
    • Add all ingredients in a cocktail shaker and shake vigorously for about 30 seconds to dissolve the powdered sugar.
    • Strain into a tall Collins glass.
    • Add lemon and cherry garnishes.

    Notes

    It's really worthwhile to use fresh squeezed lime juice rather than from a bottle for a really crisp, refreshing taste without added sugar.
    Go easy on the lime juice as it is quite overpowering and can be too tart. I typically start with only half an ounce.
    You can substitute lemon juice instead of lime juice, as there are variations of the recipe. The lime juice gives it more of a Caribbean feel and the lemon juice keeps it similar to a traditional gin Tom Collins.

    Nutrition

    Calories: 146kcalCarbohydrates: 4gProtein: 1gFat: 1gPolyunsaturated Fat: 1gSodium: 1mgPotassium: 34mgFiber: 1gSugar: 2gVitamin A: 14IUVitamin C: 9mgCalcium: 4mgIron: 1mg
    Keyword 1960's cocktails, Bond Cocktails, Caribbean cocktails, James Bond cocktail, madmen cocktails, mid century cocktails, rat pack cocktails, Rum Collins, rum drinks, Tom Collins variations
    Tried this recipe?Let us know how it was!

    Homemade Baked or Fried Tortilla Chips - Ready in Minutes

    January 12, 2021

    Basket of corn tortilla chips next to a bowl of salsa and a margarita

    These crunchy homemade corn tortilla chips served hot with a side of guacamole or salsa are so easy and delicious, you'll never buy another bag again!

    Wait - There's No Tortilla Fairy?

    It never occurred to me to make my own tortilla chips. I had no idea how they were made. I guess I just assumed the tortilla fairy waved her wand and they magically appeared in puffy bags at the grocery store.

    Last year my girlfriend Jenny, who was born in Mexico, was at my house and we were having a party and cooking up a Mexican feast. Suddenly she turned to me and asked "Hey - do you want some tortilla chips?" I ran to my pantry to see if I had a bag and she said "No, no no! I'll make them!" We had way more corn tortillas than we needed for dinner, so she took a stack, cut them into strips, and dropped them into a frying pan of hot oil. Five minutes later we were eating the hottest, best tortilla chips I've ever had. She had grown up making these with her mom, but it was magic to me! Jenny was the tortilla fairy!

    Making Your Own Chips Saves Money (A Lot!)

    If the thought of hot delicious chips isn't enough to tempt you to try making them, maybe the cost savings will. As of this writing, a 13 oz. bag of Tostitos corn chips at my local Ralph's (owned by Kroger) grocery store is $4.29. A 25 oz. package of yellow corn tortillas is only $1.89. You can make nearly twice the amount of chips for a fraction of the price, making the homemade version a much more budget friendly choice.

    Frying vs. Baking Tortilla Chips

    Frying tortilla chips in vegetable oil takes only about 5 minutes. Baking the chips is a healthier alternative to frying, but will take just a few minutes longer. Simply coat the tortillas in olive oil and bake them on a cookie sheet for 12-15 minutes or until golden and crisp.

    To make them even healthier, choose organic corn tortillas which are made with non-gmo ingredients, and no artificial preservatives.

    How To Fry Tortilla Chips

    • Corn tortillas cut into chip size
      1. Cut tortillas into desired chip size
    • Corn tortillas frying in pan of hot oil
      2. Drop into a frying pan of hot vegetable oil
    • corn tortillas being removed from pan after they have cooked to golden color
      3. Cook for 5 minutes or until golden and crisp
    • Do not overlap chips in frying pan; try to keep them separated. Overlapping will result in some areas not being fully cooked.
    • Remove chips from hot oil using a slotted spoon, and drain on a paper towel for 5 minutes before placing in serving bowl.
    • Salt and/or season immediately after removing from oil or the seasoning won't stick to the chips.
    • Use a coarse sea salt or kosher salt on the chips. Fine salt can easily result in overly salty chips.
    • Store in an airtight container or tightly sealed plastic bag.

    How to Bake Tortilla Chips

    • Spray olive oil over both sides of the corn tortillas, or spread it on using a silicon pastry brush.
    • Cut tortillas to desired chip size.
    • Place on greased cookie sheet and bake at 375 degrees for 12-15 minutes or until golden in color. Remove from oven and salt/season immediately.
    • Cool in bowl or basket lined with paper towel for 5 minutes.

    Now you have fresh, hot chips, cut in your favorite size and shape, salted and seasoned to your liking. Serve them as an appetizer with a tangy margarita before a delicious taco casserole dinner. Cheers, friends!

    Basket of corn tortilla chips next to a bowl of salsa and a margarita

    Make Homemade Baked or Fried Tortilla Chips in Minutes

    Nancy Blackstone
    These crunchy homemade corn tortilla chips served hot with a side of guacamole or salsa are so easy and delicious, you'll never buy another bag again!
    5 from 1 vote
    Print Recipe Pin Recipe
    Prep Time 10 minutes mins
    Cook Time 4 hours hrs 37 minutes mins
    Total Time 10 minutes mins
    Course Appetizer
    Cuisine Mexican
    Servings 60 chips
    Calories 52 kcal

    Ingredients


    Fried Tortilla Chips

    • 10 six-inch corn tortillas
    • Vegetable oil enough to fill to 1-inch deep in a large frying pan

    Baked Tortilla Chips

    • 10 six-inch corn tortillas
    • Olive oil cooking spray or liquid olive oil

    Instructions
     

    Fried Tortilla Chips

    • Pour olive oil into a large frying pan until it is one inch deep. Heat oil until hot. Test by putting a wooden spoon into the oil -- if small bubbles form around the spoon, it is ready. If it bubbles hard around the spoon, it is too hot and you'll need to reduce the heat.
    • Cut the tortillas into the desired size and shape of chips.
    • Carefully drop the chips into the hot oil, being careful not to burn yourself. Try not to allow the chips to overlap while cooking as it will cause spots to cook unevenly. You will probably need to cook several batches depending on the size of your frying pan.
    • Simmer in oil for 5 minutes, until chips are golden and crisp. Remove with a slotted spoon and place on a paper towel.
    • Immediately salt with a coarse salt. If you are using additional seasonings, add them now, too.
    • Allow to drain on paper towel for 5 minutes before serving.

    Baked Tortilla Chips

    • Preheat oven to 375 degrees. Lightly grease a large cookie sheet with olive oil.
    • Spray both sides of tortillas lightly with olive oil cooking spray or brush both sides of the tortillas with olive oil using a pastry brush.
    • Bake at 375 degrees for 12-15 minutes or until golden and crispy. Remove from cookie sheet and allow to cool 5 minutes before serving. Chips will get more crisp as they cool. You may need to make in several batches.

    Notes

    You can use white corn, yellow corn, or organic corn tortillas 
    For baked tortillas, you can substitute vegetable oil for olive oil if you prefer
    Store chips in an airtight container for up to 5 days. Reheat stored chips in the microwave for 30 seconds for that hot out-of-the-oven taste

    Nutrition

    Serving: 6chipsCalories: 52kcalCarbohydrates: 11gProtein: 1gFat: 1gSaturated Fat: 1gPolyunsaturated Fat: 1gMonounsaturated Fat: 1gSodium: 11mgPotassium: 45mgFiber: 2gSugar: 1gVitamin A: 1IUCalcium: 19mgIron: 1mg
    Keyword baked chips, tortilla chips, tortillas
    Tried this recipe?Let us know how it was!

    The Classic Margarita Cocktail

    January 8, 2021

    One story claims a wealthy American socialite invented the drink at one of her parties.

    You may think the Margarita is a fairly new drink, but it has a long history of its own and is more than just a variation of a Daisy Cocktail.

    A Margarita in a colorful glass
    The Margarita cocktail's history is as colorful as a Margarita glass!

    Where Did The Margarita Come From?

    It has often been said that the Margarita is a Daisy cocktail that substitutes tequila for brandy. After all, "margarita" means "daisy" in Spanish. While probably technically correct, the Margarita's origins are much more interesting than that.

    Some say that Margaritas got their start in Mexico as Americans fled across the border to drink cocktails during Prohibition. There are several different stories that have the drink being invented from Baja to Juarez, and everywhere in between. Was it named after a showgirl named Margaret? No one can say for sure, but what they can say is that this cocktail exploded in popularity in the 50's and 60's and became a mid century favorite.

    Like it's supposed 'parent' the Daisy, there have been a huge number of variations of Margaritas that have evolved over time. From sweet drinks to frozen slushes, this cocktail has evolved and grown along with its popularity.

    The Cadillac Margarita

    One of the more popular versions of this classic cocktail is the Cadillac Margarita, which is made with premium tequila and served with a shot of Grand Marnier floating on top. This version made its first appearance in the 1980's when Patrón was introduced to the U.S. market. Wolfgang Puck included it on his restaurant menu, introducing the high-end margarita to his trendsetting Hollywood clientele. I had my first Cadillac Margarita in the late 1980's when a savvy waiter asked me to try it. It's now my favorite margarita drink, although I usually request the shot of Grand Marnier to be served on the side.

    Ingredients You'll Need

    Even though there are many variations and flavors, you can't go wrong with the basic cocktail:

    • Tequila
    • Fresh lime juice
    • Orange liqueur

    Remember to have some limes for garnish and salt for the rim of the glass.

    Tips for a Successful Margarita

    Keep it simple and you will enjoy a wonderful cocktail:

    • Always use fresh-squeezed lime juice to give the drink a nice, crisp flavor, as some of the packaged mixers can be overly sweet.
    • Mix with Jose Cuervo Especial tequila, my personal favorite, which has a nice smoky taste and seems to work better than some more aged, sipping tequilas.
    • Use a cocktail shaker to mix the ingredients well and to chill the cocktail. This drink is best served ice cold, which is why the 'frozen' variation of the drink is so popular.

    Also, don't forget to use a Margarita glass for serving. They come in a variety of colors and sizes and add a dash of flair to your cocktail.

    How do you prefer your Margarita? On the rocks or frozen? Traditional lime, or another flavor?

    One story claims a wealthy American socialite invented the drink at one of her parties.

    The Margarita is a South of the Border Delight

    Kevin Mayfield
    This tangy south of the border classic is perfect for hot summer days and really quenches your thirst.
    5 from 2 votes
    Print Recipe Pin Recipe
    Prep Time 5 minutes mins
    Total Time 5 minutes mins
    Course Classic Cocktails
    Cuisine American
    Servings 1 Cocktail
    Calories 273 kcal

    Ingredients


    • 2 Ounces Tequila
    • 1 ½ Ounce Orange liqueur
    • Generous measure coarse sea salt
    • 1 ½ Ounce fresh squeezed lime juice
    • Lime wheel for garnish

    Instructions
     

    • Wet the rim of a glass, then dip into a plate of course sea salt to 'salt' the rim of the glass
    • Add two scoops of ice to a cocktail shaker
    • Pour in the liquid ingredients and shake for 20-30 seconds
    • Carefully pour or strain into the center of a Margarita glass, taking care not to knock off the salt
    • Add lime wheel for garnish

    Notes

    Salt the rim of the glass before mixing the drink to give it time to dry and stick to the rim better
    You can use Cointreau orange liqueur instead of Orange Curacao
    Add a shot of Grand Marnier orange liqueur to create a Cadillac Margarita--my personal favorite

    Nutrition

    Calories: 273kcalCarbohydrates: 17gProtein: 1gFat: 1gSaturated Fat: 1gPolyunsaturated Fat: 1gMonounsaturated Fat: 1gSodium: 5mgPotassium: 64mgFiber: 1gSugar: 14gVitamin A: 21IUVitamin C: 13mgCalcium: 6mgIron: 1mg
    Keyword 1950's cocktails, 1960's cocktails, 1970's cocktails, Cadillac Margarita, Cinco de Mayo, madment cocktails, Margarita, mid century cocktails, Tequila
    Tried this recipe?Let us know how it was!

    Mexican Lasagna With Corn Tortillas

    January 5, 2021

    Slice of Mexican Lasagna on a green plate topped with sour cream and olives, with sliced avocados and lime on the side.

    This Mexican Lasagna features savory ground beef, beans, and melted cheese in between layers of flavorful corn tortillas. Pour some margaritas and add a bowl of chips, and you've got a real crowd pleaser!

    Mexican lasagna in a green 9 x 13 tray

    Most Foods We Call Mexican are Actually Tex-Mex

    Most of the "Mexican" cuisine we serve in the U.S. originated in Texas, melding the popular foods of Texas with flavors of Mexico. Anyone who has spent any time in Mexico can tell the difference between authentic Mexican food and Tex-Mex. Though this style of food first appeared in the late 1800's, its popularity soared nationally in the mid century, and the term "Tex-Mex" entered the American vernacular in the 1960's.

    Taco Bell has tried twice, 15 years apart, to establish its Tex-Mex restaurants in Mexico, only to be shunned by the residents who did not recognize or accept the food as Mexican. Though it has a huge international presence, to this day there is not a single Taco Bell restaurant in Mexico!

    This recipe for Mexican lasagna, sometimes also called taco casserole or taco lasagna, is definitely a Tex-Mex style dish. It's easy to make, packed with flavor, and is always a crowd pleaser!

    Ingredients

    Here's what you'll need to mix up this delicious Mexican lasagna casserole:

    • Ground beef
    • Yellow onion
    • Picante sauce
    • Chili beans
    • Cottage cheese
    • Salt/Pepper
    • Egg
    • Shredded Monterey Jack cheese
    • Shredded cheddar Cheese
    • Corn tortillas

    Optional Toppings

    • Green onions
    • Sliced black olives
    • Sliced avocado
    • Sour cream
    • Salsa

    How To Make Mexican Lasagna

    The layers consist of three parts: a meat sauce, a cottage cheese mixture, and layers of shredded cheese with corn tortillas in between.

    We are not fans of super spicy foods, so we select ingredients with a mild to medium spice level. However, if you want to turn up the heat, choose a hot picante sauce and hot chili beans. You can also finely chop a tablespoon of jalapeño pepper and add it to step 1.

    First: Make the Meat Mixture

    • Ground beef browning in a cast iron skillet
      Step 1: Brown beef & onion
    • ground beef in skillet with picante sauce, chili beans, salt and pepper added
      Step 2: Add picante sauce, beans, salt & pepper

    Second: Make the Cottage Cheese Mixture

    Cottage cheese in mixing bowl with egg added in
    Add egg to cottage cheese and mix thoroughly

    Third: Assemble the Mexican Lasagna

    • Meat mixture in the bottom of 9 x 13 pan
      1. Layer ⅓ meat mixture
    • Monterey Jack cheese on top of meat mixture in 9 x 13 pan
      2. Sprinkle with Monterey Jack
    • Cottage cheese mixture on top of Monterey Jack in 9 x 13 pan
      3. Layer cottage cheese mixture
    • Layer of tortillas on top of cottage cheese mixture in 9 x 13 pan
      4. Add tortillas and repeat layers
    • Finished pan of Mexican Lasagna with cheddar cheese sprinkled over top
      5. End with meat mixture; top with cheddar
    • Slice of Mexican Lasagna on a green plate topped with sour cream and olives, with sliced avocados and lime on the side
      6. Serve with toppings

    Hints for Making Mexican Lasagna

    • Make it as spicy as you like with your choice of picante sauce, chili beans, and salsa. And you can always add some chopped chili peppers and hot pepper sauce if you prefer to really turn up the heat!
    • Use one of the shredded Mexican cheese blends in place of the Monterey Jack and/or shredded cheddar if you prefer.
    • Make some side dishes to serve along with it. Our favorites are Southern Style Cornbread and Homemade Tortilla Chips.

    This casserole is a real crowd pleaser at pot luck gatherings. Bring along tortilla chips and mix up some Cadillac Margaritas, and you've got a party on your hands!

    If you have a vintage recipe you'd like share with us for possible publication, please scan it and email it to [email protected]. We'd love to hear from you!

    Slice of Mexican Lasagna on a green plate topped with sour cream and olives, with sliced avocados and lime on the side.

    Mexican Lasagna With Corn Tortillas

    Nancy Blackstone
    Mexican Lasagna features savory ground beef, beans, and melted cheese in between layers of flavorful corn tortillas.
    5 from 3 votes
    Print Recipe Pin Recipe
    Prep Time 20 minutes mins
    Cook Time 40 minutes mins
    Total Time 1 hour hr
    Course Main Dish
    Cuisine Mexican
    Servings 10 Servings
    Calories 408 kcal

    Ingredients


    Casserole

    • 2 pounds ground turkey
    • ½ cup chopped yellow onion
    • 24 oz. jar picante sauce I use medium, choose the heat level you prefer
    • 15 oz. can chili beans undrained
    • 1 teaspoon kosher salt
    • ½ teaspoon black pepper
    • 2 cups cottage cheese 24 oz.
    • 1 large egg beaten
    • 2 cups shredded Monterey Jack cheese 8 oz.
    • 12 6-inch small corn tortillas
    • 1 cup shredded sharp cheddar cheese 4 oz.

    Toppings

    • 1 bunch thinly sliced green onions optional
    • sliced black olives optional
    • sliced avocado optional
    • sour cream optional
    • salsa optional

    Instructions
     

    • Preheat oven to 350 degrees.
    • In a large skillet, cook beef and onion over medium heat until beef is browned and onion is tender. Drain fat.
    • Stir in picante sauce, beans, salt and pepper; set aside.
    • In a small bowl, combine cottage cheese and egg. 
    • Spread ⅓ of the meat mixture in the bottom of a 13 x 9 in pan. 
    • Top with half the Monterey Jack cheese, then half the cottage cheese mixture, then six tortillas.
    • Repeat layers, ending with meat.
    • Sprinkle cheddar cheese over top. 
    • Bake at 350 degrees for 40 - 45 minutes until cheese has melted and juices are bubbling. Remove from oven and let stand 5 minutes before cutting and serving.
    • Serve with your choice of toppings.

    Nutrition

    Calories: 408kcalCarbohydrates: 27gProtein: 40gFat: 16gSaturated Fat: 8gPolyunsaturated Fat: 2gMonounsaturated Fat: 4gTrans Fat: 0.02gCholesterol: 107mgSodium: 1396mgPotassium: 779mgFiber: 5gSugar: 7gVitamin A: 728IUVitamin C: 3mgCalcium: 347mgIron: 2mg
    Keyword cheesy taco casserole, Mexican Casserole, Southwest Casserole, Taco casserole, Tex Mex Dinner, Tortilla Casserole
    Tried this recipe?Let us know how it was!

    Southern Style Chicken and Dumplings

    December 31, 2020

    Chicken and dumplings served on a dinner plate

    On a chilly night, nothing is more comforting than a big bowl of homemade chicken and dumplings. Tender chicken cooked in homemade broth and from-scratch dumplings served in a creamy dumpling sauce are absolutely irresistible!

    Plate of chicken and dumplings

    In Illinois, my former next-door neighbor, Jody, made the BEST chicken and dumplings. After raving about her dinner, she offered to have me come over and make it with her. In my opinion this is the best way to learn, because an experienced cook can fill you in on all the details that you don't get from reading a recipe. I'm talking about things like visual cues, shortcuts, and what to look for while taste testing along the way.

    This from-scratch dish of hot and hearty comfort food takes a couple of hours to make from start to finish, and is so worth it. I love to make it on a Sunday, because it's great to have the leftovers after a busy Monday back at work.

    • Original handwritten recipe for chicken and dumplings
    Jody's original handwritten recipe for chicken and dumplings. I've made a few minor adjustments.

    Cook a Whole Chicken, or Parts?

    When I first began making this dish, I cooked a whole chicken. There is something to be said for making the chicken stock with the bones. It adds both a boost of flavor and nutritional value.

    I switched to using chicken breasts, mainly because Kevin only likes white meat and it was hard to get enough white meat from one chicken. Also, I didn't know what to do with the remaining dark meat and I hated to discard it. Second, removing the meat from the bones was time consuming, and inevitably a small chicken bone would find it's way into the meal. Third, it's just easier to use a 1.5 - 2 pound package of chicken breasts, and we didn't notice a difference in the final taste.

    If you prefer to use a whole chicken, choose one that is 4-5 pounds. Boil it for 1-½ hours using the chicken stock recipe, then carefully remove the meat from the bones and set it aside, making sure there are no bones left behind in the broth. Then continue following the recipe.

    What Kind of Dumplings Are in This Dish?

    There are three common types of dumplings: bread dumplings, flour dumplings, and potato dumplings. Different recipes call for different types of dumplings. I have seen chicken and dumplings made with both bread dumplings and flour dumplings.

    This recipe calls for Southern style flour dumplings, also called pastry dumplings. The texture and flavor is like a thick noodle. In this dish, this dumpling is far superior to a bread dumpling made from a biscuit mix.

    Don't be intimidated by making homemade dumplings; these are easy! You can mix the dough quickly in one bowl, roll it in a ball and chill it for a half an hour. Then you simply roll it out and slice it with a pizza wheel. Fool proof! Don't worry about rolling the dough into a perfect rectangle...mine turned out heart shaped! You get no points for symmetry, and it doesn't impact the look or taste of the final dish, so why stress over it?

    Steps For Making Southern Style Chicken and Dumplings

    1. Start by making the chicken stock. This will cook your chicken and create a stock that will be used in making your creamy dumpling sauce. Total prep & cooking time: 1-½ hours.
    2. Next, make the dough for the dumplings while the chicken stock is cooking. It needs to be refrigerated for a half an hour or so before rolling it out. Getting it in the refrigerator while the chicken stock is simmering will ensure it is ready when the chicken stock is done. Total prep & chill time: 45 minutes.
    3. When the chicken stock is finished cooking, remove the chicken to another plate and divide it into bite sized pieces. Discard the bay leaf and parsley stalks, and leave the broth on the stove. Total prep time: 5 minutes.
    4. Remove the dough from the refrigerator and divide it into 2 sections. On a floured surface, roll out one section of the dough to about ⅛ inch thickness and slice it into 1-inch pieces using a pizza wheel. Bring the chicken stock to a boil and drop the dumplings inside. Boil for 8-10 minutes; remove with a slotted spoon and set aside. (You can roll out the second section of dough and make another batch of dumplings, or keep it in the refrigerator to make the next day with leftovers.) Total prep and cooking time: 15 minutes.
    5. While the dumplings are cooking, prepare the dumpling sauce. The most important part of this step is to make sure your flour is fully dissolved by whisking it vigorously into the milk. If it is not fully dissolved, you might get small lumps of flour in the dumpling sauce. Total prep and cooking time: 15 minutes.
    6. When the sauce has thickened, add the chicken and dumplings to it and stir until heated through. If it's too thick, add more chicken stock until it reaches desired consistency. Take a taste and add salt and pepper if needed. Total prep time: 5 minutes.
    • Pot of cooked chicken stock, with spoon lifting up onions, celery, & chicken
      Cooked chicken stock
    • Cooked chicken, cut into serving size bites
      Cooked chicken in bite sized pieces
    • Dough for dumplings, rolled out
      Rolled out dumpling dough
    • Dumplings being sliced with a pizza wheel
      Slicing dumplings with pizza wheel
    • chicken and dumplings in dumpling sauce
      Chicken and dumplings in dumpling sauce

    How Much To Make

    I usually roll out one half of the dough and make one set of dumplings on the first night. The next day I roll out the second half, cook them in leftover heated broth and add them to leftover dumpling sauce. (If you don't have leftover broth you can cook them in a can of heated chicken broth.)

    I find that this recipe makes plenty for my husband and me for 2-3 meals. I keep the leftover broth on hand, as the leftover dumpling sauce will thicken overnight in the refrigerator. On the second night I heat up the broth and use it to thin the dumpling sauce and stretch it out a bit.

    If you are feeding a group of people and need to make a large amount, you can make both batches of dumplings. After you cook the first batch of dumplings, remove them from the broth and set them aside, then toss in the second batch for another ten minutes.

    Jody often made a double batch of dumplings and dumpling sauce to reserve for leftovers. If you need a larger quantity, here's what to do:

    • Double the recipe for the dumplings, except for the oil. For a double recipe of dumplings use 7 tablespoons of oil, not 8.
    • Double the recipe for the dumpling sauce, except for the bouillon cubes. Use 3 bouillon cubes, not 4.
    • You will not need to double the broth recipe, but if you need a little extra just add a can of chicken broth to it.

    Serve with some hot rolls or buttered bread and enjoy!

    If you love Southern-style dinners, also try our Ultimate Chicken Fried Steak With White Pepper Gravy. Delish!

    If you have a vintage recipe you'd like share with us for possible publication, please scan it and email it to [email protected]. We'd love to hear from you!

    Chicken and dumplings served on a dinner plate

    Old Fashioned Chicken and Dumplings

    Nancy Blackstone
    On a chilly night, nothing is more comforting than a big bowl of homemade chicken and dumplings. Tender chicken cooked in homemade broth and from-scratch dumplings served in a creamy dumpling sauce are absolutely irresistible!
    4.95 from 18 votes
    Print Recipe Pin Recipe
    Prep Time 30 minutes mins
    Cook Time 1 hour hr 45 minutes mins
    Total Time 2 hours hrs 15 minutes mins
    Course Main Dish
    Cuisine American Southern
    Servings 6 -8 servings
    Calories 443 kcal

    Ingredients


    Chicken Stock:

    • 3 quarts water
    • 2-3 large boneless chicken breasts 1.5 - 2 lbs.
    • 1 teaspoon kosher salt
    • ½ teaspoon pepper
    • 1 small yellow onion sliced into thin rings and then quarter the rings
    • 2 stalks celery sliced
    • 1 clove garlic peeled and quartered (or ½ teaspoon minced garlic)
    • 1 bay leaf
    • 4 whole parsley stalks

    Dumplings:

    • 2 cups flour
    • 2 teaspoons baking powder
    • ½ teaspoon salt
    • 1 cup whole milk
    • 4 tablespoons vegetable oil

    Dumpling Sauce:

    • 4 tablespoons flour
    • 1 cup whole milk
    • 3 tablespoons butter
    • ½ teaspoon sugar
    • 1 cup chicken stock
    • 2 chicken bouillon cubes crushed

    Instructions
     

    Chicken Stock:

    • Put all ingredients in a large stock pot; bring to a boil, then reduce heat and simmer, covered, on low for 1 hour.
    • Remove chicken to a platter and set aside.
    • Remove and discard bay leaf and parsley stalks from chicken stock. leaving onions and celery inside. Leave broth in stockpot; you will use it to cook the dumplings and make the dumplings sauce.
    • Using a fork, pull chicken apart into bite sized pieces.

    Dumplings:

    • Add all ingredients to a large bowl. Using a spoon or spatula, mix until well blended.
    • Flour your hands and knead by hand 4 or 5 times, then form a ball, wrap in plastic wrap, and chill in refrigerator for half an hour.
    • On a floured surface, roll dough to ⅛” thick & cut dumplings into roughly 1” X 1-½” strips using a pizza wheel.
    • Drop dumplings in boiling chicken stock after chicken has been removed, and cook for 8-10 minutes, stirring occasionally to prevent dumplings from sticking together.
    • When finished cooking, remove with a slotted spoon. Place in a bowl and set aside.  

    Dumpling Sauce:

    • Whisk the flour thoroughly into cold milk until it is completely dissolved, then put in a deep skillet.
    • Add chicken stock and butter to skillet, and heat to a simmer on medium heat, whisking constantly. It's okay if some onion and celery pieces get into the dumpling sauce -- it adds to the flavor.
    • Whisk in sugar and crushed bouillon cubes until completely dissolved.
    • Increase heat to a low boil, stirring constantly until thickened. Turn heat down to low; add chicken pieces and cooked dumplings to the dumpling sauce. Heat through and serve. (Add additional chicken stock as needed if the mixture gets too thick.)

    Notes

    Reserve your leftover chicken stock in the refrigerator and use it to thin the dumpling sauce for leftovers. This will retain the original flavor rather than diluting it with milk.
    Refrigerate leftover chicken stock, dumpling dough, and dumpling sauce for up to 2 nights. 
    Freeze leftover chicken an dumplings in an airtight container for up to 3 months. It is recommended to let it come to room temperature before heating for best consistency.

    Nutrition

    Calories: 443kcalCarbohydrates: 44gProtein: 17gFat: 22gSaturated Fat: 8gPolyunsaturated Fat: 7gMonounsaturated Fat: 6gTrans Fat: 1gCholesterol: 49mgSodium: 1243mgPotassium: 348mgFiber: 2gSugar: 6gVitamin A: 457IUVitamin C: 2mgCalcium: 212mgIron: 3mg
    Keyword chicken, Cold weather dinners, comfort food dinners, dumplings, Kentucky main dish, southern main dish, winter dinners
    Tried this recipe?Let us know how it was!

    Let's Dish -- About The Pyrex Cinderella Serving Casserole - "Atomic Starburst"

    December 30, 2020

    Pyrex starburst cinderella casserole dish on a table
    Pyrex Cinderella Starburst Casserole Dish on a table

    I am absolutely awestruck by this rare and gorgeous Pyrex starburst casserole dish that I received from my sister and niece as a Christmas gift this year! I never thought I would see one in person, much less own one. To me, this dish is the Holy Grail of Pyrex.

    This model is a 575-B two-quart space-saver casserole that measures 9 ½"L x 6 ½"W x 2"D. Released in 1960, it originally came with a clear glass lid, cradle and double candle holder. Despite its popularity, the design was produced for only a year as a promotional piece.

    This iconic mid century casserole dish came in three colors; turquoise, black, and cream, all with an atomic gold star. The rarest color is cream, of which only a handful of pieces are known to exist in the world. The most coveted by collectors, however, is the turquoise.

    This particular Pyrex starburst casserole dish is in pristine condition, albeit missing the lid and stand which are much easier to acquire at a later date, if desired. There is a temptation to set it on a shelf and treat it as a museum piece. But for someone who loves cooking, that wouldn't be much fun! Though I'll treat it with kid gloves, this beauty will definitely get used in my kitchen and will be featured in recipe posts for years to come.

    Looking forward to sharing it with you!

    The French 75 is Pure Elegance in a Glass

    December 29, 2020

    two champagne glasses

    The French 75 Champagne drink is perfect for ringing in a new year with family and friends. But be careful -- as the name implies, it packs the punch of a French howitzer!

    two champagne glasses
    Toast your special occasions with a great French cocktail.

    A Classic Drink from the World War One Era that Still Works Today

    Many of the cocktails we write about don't have a clear history or inventor. The French 75 is an exception. It was created by Harry MacElhone at the New York Bar in Paris in 1915. It was probably inspired by the popular gin and Champagne cocktail of the mid-1860's. This drink was said to have a 'kick' as strong as a French 75 mm field howitzer, and that's how it got its name.

    I always think of the French 75 and the Sidecar as similar era cocktails. They evoke both an elegance and a power that cocktails today don't often have. The French 75 continued to be a popular cocktail long after WWI, and made appearances in classic films such as Casablanca and even a couple of John Wayne movies.

    This cocktail has become an alternative for other champagne-based drinks like the Champagne Cocktail and is often served to ring in the New Year.

    Ingredients for a French 75 Cocktail

    The star of this show is the Champagne but the supporting cast is equally important:

    • Dry gin
    • Lemon juice
    • Simple syrup
    • Dry Champagne

    Tips for a Successful '75

    Here's a few how-to's for making this drink:

    • Chill your glasses and ingredients first.
    • Always mix with a good-quality Champagne. I prefer to mix with a good California sparkling white wine.
    • Use an Extra Dry or Brut Champagne to mix with. Otherwise you may end up with an overly sweet cocktail.

    When do you drink a '75? Anytime? Or New Years Eve?

    two champagne glasses

    The French 75 is pure Elegance in a Glass

    Kevin Mayfield
    This turn of the century cocktail never goes out of style and is a great alternative to a Champagne Cocktail.
    5 from 2 votes
    Print Recipe Pin Recipe
    Prep Time 2 minutes mins
    Total Time 2 minutes mins
    Course Classic Cocktails
    Cuisine French
    Servings 1 Cocktail
    Calories 56 kcal

    Ingredients


    • 1 ounce gin
    • ½ ounce freshly squeezed lemon juice
    • 1-2 dashes of simple syrup
    • 2-4 ounces of Champagne

    Instructions
     

    • Add a scoop of ice to a cocktail shaker.
    • Pour in gin, lemon juice and simple syrup and shake for about 20 seconds.
    • Strain into a chilled Champagne flute and fill with Champagne.
    • Add a lemon peel twist for garnish.

    Notes

    Even though you are mixing, use a quality Champagne. The taste of inferior spirits will come through.
    I prefer a dry or brut champagne, as it will pair better with the botanical gin.
    You can substitute Cognac for the gin (but then you are getting close to a Champagne Cocktail)

    Nutrition

    Calories: 56kcalCarbohydrates: 7gProtein: 1gFat: 1gSaturated Fat: 1gPolyunsaturated Fat: 1gMonounsaturated Fat: 1gSodium: 8mgPotassium: 183mgFiber: 1gSugar: 2gVitamin A: 1IUVitamin C: 7mgCalcium: 11mgIron: 1mg
    Keyword Champagne drinks, French 75, French cocktails, New Years cocktails
    Tried this recipe?Let us know how it was!

    Bacon and Asparagus Quiche Recipe

    December 28, 2020

    Bacon asparagus quiche in a pie plate

    This savory bacon and asparagus quiche is packed with protein for a warm and hearty start to your day!

    Bacon asparagus quiche in a pie plate

    Quiche Originated in Germany, Not France

    Though quiche is largely thought of as French cuisine, it actually originated in Lothringen, Germany. It has since become a French territory now known as Alsace-Lorraine, which is where the name quiche Lorraine comes from. The first written reference to the dish came in 1805, although evidence suggests it was invented a few hundred years earlier.

    Quiche Lorraine started out as an egg, cream and bacon pie in a brioche pastry crust, with no cheese. It's hard to imagine quiche without cheese! The French experimented with the dish by using a traditional pastry crust and adding fresh vegetables and seafoods like shrimp and scallops, as well as different varieties of cheese. They turned it into the dish that we know and love today.

    WWII Soldiers Made Quiche an American Mid Century Sensation

    By the time WWII had started, quiche had become popular in England. American soldiers that were stationed there became fond of it, and brought the recipe home when they returned from the war. The dish then became extremely popular in mid century in the United States. Unlike most U.S. meals it could be served hot or cold, and was an appropriate breakfast, lunch, or dinner entree.

    Contrary to Popular Belief, Bacon Asparagus Quiche is Easy To Make

    Many people are surprised when I serve quiche because they perceive it to be difficult to make. It's actually an easy dish to make and makes a big impression. Think of it as a morning casserole -- you toss everything together and pop it in the oven. What could be easier than that?

    Single slice of bacon and asparagus quiche on a small plate with a fork

    I enjoy making my own quiche crust, but it's faster and easier to buy a roll-out or pre-made unbaked pie crust from the grocery store. And since the egg filling dominates the taste, you won't be harming the flavor at all.

    Hints For Making Bacon and Asparagus Quiche

    • Prepare your crust first, then set it in the freezer while you prepare the quiche. Quiche turns out best when baked in an ice cold crust.
    • Cook and chop the bacon and asparagus second, and set it aside until you need it.
    • Monitor your quiche toward the end of baking, but try to do so without opening the oven door too frequently. Make sure it is browned on top and a toothpick inserted in the center comes out clean. If you remove it from the oven too soon, the center will cave in.

    Feel free to experiment with different shredded cheeses and chopped vegetables in your quiche. I like to switch between chopped broccoli and chopped asparagus when I make this recipe.

    As mentioned earlier, you can serve quiche for any meal, hot or cold! Enjoy!

    Bacon asparagus quiche in a pie plate

    Bacon and Asparagus Quiche

    Nancy Blackstone
    This savory bacon and asparagus quiche is packed with protein for a warm and hearty start to your day!
    5 from 3 votes
    Print Recipe Pin Recipe
    Prep Time 20 minutes mins
    Cook Time 40 minutes mins
    Total Time 1 hour hr
    Course Breakfasts
    Cuisine French - German
    Servings 8 Servings
    Calories 404 kcal

    Ingredients


    • 1 9-inch unbaked pie crust
    • 1 bunch asparagus tips chopped
    • 4 slices crisp bacon cooked and crumbled, divided
    • 4 large eggs
    • 1 ½ cups heavy cream
    • 1 cup shredded cheddar jack cheese divided
    • 1 small bunch green onions chopped
    • ¼ teaspoon sea salt
    • ¼ teaspoon black pepper

    Instructions
     

    • Preheat oven to 375 degrees.
    • Follow package directions to prepare refrigerated pie crust. When it's in your pie plate, poke holes in the bottom with a fork to avoid bubbling. When it is ready, place it in the freezer until you are ready to assemble the quiche.
    • Cook and crumble the bacon.
    • Boil a small pot of water and cook the asparagus tips for 4 minutes. Drain in colander and rinse in cold water.
    • In a mixing bowl, whisk the eggs. Then add the heavy cream, half of the cheese, the green onions, salt, and pepper.
    • Remove your pie crust from the freezer. Put the asparagus and ¾ of the bacon in the bottom of the pie shell. 
    • Pour the egg mixture over the asparagus and bacon.
    • Top with remaining ½ cup of cheese and remaining bacon.
    • Bake for 40-45 minutes or until top of quiche is browned and wooden toothpick inserted in center comes out clean.
    • Let sit for 5 minutes before cutting and serving.

    Notes

    You can substitute different types of shredded cheese for the cheddar jack. Cheddar and Monterey Jack are my favorites, but I've even tossed in a bit of mozzarella when I've fallen short on cheddar.
    You can substitute chopped broccoli for the chopped asparagus if you prefer.
    Make sure you use heavy cream in the recipe or the quiche will not turn out.

    Nutrition

    Calories: 404kcalCarbohydrates: 15gProtein: 12gFat: 34gSaturated Fat: 17gPolyunsaturated Fat: 3gMonounsaturated Fat: 12gTrans Fat: 1gCholesterol: 176mgSodium: 376mgPotassium: 247mgFiber: 2gSugar: 1gVitamin A: 1392IUVitamin C: 4mgCalcium: 165mgIron: 2mg
    Keyword breakfast casserole, breakfast quiche, high protein breakfast, holiday breakfast, mid century breakfast, special occasion breakfast
    Tried this recipe?Let us know how it was!

    The Americano Cocktail is a Delicious Classic

    December 25, 2020

    An Americano cocktail with an orange wheel in a bar setting

    The Americano Cocktail was well known even before Ian Fleming included it in his spy novels.

    An Americano cocktail with an orange wheel in a bar setting
    Looking for a tangy, refreshing cocktail on a summer day? Or an aperitif with some bite? Look no further than this European delight.

    The Americano Cocktail is a Mid Century Delight

    This drink has been around since the mid-1860's and is said to have originated in Milan by bartender and inventor, Gaspare Campari. Campari is classified as an aperitif, meaning an alcoholic drink that is said to stimulate the appetite. These drinks tend to be more bitter than sweet.

    It was originally called a "Milan-Torino" or "Mi-To" for short, because it used ingredients from both Milan (Campari) and Torino (sweet vermouth). This early version was missing the splash of sparkling water. It is said that the name Americano came about because so many American tourists enjoyed it while traveling in Milan during Prohibition. It became a mid century favorite thanks to everyone's favorite spy, Bond. James Bond.

    James Bond's First Cocktail

    Fans of James Bond all know the story of the Vesper and the fact that he prefers his Martinis to be shaken and not stirred. But they may not know that Ian Fleming had Bond drink an Americano as his first cocktail in 1953's book, Casino Royale.

    Ingredients for an Americano Cocktail

    Okay, I admit that I make my Americanos with just a slight deviation. As you probably have guessed by now, I am a fan of Dubonnet. I use it in my Manhattan cocktails and several others. Dubonnet is technically not a vermouth. but it has been used interchangeably by fans for many decades. Here's what you need for this simple, but delicious drink:

    • Campari
    • Sweet vermouth
    • Sparkling water or club soda (these terms are used interchangeably)

    I prefer to use my classic ISI Sodamaker when I need a spritz to top off a drink with sparkling water. But Ian Fleming saw things differently. He was a fan of Perrier. As he wrote, "expensive soda water was the cheapest way to improve a poor drink."

    Tips for Success

    There's not much to making an Americano, just remember to use equal amounts of the ingredients and you can't go wrong. But keep the following pointers in mind:

    • Depending on how truly authentic you want to go, you can use either a lemon wedge or an orange wedge as a garnish. I prefer the orange because it gives this very dry drink a little sweetness.
    • If you're not a big Dubonnet fan, by all means use a vermouth such as Cinzano Rosso. While I didn't use it for this post, I did include my mid century Cinzano ashtray in the picture as a small hat-tip to that excellent vermouth.

    How do you prefer your Americano cocktail? Before dinner? Or sipped on a hot day to cool off?

    An Americano cocktail with an orange wheel in a bar setting

    The Americano Cocktail is a Delicious Classic

    Kevin Mayfield
    You don't need to be a brilliant spy to know that the Americano is perfect before a meal or on a hot day outside a lovely cafe.
    5 from 1 vote
    Print Recipe Pin Recipe
    Prep Time 2 minutes mins
    Total Time 2 minutes mins
    Course Classic Cocktails
    Cuisine American
    Servings 1 Cocktail
    Calories 148 kcal

    Ingredients


    • 1 ½ ounces Campari
    • 1 ½ ounces Sweet Vermouth
    • Splash of sparkling water
    • Orange slice

    Instructions
     

    • Add one scoop of ice to an old fashion glass
    • Pour in the Campari and vermouth, and stir to mix
    • Add a splash of sparkling water
    • Add orange garnish (or lemon, if you prefer)

    Notes

    Use a tall high-ball glass and add more sparkling water for a more refreshing cocktail

    Nutrition

    Calories: 148kcalCarbohydrates: 13gProtein: 1g
    Keyword Americano, Campari, Casino Royale cocktail, Ian Fleming cocktail, James Bond cocktail, madmen cocktails, mid century cocktail, rat pack cocktails
    Tried this recipe?Let us know how it was!

    Giant Holiday Ice Cubes - Fun and Festive

    December 23, 2020

    3 giant holiday ice cubes filled with cranberries and rosemary are stacked on a wooden cutting board

    These fun and festive giant holiday ice cubes are a cute addition to cocktail glasses or pitchers of holiday punch.

    Stack of 4 giant holiday ice cubes with cranberries and rosemary inside

    Add A Little Fun To Your Holiday Drinks

    This is one of those small details that is a great conversation starter (dare I say ice breaker?) at a holiday gathering. And with almost no fuss at all!

    These particular ice cubes have fresh cranberries and fresh rosemary sprigs inside of them, but you can add any virtually any small, fresh produce.

    You Need Giant Ice Cube Molds

    You need a giant ice cube mold for a couple of reasons. First, you want enough space in the ice cube to fit a couple of items. Second, you want them to last a while so that people can enjoy them, and if they are small they will melt very quickly. I make 2-inch cubes which last for hours in a cold drink. Mine were still in tact in a pitcher of punch that I put in the refrigerator overnight!

    Distilled Water is Recommended

    You can use regular tap water to make the ice cubes, but they tend to come out quite cloudy. I used distilled water to make my ice cubes. They still have some cloudiness, but you can definitely see the contents of the ice cube. For very clear cubes you should use water that has been boiled. See a chemist's instructions for making crystal clear ice cubes here: https://www.thoughtco.com/crystal-clear-ice-cubes-3980638.

    Steps To Make Holiday Ice Cubes

    • Add water to ice cube molds until they are ⅓ - ½ full. Let set for about 2 hours.
    • Add in several cranberries and a sprig or two of rosemary. Let set for another hour.
    • Add water to fill ice cube molds to the top. Freeze thoroughly.

    Serve with your favorite cocktail or in a festive holiday punch and enjoy!

    Non-Alcoholic Holiday Punch is a Festive Treat

    December 21, 2020

    A punch glass filled with holiday punch and garnished with a sliced orange and cranberry.

    This delicious non-alcoholic punch is a fruity, flavorful, and colorful addition to your holiday table! Serve with hors d'oeuvres or as a refreshing drink with brunch.

    A pitcher of pink non alcoholic holiday punch with slices of orange and cranberries inside, with

    A Special Non Alcoholic Punch The Whole Family Can Enjoy

    Holidays are a time when you serve things you don't normally make during the rest of the year. Of course this includes main dishes and desserts, but don't forget about drinks!

    This is a festive and tasty non alcoholic punch that's perfect for anyone who prefers to skip alcohol. It's something you normally don't keep in your 'fridge, so the kids find it extra special, too. Plus, the juice in it will satisfy your vitamin C requirement for the day!

    Here's what you'll need:

    • Pineapple juice
    • Cranberry juice blend (not cranberry juice cocktail)
    • Ginger ale
    • Cranberries for garnish
    • Fresh slices of oranges for garnish
    • Decorative ice cubes, if desired

    One of the problems I have with punch recipes is that they tend to make a huge quantity. I just make it a pitcher at a time and keep it in the refrigerator for a taste of the holidays whenever the mood strikes me.

    This punch does call for carbonated ginger ale in it, and it gives it a nice fizz when you serve it fresh. Once it sits in the refrigerator for a while the fizz lessens. Normally I don't care for soda once it has lost its carbonation, but inside this juicy punch it doesn't bother me. It still tastes great a day or two after you make it, so don't worry about letting it sit for a while.

    Can I Spike It?

    Of course! If you want to give it some kick, I prefer a shot of gin or rum as they seem to mix well with the fruity flavor of the punch. There are no hard and fast rules, so add a bit of your favorite spirit. Vodka, Bourbon, tequila -- whatever you fancy!

    A punch glass filled with holiday punch and garnished with a sliced orange and cranberry.

    Non-Alcoholic Holiday Punch is a Festive Treat

    Nancy Blackstone
    This delicious non-alcoholic punch is a fruity, flavorful, and colorful addition to your holiday table! Serve with hors d'oeuvres or as a refreshing drink with brunch.
    5 from 2 votes
    Print Recipe Pin Recipe
    Prep Time 5 minutes mins
    Cook Time 0 minutes mins
    Total Time 5 minutes mins
    Course Drinks
    Cuisine American
    Servings 16 Servings
    Calories 49 kcal

    Ingredients


    • 2 cups pineapple juice cold
    • 2 cups cranberry juice cold
    • 32 ounces ginger ale cold
    • slices of fresh oranges
    • cranberries

    Instructions
     

    • Mix ingredients together in a large pitcher.
    • Float slices of oranges and cranberries in the pitcher.
    • Add decorative ice cubes if you have made them (optional.)
    • If desired, garnish glasses with an orange slice and a few cranberries when serving. 

    Nutrition

    Calories: 49kcalCarbohydrates: 13gProtein: 1gFat: 1gSaturated Fat: 1gPolyunsaturated Fat: 1gMonounsaturated Fat: 1gSodium: 5mgPotassium: 63mgFiber: 1gSugar: 12gVitamin A: 16IUVitamin C: 6mgCalcium: 8mgIron: 1mg
    Keyword Birthday punch, Christmas punch, Festive punch, Gingerale punch, Holiday punch, Old fashioned punch, Thanksgiving punch, Winter punch
    Tried this recipe?Let us know how it was!

    How to Make the Perfect Maple Manhattan Cocktail

    December 19, 2020

    Closeup of a maple manhattan in a coupe glass

    Elevate your cocktail experience and savor the taste of fall in a glass with the Maple Manhattan. It's a sweet and warm cocktail for cool autumn nights, and might just be the perfect Manhattan.

    Closeup of a maple manhattan in a coupe glass
    A sweet take on a classic cocktail

    One Little Change Has a Big Impact

    Now that the weather has turned chilly, a cool evening is the perfect time for a strong cocktail. This fall cocktail recipe is a variation on the classic Manhattan cocktail. No one seems to be quite sure where this variation started. I like to think it was created by a bartender at one of the small ski lodges off the slopes in Vermont. I've read that it may have started at The 21 Club in New York, but who really knows?

    Many recipes call for 2 ounces rye whiskey, but I prefer to stick pretty close to the original recipe and use Bourbon. I do slightly change things up by calling for a spicy Bourbon, such as Henry McKenna Single Barrel.

    What Is Maple Syrup?

    Pure Maple syrup is made from the tree sap of the sugar maple and various other maple trees. When we lived in the midwest, our house sat on a couple of acres in a forest that had many sugar maples. One of our neighbors used to tap the trees in our area by drilling holes in them and attaching plastic tubing that drained the sap into small barrels. Once he'd collected enough, he would then spend a day boiling it down in his backyard to form the syrup. Since we always let him tap our trees, he'd give us some free bottles of it. One of my favorite things to use it for was making a maple Manhattan. Now that live in LA, we just buy syrup at the store like everybody else -- and it's pricey!

    Our friends to the north in Canada are the world's leading producers of maple syrup, and developed a grading system that we have adopted here in the US. It can be a bit confusing, but try to purchase a Grade A Light Amber for a quality tasting syrup. Be sure to choose genuine maple syrup and not maple flavored pancake syrup -- they are not the same thing. The maple flavored syrup is basically a sugar syrup with artificial flavoring in it. It's much less expensive and has an inferior taste to the real thing.

    If you really want to splurge, treat yourself to the Pappy Van Winkle Bourbon Barrel-Aged Maple Syrup. This is a pure infused maple syrup with the flavors of vanilla, caramel, butter, and oak, and will definitely elevate your cocktail experience!

    Ingredients for a Maple Manhattan

    If you are a regular Manhattan drinker, you probably already have everything you need to make this one.

    • Your favorite Bourbon, or if you prefer, Knob Creek Rye
    • Sweet vermouth (not dry vermouth)
    • Maple syrup (which takes the place of a simple syrup)
    • Bitters
    • Maraschino cherry

    As you can see, it is not that different from a classic Manhattan cocktail or even an Old Fashioned.

    Bar Tools Needed

    Like a traditional Manhattan, this cocktail is popular because it is so easy to make --and simple cocktails are the best cocktails. It doesn't 'require' any special tools, but here are a few basics your bar most likely already has that will make a good drink every time out:

    • Cocktail shaker instead of a mixing glass
    • Jigger
    • Strainer
    • Bar spoon

    How to Serve this Cocktail

    A note about the glass for a Maple Manhattan:  I've seen many places serve it in a cocktail glass or a rocks glass, but I've always preferred to drink this in a coupe glass. Because the glass is stemmed, my hand doesn't warm it up and the broad bowl lets me enjoy the smell of the drink and really engage my senses.

    Tips for Success

    It's hard to go wrong with a classic whiskey drink, but here are a few things to keep in mind:

    • Use a quality Bourbon when mixing cocktails. Even with a sweet syrup, a poor spirit will shine through and turn your cocktail into a harsh-tasting near-miss.
    • Use a higher graded maple syrup. It will cost more, but it will have even better flavor.

    Which do you prefer in your Maple Manhattan, Rye or Bourbon? There are some places that make this drink with a slight twist, the Maple Bacon Manhattan, but I find adding bacon to a cocktail makes it a bit too savory for my tastes.

    Before you go, did you try this cocktail? Why not leave a comment in the Comments section along with a rating? I always appreciate hearing from you and getting your feedback.

    Closeup of a maple manhattan in a coupe glass

    A Maple Manhattan is Sweet Take on a Classic Cocktail

    Kevin Mayfield
    The sweet-tasting Maple Syrup Manhattan is perfect on cold winter nights.
    5 from 3 votes
    Print Recipe Pin Recipe
    Prep Time 2 minutes mins
    Total Time 2 minutes mins
    Course Classic Cocktails
    Cuisine American
    Servings 1 Cocktail
    Calories 172 kcal

    Ingredients


    • 1 jigger Bourbon
    • ½ Ounce Sweet Vermouth
    • 1 Tablespoon Maple Syrup
    • 2-3 dashes Angostura Bitters
    • 1-2 Luxardo Cherries

    Instructions
     

    • Add one scoop of fresh ice to a cocktail shaker
    • Pour in all ingredients 
    • Shake for about 20 seconds and then strain into a cocktail or coupe glass
    • Garnish with a Luxardo Cherry

    Notes

    Feel free to use rye whiskey rather than Bourbon. Bulleit makes a good one.

    Nutrition

    Calories: 172kcalCarbohydrates: 15gProtein: 1gSodium: 2mgPotassium: 46mgSugar: 12gCalcium: 22mgIron: 1mg
    Keyword Manhattan, Manhattan Variations, Maple Manhattan, Winter Cocktails
    Tried this recipe?Let us know how it was!

    James Bond's Vesper Martini Cocktail

    December 18, 2020

    A Vesper Martini in a chilled cocktail glass with bottles and lemons in the background

    You don't need to be an international man of mystery to enjoy this twist on a traditional Martini. The Vesper Martini is refreshing and packs a punch like a Walther PPK slug to the chest.

    A Vesper Martini in a chilled cocktail glass with bottles and lemons in the background
    Whether shaken or stirred this variation of the classic Martini will quench your thirst....for adventure!

    The Making of a Legend

    If you have watched many James Bond movies you've no doubt heard him order a Vodka Martini, but unless you've seen the movie Casino Royale or read the book, you may not know this drink. Many people are familiar with Bond's alter ego and creator, Ian Fleming. Fleming was born in a posh suburb of London in 1908. During the Second World War Fleming was recruited to work in British Naval Intelligence. It was here that he gained the experience he needed to create a realistic spy for his future novels.

    After the war, Fleming worked in Jamaica while running a newspaper. He also wrote his first bond novel, Casino Royale in 1953. Similar to Ernest Hemingway incorporating his own drink recipe into his book, Death In the Afternoon, Fleming created his own cocktail for his protagonist. The Vesper is slightly different from a Martini in that it contains both Gin and Vodka, substitutes a lemon peel for olives, and lastly contains Kina Lillet instead of a dry vermouth.

    The Vesper Martini is Old and New

    Fleming was very specific about how Bond ordered the drink and the amounts of alcohol it contained. "Just a moment. Three measures of Gordon’s, one of vodka, half a measure of Kina Lillet. Shake it very well until it's ice-cold, then add a large, thin slice of lemon peel. Got it?" Based on a classic Martini, the Vesper didn't even have a name until a later chapter in the book.

    It's a little tricky to make this one like Fleming enjoyed it, because the spirits used in 1953 are no longer available. For example, Gordon's does not make the same proof gin, and Kina Lillet was discontinued in 1986.

    To make this I recommend a dry gin like Bombay. And even though you can still buy a modern version of Lillet, it doesn't contain the quinine that the older version had so it tastes very different.

    Cocchi Americano contains quinine and is often substituted since it is closer to the original. Lastly, choose a strong vodka that is as close to 100 proof as you can take -- and make sure it is a grain-based vodka as Bond recommended, rather than a potato based one.

    Shaken Not Stirred?

    Ever since the first book there's been a debate about why Bond drinks his cocktails "shaken, not stirred." Purists contend that shaking the cocktail results in splinters of ice diluting it, therefore it should be stirred for a better tasting drink.

    But this cocktail is so strong that a little bit of watering down is not necessarily a bad thing! And if you're a daring spy in the middle of a mission for King and Country, can you afford to be under the influence?

    Ingredients for a Sublime Vesper Martini

    Here's all you need to crack the code on a Vesper:

    • Dry Gin
    • Vodka
    • White Vermouth

    Just add a lemon twist and you're all set.

    Tips for Success

    This drink has just a few 'rules' to follow to get it close to Ian Fleming's ideal:

    • Use a quality dry gin to give the drink a crisp taste.
    • Keep the ingredients as cold as possible. This drink is best enjoyed when served ice cold.
    • Use the proper vermouth, Cocchi Americano, which still contains quinine.

    Frequently Asked Questions

    What is the martini that James Bond drinks in Casino Royale?

    The character James Bond orders a variation on a Martini that he dubs a Vesper, after his love interest, Vesper Lynd.

    What is James Bond's Favorite cocktail?

    James Bond consumes several different drinks in the Ian Fleming books from an Americano to the Rum Collins. And of course a Vesper Martini. But we usually see Bond drink a Martini.

    What does a Vesper martini taste like?

    The Vesper is a strong drink when mixed well offers notes grain from the vodka, sweetness from the Cocchi and herbal from the gin. It tastes strongly of alcohol though.

    Similar Cocktails:

    You may also enjoy these other James Bond cocktails:

    Classic Martini Cocktail Recipe

    The Rum Collins is Good Enough to Die For

    The Americano Cocktail is a Delicious Classic

    Do you have a preference for how you like your Vesper, shaken or stirred?

    A Vesper Martini in a chilled cocktail glass with bottles and lemons in the background

    James Bond's Vesper Martini Cocktail

    Kevin Mayfield
    This literary twist on a Martini is a wickedly good-tasting cocktail.
    5 from 1 vote
    Print Recipe Pin Recipe
    Prep Time 2 minutes mins
    Total Time 2 minutes mins
    Course Classic Cocktails
    Cuisine American
    Servings 1 Cocktail
    Calories 274 kcal

    Ingredients


    • 3 Ounces Dry Gin
    • 1 Ounce Vodka
    • ½ Ounce Cocchi Americano
    • Lemon peel twist

    Instructions
     

    • Place a scoop of ice in a cocktail shaker.
    • Add all ingredients.
    • Shake for 20 seconds and strain into a cocktail glass.
    • Add a lemon twist for garnish.

    Notes

    Ensure you use the right type of vermouth, with quinine, if you want this drink to taste like what Ian Fleming had in mind.
    Use chilled ingredients poured into a chilled glass to enjoy this drink ice cold.

    Nutrition

    Calories: 274kcalCarbohydrates: 1gProtein: 1gSodium: 2mgPotassium: 16mgSugar: 1gCalcium: 1mgIron: 1mg
    Keyword Cocchi Americano, Gin Cocktails, Ian Fleming cocktail, James Bond cocktail, Martini, Movie Cocktails, Shaken not stirred, Vesper, vodka cocktails
    Tried this recipe?Let us know how it was!

    Fast and Easy Homemade Kentucky Biscuits

    December 15, 2020

    Biscuits stacked on a plate with butter and preserves

    There's nothing like waking up to the smell of hot, fresh homemade biscuits baking in the oven. What a heavenly way to start the day!

    Biscuits stacked on a plate with butter and preserves
    Nothing beats starting the day with hot, flaky homemade biscuits.

    Homemade Biscuits were a Staple growing up in Kentucky

    When I was growing up, I spent many summers with my grandmother in southeastern Kentucky. At first it was quite a culture shock going from the suburbs of Chicago to the very rural lifestyle of Appalachia. I used to joke that it was 600 miles and 75 years away from our modern home!

    I really enjoyed spending every day out hunting, fishing and hiking from dawn 'til dusk. It was peaceful and not unusual to go an entire day without seeing another person. I also began to appreciate the time with my only grandparent, and listening to her stories about growing up back in the depression.

    Every morning my grandmother made a big, hearty breakfast, and everything was made from scratch. The nearest store was miles away and she had no way to get there because she didn't drive or own a car. So there were no store-bought biscuits in her house!

    Way back in the hollows of Kentucky you'd have been pretty hard pressed to point out modern improvements or changes from her early life. Eventually, I began to hang around with her and we'd talk as she cooked. Little did I know at the time that as she went over those recipes and techniques, she was subtly passing down a big part of her knowledge and culture to a new generation -- me!

    Just a Few Simple Ingredients Are All You Need

    These biscuits are so simple that you probably already have everything you need right in your pantry:

    • All Purpose Flour
    • Baking Soda
    • Shortening
    • Salt
    • Milk

    Not only are they super simple to mix up, but it only takes a few minutes to put it all together.

    Hints For Making Homemade Biscuits

    With only a few ingredients that you probably already have, you can whip up a batch of hot, flaky biscuits in no time. A few things to keep in mind as you make the dough:

    1. Cut the shortening into the flour mixture with a large fork until it takes on a grainy, pebble-y consistency.
    2. Slowly pour the milk in, mixing as you go. If it's too dry, you may need to add a little more milk along the way.
    3. Use your hands to push and pat the dough flat. No need for a rolling pin here!
    • 1. Slightly pebble-y flour and shortening mixture
    • 2. The mixture with the milk
    • A series of process photos for making homemade biscuits
      3. Dough flattened by hand
    Steps for making biscuit dough

    A Couple of Ingredients Tips

    • Use cold shortening when mixing with the flour to ensure they mix well.
    • Use whole milk so they turn out fluffy and full.

    What do you prefer to top your biscuits with, butter, jelly or sausage gravy?

    Biscuits stacked on a plate with butter and preserves

    Fast and Simple Homemade Biscuits

    Kevin Mayfield
    These fast homemade biscuits mix up in minutes and come out flaky and tender every time.
    5 from 1 vote
    Print Recipe Pin Recipe
    Prep Time 5 minutes mins
    Cook Time 10 minutes mins
    Total Time 15 minutes mins
    Course Breakfast
    Cuisine American
    Servings 12 Biscuits
    Calories 165 kcal

    Ingredients


    • 2 Cups All Purpose Flour
    • 2 Tablespoons Baking Powder
    • ½ Teaspoon Salt
    • ½ Cup Shortening
    • 1 Cup Whole Milk

    Instructions
     

    • Pre-heat oven to 450 degrees.
    • In a large mixing bowl, use a sifter to add the dry ingredients.
    • Cut in the cold shortening using a fork until it develops a pebble-like consistency.
    • Slowly pour in the cold milk, mixing with a fork until the dough becomes tacky and forms into a large ball.
    • Place the dough ball on a large, lightly floured surface.
    • Using your hands, knead the ball a few times and pat down into a flat ½ inch thick layer -- no need for a rolling pin.
    • Using a biscuit cutter, cut out individual biscuits and place them on an ungreased cookie sheet. 
    • Combine the dough pieces and form them back into a flat layer to cut more biscuits, until all the dough is used up. You should have about a dozen biscuits; it will vary slightly depending on the size and thickness. 

    Notes

    You can substitute butter for shortening, but the biscuits may not be as fluffy.
    Keep your wet ingredients as cold as possible to ensure they mix in properly.
    Add the milk slowly and mix as you go, making sure the dough does not get too wet.

    Nutrition

    Calories: 165kcalCarbohydrates: 17gProtein: 3gFat: 9gSaturated Fat: 3gPolyunsaturated Fat: 3gMonounsaturated Fat: 4gTrans Fat: 1gCholesterol: 2mgSodium: 318mgPotassium: 50mgFiber: 1gSugar: 1gVitamin A: 33IUCalcium: 144mgIron: 1mg
    Keyword Biscuits and Gravy, Homemade Biscuits, old fashioned biscuits, Simple Biscuits, Southern style biscuits
    Tried this recipe?Let us know how it was!

    Old Fashioned Peanut Butter Cookies

    December 14, 2020

    Close up image of 3 peanut butter cookies on a dessert plate

    These old fashioned peanut butter cookies are soft and chewy with a hint of peanut crunch. Just like Grandma used to make!

    Peanut butter cookies on a dessert plate with a glass of milk next to it and a platter of peanut butter cookies behind it
    Old fashioned peanut butter cookies

    When my Grandma made cookies, there were always a few regulars on the cookie plate. They included butter cookies, sugar cookies, and these -- old fashioned peanut butter cookies with a criss-cross pattern on top!

    People seem to either love peanut butter or hate it. But if you love it, then you will love these cookies! They have a soft and chewy texture, a creamy peanut butter taste, and just a little bit of crunch from the ground peanuts. Yum!

    An American Original

    Peanut butter cookies first appeared in cookbooks in the 1930's, and mid century children quickly fell in love them. Washington Carver (1864-1943), famed agricultural scientist, inventor, and professor at the Tuskegee Institute, invented them. He was promoting peanuts to farmers as an alternative crop to cotton when beetles were destroying cotton crops. Carver came up with many uses for peanuts, his most famous being cookies!

    Why The Criss Cross on Top?

    The signature criss-cross design on the peanut butter cookie is not only decorative, it actually serves a purpose. Pressing the cookies down flattens them so that they can bake evenly. The cookie packed with peanut butter is so dense that if it were not pressed down, it would not bake thoroughly.

    Hints For Peanut Butter Cookie Success

    Peanut butter cookie ingredients
    Peanut Butter Cookie Ingredients

    You probably keep all the ingredients for peanut butter cookies in your cupboard, except maybe the peanuts. I bought a jar of roasted, salted peanuts from the grocery store and then used a handy nut grinder on the "fine grind" setting to get the small, even pieces I needed.

    Keep the following things in mind when making these tasty cookies:

    • Use a good quality, non-greasy peanut butter. I use Jiff creamy peanut butter.
    • Chill the dough before baking. It's tempting to skip this step, but the cookies are easier to form and to make the criss-crosses in when the dough is cold.
    • Use a food processor or blender and pulse the peanuts to a fine grind if you don't have a nut grinder.

    Kids still name peanut butter as one of their favorite cookies, but big kids (me!) like them, too! These are the best ones I've ever had. Give them a try and let me know what you think.

    If you love cookies, try our favorite Chocolate Frosted Pecan Cookies while you're in the mood for baking!

    Close up image of 3 peanut butter cookies on a dessert plate

    Old Fashioned Peanut Butter Cookies

    Nancy Blackstone
    These old fashioned peanut butter cookies are soft and chewy with a hint of peanut crunch. Just like Grandma used to make!
    5 from 1 vote
    Print Recipe Pin Recipe
    Prep Time 1 hour hr 15 minutes mins
    Cook Time 10 minutes mins
    Total Time 1 hour hr 25 minutes mins
    Course Dessert
    Cuisine American
    Servings 24 cookies
    Calories 288 kcal

    Ingredients


    • 1 cup butter room temperature
    • 1 cup sugar
    • 1 cup brown sugar
    • 2 large eggs
    • 2 teaspoons vanilla
    • 1 cup creamy peanut butter
    • 2 ½ cups flour
    • ½ teaspoon baking soda
    • 1 teaspoon baking powder
    • 1 cup roasted salted peanuts finely ground

    Instructions
     

    • Set aside a small plate with granulated sugar (about 3 tablespoons.)
    • In a large bowl, mix butter, sugar and brown sugar with an electric mixer until consistency is fluffy.
    • Mix in eggs and vanilla until thoroughly combined.
    • Using a spatula, mix in peanut butter, then add flour, baking soda, and baking powder, stirring by hand.
    • Fold in ground peanuts.
    • Chill dough for one hour.
    • Preheat oven to 350 degrees.
    • Using a cookie scooper or tablespoon, roll cookies into evenly sized balls roughly 2-inches in diameter, then roll the balls in granulated sugar.
    • Place on a non-stick cookie sheet or a cookie sheet lined with parchment paper. Using the back of a fork, press down on the cookie to flatten it and make a criss cross design.
    • Bake 10-12 minutes or until edges begin to turn a light golden brown.

    Notes

    Be careful not to over bake or the cookies will be crunchy rather than soft and chewy.

    Nutrition

    Calories: 288kcalCarbohydrates: 31gProtein: 6gFat: 17gSaturated Fat: 7gPolyunsaturated Fat: 3gMonounsaturated Fat: 6gTrans Fat: 1gCholesterol: 36mgSodium: 193mgPotassium: 152mgFiber: 2gSugar: 18gVitamin A: 259IUCalcium: 35mgIron: 1mg
    Keyword Christmas cookies, holiday cookies, mid century cookies, peanut butter
    Tried this recipe?Let us know how it was!

    Let's Dish About Dorothy Thorpe Iconic Cocktail Glasses

    December 9, 2020

    Two examples of Dorothy Thorpe glasses

    You may not realize it, but Dorothy Thorpe glassware has been featured in many of your favorite shows.

    Two examples of Dorothy Thorpe glasses
    Two classic cocktails in mid century classic glasses, a highball and an old fashioned.

    Dorothy Thorpe was ahead of her time

    Before I became a fan of all things mid century modern, I had not heard of Dorothy Thorpe. However, I was already familiar with her cocktail glasses. That's because I had seen them so many times in movies and television shows without knowing what they were.

    Several years ago Nancy gave me a pair of nice rocks glasses with a cool platinum silver stripe around the rim that I used for serving Old Fashioned cocktails. They reminded me of the ones used by Don Draper in Mad Men. And recently while watching an episode of the early 70's detective show, Banacek, I noticed the suave millionaire also served cocktails in the iconic silver rimmed glasses.

    When we started shopping thrift stores and antique markets trying to find mid century items, I started seeing some sets of glasses with silver hand painted rims that were very badly tarnished and also very pricey! That's when I discovered genuine hand painted Dorothy Thorpe glasses.

    Dorothy Thorpe was born in Salt Lake City, Utah in 1901. She and her husband lived in Los Angeles where she became a prominent mid century artist. After selling some of her original items to a Hollywood gift shop, studios took notice and began buying up her merchandise. She would go on to design many prized glassware creations over the years.

    Dorothy did not manufacture the glassware or dinnerware herself. Instead, she would purchase 'blanks' from companies such as Libby and Federal, and then work her magic. She used techniques such as sandblasting and hand-painting to create mid century classics that today are highly collectible.

    I have used these glasses on some cocktail posts you may have seen, such as the Tom Collins recipe. I've even used my 'tribute' glass for the Martini post. While it is not an original, it has the look and feel of a Dorothy Thorpe glass, but it was much more affordable and I never have to worry about breaking it. One way to tell an original from a more recent copycat glass is to inspect the silver. If it is shiny and perfect, it's probably not an original. By this time, her original glasses have taken on a bit of patina.

    I only have a handful of original Dorothy Thorpe glasses, but I'm always on the lookout for more--at the right price, of course!

    Austrian Crescent Cookies With Powdered Sugar Topping

    December 7, 2020

    dessert plate with 3 crescent cookies next to a cup of coffee

    These almond crescent cookies are light, flaky, traditional Christmas cookies that should be part of your annual baking ritual!

    A plate with 3 crescent cookies on it next to a cup of coffee, with a serving tray of cookies in th background
    Austrian vanillekipferl, aka almond crescent cookies

    Crescent Cookies Are An Old Austrian Tradition

    Almond crescent cookies are a traditional shortbread holiday cookie that originated in Austria in the 13th century. Also popular throughout other European countries such as Hungary and Germany, they became known worldwide largely through Germany's influence in the 20th century, and are often mistaken as a German creation.

    There Are No Eggs in Crescent Cookies

    Most cookie recipes call for eggs, which act as a binder and give them structure. Traditional crescent cookies are not made with eggs, which gives them their flaky, delicate, melt-in-your-mouth texture. They taste wonderful, but if you're transporting them to someone's house be careful -- they break easily!

    Do I Have to Use Almonds?

    The original and authentic Austrian version of this cookie calls for almonds, but there is no law that says you have to make the original version! Pecans, walnuts and almonds can be used interchangeably in recipes. They do have a different flavor, so if you favor one over the other, feel free to use it.

    My girlfriend Jean Marie sent me this mid century recipe for a pecan crescent cookie belonging to her mom, Jean. Our moms worked together at Sears in the 1960's and 70's, and often brought baked goods in to work and shared recipes. Our moms are no longer with us, and we both cherish the hand written recipes we've inherited. I love the simplicity of her 5-ingredient recipe!

    Handwritten Recipe
    Another version: pecan crescent cookies

    Hints For Crescent Cookie Success

    • Use a nut grinder on it's finest setting to grind the almonds.
    • Keep a uniform size to the cookies so they bake evenly and are done at the same time.
    • The dough is supposed to be dry and flaky, however if it is too dry to work with you can add a tablespoon of milk.
    dessert plate with 3 crescent cookies next to a cup of coffee

    Almond Crescent Cookies With Powdered Sugar Topping

    Nancy Blackstone
    These almond crescent cookies are light, flaky, traditional Christmas cookies that should be part of your annual baking ritual!
    5 from 4 votes
    Print Recipe Pin Recipe
    Prep Time 4 hours hrs 37 minutes mins
    Cook Time 12 minutes mins
    Total Time 12 minutes mins
    Course Dessert
    Cuisine Austrian
    Servings 36 cookies
    Calories 116 kcal

    Ingredients


    Cookie Dough

    • 1 cup butter room temperature
    • ⅔ cup sugar
    • 1 teaspoon vanilla extract
    • 1 teaspoon almond extract
    • 2 ½ cups flour
    • 1 cup ground almonds

    Topping

    • ½ cup powdered sugar
    • 1 package vanilla sugar 1 ½ teaspoons

    Instructions
     

    • Beat butter, sugar, vanilla extract, and almond extract with an electric mixer until thoroughly mixed. 
    • Add in the flour and ground almonds, and knead with your hands until fully combined.
    • Roll the dough into a log, wrap in plastic wrap and chill for one hour.
    • Preheat the oven to 350 degrees. 
    • Combine the powdered sugar and vanilla sugar for the topping and set aside.
    • Slice small sections of dough and form into crescent shapes. Place on a parchment lined cookie sheet. 
    • Bake 12 minutes or until cookies begin to turn a light golden color. 
    • Dust with sugar mixture after removing from oven, while hot. 

    Notes

    Ground pecans or walnuts can be substituted for almonds.

    Nutrition

    Calories: 116kcalCarbohydrates: 13gProtein: 2gFat: 7gSaturated Fat: 3gPolyunsaturated Fat: 1gMonounsaturated Fat: 1gTrans Fat: 1gCholesterol: 14mgSodium: 45mgPotassium: 11mgFiber: 1gSugar: 6gVitamin A: 158IUCalcium: 9mgIron: 1mg
    Keyword almond crescent cookies, Christmas cookies, holiday cookies, mid century cookies, old fashioned cookies, pecan crescent cookies, walnut crescent cookies
    Tried this recipe?Let us know how it was!

    How to Make a B&B Cocktail (Benedictine and Brandy)

    December 4, 2020

    The classic B&B cocktail shown in a snifter

    The Benedictine and Brandy cocktail melds the rich and aromatic complexities of Benedictine herbal liqueur with the smooth, warming flavor of fine brandy. With its long and storied history, it’s the perfect drink for those seeking a glimpse into a bygone cocktail era. 

    The classic B&B cocktail shown in a snifter
    Nothing says cocktail elegance like a brandy snifter containing Benedictine and Brandy.

    The Smooth and Spicy Cocktail

    Any cocktail that uses a liqueur blended by monks -- using a secret recipe hundreds of years old -- has got to be good. This one does not disappoint! It is warm, smooth, and has a slight herbal taste from the Benedictine. It starts out rather sweet, and ends with a comforting warmth. While there are other Benedictine cocktails, none compare to the B&B cocktail in taste and smoothness. That is what makes it one of the best classic cocktails.

    At the heart of the B&B cocktail lies a unique blend of flavors and tradition. B&B stands for "Bénédictine and Brandy," a harmonious pairing of fine French brandy and herbal liqueur. Dating back to the early 1300’s when people began experimenting with various herbs and spirits for medicinal purposes, this cocktail traces its origins back to the Benedictine monks who crafted Bénédictine D.O.M. in 1510, up to the early 1900s when this cocktail enjoyed a resurgence of popularity.

    Bénédictine liqueur, often referred to simply as "Bénédictine," is a complex herbal liquor with a cognac base. Its secret blend of different herbs lends it a slight herbal taste, while the honey-like sweetness adds an extra dimension to its flavor profile. This medicinal tonic has been cherished since its creation by the monks, who believed it possessed healing properties.

    How to Drink Benedictine and Brandy

    I prefer having this drink served 'up' and in a snifter glass, not a cordial glass. If you're not familiar with this type of glass, then you really should treat yourself. It's designed with a short stem and a large bowl that allows the spirit to evaporate. The narrow top of the glass traps the aroma, allowing you to inhale the spirit for one of the best ways to enjoy this drink. The large bowl of the glass is meant to be cupped in your hand and used to warm the drink a bit.

    The Ingredients for a Perfect B&B Cocktail

    There is something special about a mixed drink that contains only two ingredients. I love how a "duo" cocktail combines two different spirits into something that tastes better together than the ingredients do on their own. Another example of an excellent duo cocktail is the Classic Martini.

    The two ingredients needed for a Benedictine and Brandy drink in tubes
    Two simple ingredients are needed for a B&B cocktail recipe.

    For this Benedictine and Brandy drink recipe you will only need:

    • Benedictine liqueur
    • Your favorite Brandy

    How to make a B&B

    This cocktail requires no special tools or shakers. Simply pour the ingredients into a glass together.

    Demonstration of mixing Benedictine and brandy for a B&B cocktail
    Pour in the Benedictine first.
    Demonstration of mixing Benedictine and brandy for a B&B cocktail
    Float the brandy using a bar spoon.

    Tips for Success

    Keep these tips in mind:

    • Use a quality brandy that mixes well with the Benedictine.
    • Use a snifter if serving 'up'.
    • Pre-warm the snifter by running hot water in it first to open up the fragrance of the drink. Some people like to add a lemon twist or orange peel, but I prefer to keep it simple.
    • Use a rocks glass if serving over ice.
    • Use the back of a bar spoon to 'float' the brandy on top of the thicker Benedictine so there's no need for a mixing glass.

    Frequently Asked Questions

    What does Benedictine and brandy taste like?

    This cocktail combines the sweet taste of brandy with the herbal taste of Benedictine, for a bit of a sweet and spicy taste.

    Can you drink Benedictine straight?

    Yes, you can. It was originally created to be consumed as a medicinal drink. I like the taste of it by itself just fine.

    Is Benedictine a Cognac?

    They are two separate things. Cognac is a variety of brandy that is produced in the Cognac region of France, whereas Benedictine is an herbal liqueur.

    The company that produces DOM Benedictine makes a pre-blended B&B liquor which tastes almost as good as making one yourself. I really like the convenience, and the taste is outstanding.

    How do you like your B&B's? Straight up or on the rocks?

    Before you go, did you try this cocktail? Why not leave a comment in the Comments section along with a rating? I always appreciate hearing from you and getting your feedback.

    • Greyhound cocktail with a grapefruit wedge in a cocktail glass
      How to Make a Vodka and Grapefruit Greyhound Cocktail
    • Gin Gibson cocktail in a martini glass on a white bar napkin with an ice bucket in the background.
      How to Make the Best Classic Gin Gibson Cocktail
    • A closeup of a whiskey in a rocks glass
      How to Make The Easy Frank Sinatra 3-2-1 Cocktail
    • An apple butter old fashioned cocktail in a tumbler with apples and fall-related items in the background
      Sip into Fall: How to Make the Perfect Apple Butter Old-Fashioned Cocktail

    The classic B&B cocktail shown in a snifter

    The B&B Cocktail is Sophisticated, Simple and So Delicious

    Kevin Mayfield
    The warm, smooth Benedictine and brandy is the perfect elegant cocktail. It calls for equal amounts of the two ingredients, but you can always adjust it to your exact preference.
    5 from 7 votes
    Print Recipe Pin Recipe
    Prep Time 1 minute min
    Total Time 1 minute min
    Course Classic Cocktails
    Cuisine American
    Servings 1 Cocktail
    Calories 229 kcal

    Ingredients


    • 1 ½ ounces Benedictine liqueur
    • 1 ½ ounces brandy

    Instructions
     

    • Pre-warm the brandy snifter by pouring a little hot water in the glass. Swirl it around, then discard.
    • Pour the jigger of Benedictine into the warm brandy snifter.
    • Gently pour the brandy over the back of a bar spoon and let it fall on top of the Benedictine to 'float' it on the thicker liqueur.

    Notes

    Use only a quality brandy when making this cocktail. A low quality brandy will be harsh-tasting, and will not complement the Benedictine. Ask your liquor store for a recommendation. 
    Though it's not the traditional way to serve it, some people prefer this cocktail over ice. For this version, simply add a couple of cocktail ice cubes to a rocks glass, and then add the spirits.

    Nutrition

    Calories: 229kcalCarbohydrates: 14gProtein: 1gFat: 1gSaturated Fat: 1gPolyunsaturated Fat: 1gMonounsaturated Fat: 1gSodium: 4mgPotassium: 14mgSugar: 14gCalcium: 1mgIron: 1mg
    Keyword B and B cocktail, B&B, b&b brandy, b&b liquor, Benedictine, Benedictine and brandy, brandy, elegant cocktails
    Tried this recipe?Let us know how it was!

    Southern Pecan Pie Bars - The Best Bar Cookies Ever!

    December 3, 2020

    Three pecan pie bars stacked on a dessert plate

    If you love pecan pie but don't have the time to make one, these pecan pie bars are quick and easy to whip up and are absolutely scrumptious!

    Three pecan pie bars stacked on top of each other, sitting on a small dessert plate
    Pecan Pie Bars

    Chewy, crunchy, sweet, and incredibly addictive! This is everything a cookie should be, and it's permanently on my Christmas cookie list beginning this year.

    Pecan Pie - A North American Original

    Pecan pie is known as a specialty of the South. Pecans originally grew along areas that received water from the Mississippi River. They were propagated by Native Americans who made the first versions of this popular dessert. Now most pecan farms are found in Georgia.

    The earliest recipes for pecan pie emerged from Texas in the 1920's. But when Karo syrup printed a copy of the recipe on their corn syrup bottle in the mid 1920's, it became popular across the country.

    Pecans Are Associated With The Winter Holidays

    Pecans are often associated with Thanksgiving and Christmas recipes. That's because they are harvested beginning late in September through November, which gets them to your table just in time for the holidays. I use pecans on top of my sweet potato casserole, in Kevin's favorite Christmas cookies, and in these wonderful pecan pie bars!

    Origin of This Recipe

    • Original hand written recipe for pecan pie bars
    Original handwritten recipe for Pecan Pie Bars

    This mid century handwritten recipe is from my friend Susan's 96-year-old Aunt Helen. I was thumbing through her recipes one day and when I came across this one. As soon as I read it I knew it would be fantastic! Aunt Helen lived in the Hollywood Hills during the mid century years, and is still living here in Los Angeles. She doesn't cook anymore, but other family members are carrying on the tradition of cooking her well loved recipes. And now you can, too!

    Just a Few Simple Ingredients

    • Crust Ingredients
    • Ingredients for making southern pecan pie bars
      Filling Ingredients

    It only takes a few ingredients for these chewy and delicious bar cookies:

    For the crust:

    • Flour
    • Powdered sugar
    • Butter

    For the filling:

    • Sweetened condensed milk
    • Egg
    • Vanilla extract
    • Heath bar chips
    • Chopped pecans

    Hints for Making Pecan Pie Bars

    • Use cold butter for the crust. You want to cut it into the flour mixture until it looks like small pearls, but not cream it so that it blends in completely. Pulsing it in a food processor is the fastest and easiest method and will give you the best results.
    • To prepare the pecans, I use a nut grinder on a coarse setting.
    • Remove the bars from the oven when they begin turning a golden color. If you overtbake them they will harden upon cooling, and you want them to be chewy.

    These are fast and easy, so why not whip up a batch now? Let us know what you think after you try them!

    Three pecan pie bars stacked on a dessert plate

    Pecan Pie Bars - The Best Bar Cookies Ever!

    Nancy Blackstone
    If you love pecan pie but don't have the time to make one, these pecan pie bars are quick and easy to whip up and are absolutely scrumptious!
    5 from 1 vote
    Print Recipe Pin Recipe
    Prep Time 15 minutes mins
    Cook Time 35 minutes mins
    Total Time 50 minutes mins
    Course Dessert
    Cuisine American
    Servings 16 bars
    Calories 365 kcal

    Ingredients
      

    Crust

    • 2 cups flour
    • ½ cup powdered sugar
    • 1 cup cold butter

    Filling

    • 14 oz. can sweetened condensed milk
    • 1 large egg
    • 1 teaspoon vanilla
    • 6 oz. Heath Bar chips
    • 1 cup chopped pecans

    Instructions
     

    • Preheat oven to 350 degrees. Spray a 13 x 9 pan with non-stick spray.

    Crust

    • Combine flour and powdered sugar in a food processor and pulse a few times until mixed.
    • Cut butter into cubes, then add to mixture in food processor and pulse until it is evenly distributed and looks like small beads. 
    • Using the back of a large spoon, pat into the bottom of greased 13 x 9 in pan. Bake at 350 degrees for 15 minutes. When you remove it from the oven the crust will be moist, light in color and partially baked. 

    Filling

    • In a large bowl, beat the sweetened condensed milk, egg, and vanilla with an electric mixer until smooth.  
    • Stir in chips and pecans until fully combined.
    • Spread evenly over crust and bake 20-25 minutes until golden brown. 
    • Cool, then cut into bars. Store in sealed container.

    Nutrition

    Calories: 365kcalCarbohydrates: 37gProtein: 5gFat: 23gSaturated Fat: 11gPolyunsaturated Fat: 2gMonounsaturated Fat: 7gTrans Fat: 1gCholesterol: 62mgSodium: 152mgPotassium: 150mgFiber: 1gSugar: 24gVitamin A: 564IUVitamin C: 1mgCalcium: 86mgIron: 1mg
    Keyword bar cookies, Christmas cookies, holiday cookies, mid century cookie recipe, old fashioned cookies, old fashioned desserts
    Tried this recipe?Let us know how it was!

    Cranberry Whipped Cream Salad

    December 1, 2020

    Cranberry whipped cream salad in a small serving dish, with three cranberries garnishing the top.

    Cranberry Whipped Cream Salad has a festive holiday taste that will be a popular addition to your dinner celebrations. Tart cranberries mixed with the sweet fruits, whipped cream, and crunchy walnuts makes this an irresistible retro salad sensation!

    Cranberry whipped cream salad in a small serving dish, with three cranberries garnishing the top.

    Cranberries - So Many Holiday Possibilities!

    There are some items you eat only during the fall/winter holiday season. In my family, they include sweet potatoes, pumpkin pie, and anything cranberry. But when this time of year rolls around, we consume a year's worth in just a few months!

    Cranberries are available frozen year-round, but they have a "holiday season" taste to me, so I anxiously await the arrival of fresh cranberries in late October. Then I start making my favorite recipes, like Cranberry Orange Quick Bread, Cranberry Pudding with Butter Sauce, and Bourbon Cranberry Sauce.

    This recipe combines the sweetness of fruits and whipped cream with the tartness of fresh cranberries. It can be served alone or on a bed of lettuce as a fruit salad, and it can just as easily be a light dessert after a heavy meal. When I have company I love to serve buffet-style, so everyone can pick and choose what items they want to eat and when.

    Origin of This Cranberry Whipped Cream Salad Recipe

    Handwritten Recipe for Cranberry Whipped Cream Salad

    I grew up next door to my friend, Liz. We got married before the days of cell phones and lived about 60 miles apart, so we would write letters and exchange recipes. This is a recipe she sent me a long time ago. I just recently asked her its origin, and she told me that many years ago a friend of her mother-in-law's served it at a luncheon. Her mother-in-law asked for the recipe, Liz got it from her, and later she sent it to me. A true mid century gem. I just love how recipes travel like that!

    Hints For Making Cranberry Whipped Cream Salad

    I made a couple of minor changes to the original recipe based on my own tastes. The ingredients remained the same, but I adjusted the quantities a bit. I decreased the amount of whipping cream, switched from crushed pineapple to pineapple chunks, and increased the amount of apples and walnuts. I feel like this created a more balanced taste.

    Please note that this recipe should be made a day ahead of serving. The ingredients need to sit together overnight before adding the whipping cream.

    When you're making this dish, keep in mind the following:

    • Use a food processor with a metal blade on "pulse" to coarsely chop the cranberries. Chopping them by hand is difficult and time consuming, but if you don't have a food processor allow some extra time for this step.
    • Drain pineapple chunks well before adding to bowl.
    • Combine all of the ingredients and let them sit overnight before adding the whipping cream. This allows the flavors to meld together and the sugar to sweeten and soften the cranberries.
    • Before serving, measure 1-¾ cups of whipping cream in a measuring cup. Whip to a fairly stiff consistency so it can hold up to the other ingredients.

    Fruit salads were a popular mid century dish, and this will be a lovely and tasty addition to your dinner table!


    Cranberry whipped cream salad in a small serving dish, with three cranberries garnishing the top.

    Cranberry Whipped Cream Salad

    Nancy Blackstone
    Cranberry Whipped Cream Salad has a festive holiday taste that will be a popular addition to your dinner celebrations. Tart cranberries mixed with the sweet fruits, whipped cream, and crunchy walnuts makes this an irresistible retro salad sensation!
    5 from 1 vote
    Print Recipe Pin Recipe
    Prep Time 20 minutes mins
    Cook Time 0 minutes mins
    Total Time 20 minutes mins
    Course Salad
    Cuisine American
    Servings 16 Servings
    Calories 209 kcal

    Ingredients


    • 12 oz fresh or frozen cranberries coarsely chopped (food processor recommended)
    • 20 oz. pineapple chunks in juice drained well
    • 2 medium apples peeled and chopped (pink lady, gala or fuji are recommended)
    • 2 cups miniature marshmallows
    • ⅔ cups sugar
    • ⅛ teaspoon salt
    • ½ cup chopped walnuts optional
    • 1 ¾ cups whipping cream whipped

    Instructions
     

    • In a large mixing bowl, combine chopped cranberries, pineapple chunks, chopped apples, miniature marshmallows, sugar, salt and walnuts. Mix well.
    • Cover tightly and refrigerate overnight.
    • Just before serving, whip the whipping cream to a fairly stiff consistency and fold in. Garnish with fresh cranberries and chopped walnuts, if desired.

    Notes

    Variation:  Add in ¾ cups shredded coconut
    If you're plating individual salads rather than serving buffet-style, serve on a bed of lettuce.

    Nutrition

    Calories: 209kcalCarbohydrates: 26gProtein: 2gFat: 12gSaturated Fat: 6gPolyunsaturated Fat: 2gMonounsaturated Fat: 3gCholesterol: 36mgSodium: 34mgPotassium: 122mgFiber: 2gSugar: 20gVitamin A: 426IUVitamin C: 7mgCalcium: 30mgIron: 1mg
    Keyword easy salad recipe, Fruit salads, holiday desserts, holiday salads, light desserts, mid century salads, old fashioned salads., whipped cream desserts, whipped cream salads
    Tried this recipe?Let us know how it was!

    Light and Flaky Butter Cookies

    November 30, 2020

    Two butter cookies on a green plate, with a tray of butter cookies behind it

    These light and flaky butter cookies just melt in your mouth. They're a perfect complement to your holiday cookie assortment, or as an anytime dessert with a cup of hot coffee or a tall glass of milk.

    Two butter cookies on a green plate, with a tray of butter cookies behind it.

    Butter Cookies - A Danish Creation

    Butter cookies, a basic little dessert made primarily from butter, sugar and flour, originated in Denmark around the year 1100. They became popular when the first bakeries emerged there in the 1800's. Dutch settlers brought the first koekjes, or cookies, to North America in the 1620's.

    The first butter cookies had very few ingredients in them, deriving their flavor entirely from the butter. These days, it's not unusual to add a teaspoon of an extract, such as vanilla or almond, to give them an additional pop of flavor.

    Origin of This Butter Cookie Recipe

    My mom began working part-time at Sears, Roebuck & Co. in the 1960's to earn some extra money when my sister and brother were in college. She worked a few days a week but she was always home on Sundays because all the malls and retail stores were closed. In mid century blue laws were in effect, which called for Sundays to be spent at worship services and at home. It wasn't until later in the 1970's that most of those laws were repealed and retail stores remained open on Sundays.

    My mom worked in the office of the Sears credit department. She had two best friends there, Doris and Jean. They often traded recipes and brought trays of cookies to work for sharing at the holidays. Doris' butter cookies obviously struck a chord with my mom, who brought the recipe home. They are fast and easy to make, so she would frequently whip up a batch to satisfy my dad's sweet tooth.

    Original mid century handwritten recipe card
    Original mid century handwritten recipe

    Butter and Oil Make This Recipe Different

    Most butter cookie recipes are made with butter as the only fat; this recipe calls for both butter and canola oil. In a cookie recipe, oil adds tenderness and flakiness. You have to be careful not to add too much, or the cookies will turn out greasy. These cookies had just the right amount; they have a light and flaky texture with no oily residue.

    Hints for Successful Butter Cookies

    • Bring the butter to room temperature so that it mixes smoothly with the sugars.
    • Fold in the flour using a spatula rather than beating with an electric mixer. Overmixing releases the gluten in the flour and causes the cookies to become hard and dry.
    • Use a cookie scooper to get uniform sizes balls of dough on your cookie sheet.

    The handwritten recipe says to place the balls of dough on a cookie sheet and then flatten them for baking. I made a batch of flattened cookies and a batch not flattened. There was no difference in the taste, of course, but I preferred the look of the non-flattened cookies after they were baked.

    These cookies were ready to come out of the oven in 12 minutes, but since oven temperatures vary, watch for a very light golden color to appear at the bottom of the cookie before removing them from the oven.

    Looking for a delicious cookie recipe? Try our amazing Chocolate Frosted Pecan Cookies.

    Two butter cookies on a green plate, with a tray of butter cookies behind it

    Light and Flaky Butter Cookies

    Nancy Blackstone
    These light and flaky butter cookies just melt in your mouth. They're a perfect complement to your holiday cookie assortment, or as an anytime dessert with a cup of hot coffee or a tall glass of milk.
    5 from 9 votes
    Print Recipe Pin Recipe
    Prep Time 15 minutes mins
    Cook Time 12 minutes mins
    Total Time 27 minutes mins
    Course Dessert
    Cuisine American
    Servings 30 cookies
    Calories 227 kcal

    Ingredients


    • 1 cup butter room temperature
    • 1 cup powdered sugar
    • 1 cup granulated sugar
    • 2 large eggs
    • 1 cup canola oil
    • 1 teaspoon cream of tartar
    • 1 teaspoon baking soda
    • 4 cups flour

    Instructions
     

    • Preheat oven to 350 degrees.
    • Using an electric mixer, cream butter, powdered sugar, and sugar together in a large bowl.
    • Add eggs and oil, mixing until fully combined.
    • Mix in cream of tartar and baking soda.
    • Using a spatula, fold in the flour just until combined. Do not mix more than necessary.
    • Roll into small balls, or use a cookie scooper to form balls. Place on ungreased cookie sheet and bake for 12 minutes.

    Notes

    Add a teaspoon of vanilla or almond extract for an extra flavor boost in your cookies.

    Nutrition

    Calories: 227kcalCarbohydrates: 23gProtein: 2gFat: 14gSaturated Fat: 5gPolyunsaturated Fat: 2gMonounsaturated Fat: 6gTrans Fat: 1gCholesterol: 29mgSodium: 96mgPotassium: 41mgFiber: 1gSugar: 11gVitamin A: 207IUCalcium: 6mgIron: 1mg
    Keyword Christmas cookies, Dessert Cookies, holiday cookies, holiday desserts, old fashioned butter cookies
    Tried this recipe?Let us know how it was!

    How to Make an Easy Bourbon and Honey Hot Toddy

    November 27, 2020

    Hot Toddy cocktail in a clear mug with a lemon wheel and 2 small cranberries for garnish

    There's really nothing like sipping on a Bourbon and Honey Hot Toddy before turning in on a cold winter night. Whether you're trying to warm up, or need to soothe a sore throat and cough, this will become one of your favorite Bourbon cocktails on chilly evenings.

    Hot Toddy cocktail in a clear mug with a lemon wheel and 2 small cranberries for garnish

    A Victorian Medicinal Treatment that Tastes Great

    A nice classic cocktail that is also a warm drink, or hot toddy, on a cold night (or cold day) is perfect for relaxing -- hot fire in the fireplace is optional!

    The word toddy likely evolved from the 17th century Hindi word taddy, meaning a fermented beverage. However, some say it was named after a London physician who dispensed a recipe for a hot drink made with spirits. Either way, it was a good idea and we can all agree that this warming drink works as it's supposed to, and for that we can all be thankful!

    Mixing spirits with hot water was thought to be a treatment for many mid-18th century Victorian-era cold symptoms such as a sore throat, common cold, or even a toothache. There may actually be a little bit truth to the claim it was a medicinal aid. The vitamin C from the strip of lemon peel was beneficial, and certainly the alcohol acted to numb pain. Also, the honey coated the throat, and the heat could clear the sinuses as well as any chamomile tea or black tea could. Instead of aspirin, the Victorians reached for a hot whiskey drink as cold medicine. It was the best bedtime solution when they didn't feel well and didn't get sick days.

    Whether it was used as a cure-all drink or a pleasant way to end a long day, this hot cocktail has had staying power for over two hundred years because it is truly the perfect winter drink.

    Finding The Classic Hot Toddy Recipe in Mid Century

    Tennessee Williams referenced the bourbon hot toddy cocktail in his 1954 book Cat on a Hot Tin Roof, when main character Brick Pollitt indulges in the whiskey cocktail. But that isn't the only time the hot toddy made an appearance in mid century -- it was a popular cold weather drink of that era. If you have any doubt, just look in antique stores or online for vintage hot toddy glass mugs. They were a staple of the 1950's and 60's and are still readily available. They're perfect for hot tea, hot apple cider or other winter cocktails. I recently picked up a great set of vintage, stamped Federal hot toddy glasses with a display rack. And it's no big surprise that I've been putting them to good use for this hot toddy drink (just last night, in fact!)

    Ingredients for a Hot Toddy

    Ingredients needed for a bourbon and honey hot toddy, bourbon, honey, lemon and cinnamon

    There's nothing to mixing up a mug of this warm cup of comfort. Aside from your favorite mug, you'll need:

    • Hot filtered water
    • Your favorite type of whiskey such as Bourbon whiskey, Irish whiskey, or even rye whiskey (however, I believe Bourbon is the best liquor to use.)
    • Local honey if you can find a good one in your local grocery store
    • Fresh lemon juice and a lemon wedge for garnish
    • Cinnamon stick

    You can add other whole spices like star anise pods, nutmeg, ground cloves or whole cloves for extra flavor. That changes the taste of the drink too much for me, so I like to stick to the basics on the recipe card. However, it's good to have these options on hand to cater to different preferences when serving hot toddies at a holiday party.

    Bar Tools Needed

    You don't need any fancy bar tools to make this cocktail, but you will need to borrow some kitchen basics:

    • Pot or tea kettle for heating the water (I like to "cheat" and use an electric kettle such as this one)
    • 2 Drinking mugs or one large mug (or try an insulated heatproof mug)
    • Mixing glass
    • Bar knife
    • Bar spoon
    • Jigger

    How to Make a Delicious Hot Toddy

    Pour in hot water.
    Add the honey.
    Pour in the lemon juice.
    Pour in Bourbon.
    Process pictures of pouring hot water, honey, lemon juice, bourbon and stirring with a cinnamon stick.
    Stir with a cinnamon stick.

    This hot toddy recipe is so easy that even at the end of a long day, you'll still have plenty of energy to make it. So throw away the tea bag and follow these simple steps for a comforting evening drink:

    • Heat the water to just below boiling
    • Pour into the mixing glass
    • Add the honey
    • Add the lemon
    • Add a couple of ounces of Bourbon
    • Stir with a cinnamon stick until well mixed and the honey is dissolved
    • Pour into mugs
    • Garnish with a lemon slice or lemon wedge, and even a cinnamon stick and a couple of cranberries if you like.

    Tips for a Successful Hot Toddy

    Here are a few pointers to keep in mind:

    • Start out easy with amount of tart lemon juice you use. I recommend starting with a little and adding more as you taste-test, otherwise it may be too tart.
    • I recommend using honey, because honey dissolves well and is so soothing. Some people like to use maple syrup or brown sugar. I would not recommend a simple syrup made from Demerara sugar for this drink, though. I'd also skip the agave nectar. Both of those are too sweet.
    • Choose a quality base spirit when making this, or any other cocktails. I usually prefer a wheated Bourbon such as Maker's Mark because it is sweet and not overpowering. Of course, Buffalo Trace Bourbon makes for a great option as an every day mixer as well, so that's the one I usually reach for.
    • If you like a little spice in your whiskey, don't be afraid to try a Bourbon like Basil Hayden's, which has a high-rye content to give it a little kick. If you do prefer rye as your favorite whiskey, try Bulleit rye in this comforting cocktail.

    Frequently Asked Questions

    What is a good Bourbon for hot toddy?

    I prefer a wheated Bourbon because of the sweet taste. I think it cuts down on the sharp lemon acid and compliments the honey.

    Can you heat Bourbon

    Yes, you can heat Bourbon and it makes for a great warm cocktail. I just pour it directly in the mug of hot water while making a hot toddy. Warm Bourbon is great in colder months!

    What kind of whiskey goes in a hot toddy?

    This mixed drink is very versatile. Traditionally it's Bourbon, but you can also use rye, rum or even brandy in your hot toddy cocktail. Its flexibility is good news for people who aren't Bourbon fans.

    Similar Cocktails

    If you'd like to try some other recipes to keep you warm, try a Hot Buttered Bourbon for special bedtime treat. And you can't beat an Egg Nog to get in the wintertime spirit!

    Do you drink a hot toddy for its medicinal qualities? Which alcohol do you use, Bourbon, rye, dark rum or brandy?

    Before you go, did you try this cocktail? Why not leave a comment in the comments section along with a rating? I always appreciate hearing from you and getting your feedback.

    Hot Toddy cocktail in a clear mug with a lemon wheel and 2 small cranberries for garnish

    Easy Bourbon Hot Toddy

    Kevin Mayfield
    A wonderful, warm hot toddy is perfect for soothing a cold, or for just relaxing on a cold night!
    5 from 2 votes
    Print Recipe Pin Recipe
    Prep Time 2 minutes mins
    Cook Time 5 minutes mins
    Total Time 7 minutes mins
    Course Classic Cocktails
    Cuisine American
    Servings 2 Mugs
    Calories 72 kcal

    Ingredients
      

    • 1-½ cups hot water
    • 2 oz Bourbon
    • ¼ oz fresh lemon juice
    • 2 tablespoons honey
    • 1 cinnamon stick
    • lemon rounds for garnish

    Instructions
     

    • Add hot water to a mixing glass.
    • Add the honey.
    • Add the lemon juice.
    • Add the Bourbon--stir with a cinnamon stick to dissolve the honey.
    • Pour into mugs
    • Add lemon rounds and serve

    Notes

    You may want to experiment a little with the lemon juice. Start small and add more as you go. It can be strong and overpower the other ingredients.
    Feel free to use other spirits such as rye or brandy to give it a spicier taste.
    If you like the drink with more lemon flavor, add a slice or two of lemon peel to the hot water while simmering.

    Nutrition

    Calories: 72kcalCarbohydrates: 19gProtein: 1gFat: 1gSaturated Fat: 1gMonounsaturated Fat: 1gSodium: 4mgPotassium: 26mgFiber: 1gSugar: 17gVitamin A: 6IUVitamin C: 3mgCalcium: 21mgIron: 1mg
    Keyword 1950's cocktails, 1960's cocktails, cat in a hot tin room cocktails, cocktail cures, hot toddy, madmen cocktails, mid century cocktails, warm bourbon cocktails, Winter Cocktails, winter drinks
    Tried this recipe?Let us know how it was!

    Cranberry Pudding With Butter Sauce - A Tasty British Dessert

    November 23, 2020

    a white pitcher of butter sauce poured over a bowl of cranberry pudding

    Tart cranberry muffins with a hot, sticky, sweet butter sauce come together in a delicious cranberry pudding holiday dessert (or breakfast!) that is impossible to resist!

    Dish of cranberry muffins with hot butter sauce being poured over the top.
    Hot, sweet butter sauce being drizzled over tart cranberry muffins

    One thing I love about producing this website is that it challenges me to try recipes I probably would not have made otherwise. This is a recipe I most likely would have skipped over, and it would have been a huge mistake! The hot, creamy, sweet butter sauce flowing over the tart cranberry muffins is pure heaven. When I made this, Kevin and I both ate so much that we had to skip dinner!

    Wait a Minute -- That Doesn't Look Like Pudding!

    When I first read this mid century recipe and saw that it required baking muffins, I thought there was a mistake in the title. It didn't sound anything like pudding! If you grew up in the U.S., pudding is a creamy, milk based dessert in flavors like chocolate, vanilla and butterscotch. There are no muffins in pudding! So what's the deal?

    I mentioned the recipe to my sister who majored in home economics in college during the 1960's, and she immediately said "That's a British recipe." I began researching the dish and learned that it is indeed British, and that the term pudding means something different in England than it does in the U.S.

    Are You Posh, or Not?

    According to the 1956 linguistics book "Noblesse Oblige" by mid century British writer Nancy Mitford, the elite upper class Britons used the term pudding to mean the final course of a meal, or what Americans refer to as dessert. The working class used the word sweets. So not only were there two different words for dessert in England, but they indicated your place in society. I had to giggle when I realized that Pink Floyd used the posh term at the end of their song Another Brick in the Wall ("If you don't eat your meat, you can't have any pudding!") Forty years later I finally understand that lyric, but I digress. Today, there is less of a class distinction with these terms and they are frequently used interchangeably.

    Original handwritten recipe card for cranberry pudding with butter sauce.
    The original mid century handwritten recipe

    Start By Making the Cranberry Muffins

    Because these muffins are intended to be served with a sweet butter sauce poured over the top, they are quite tart. Therefore, you probably won't want to eat them without the sauce as they are not as sweet as a traditional cranberry muffin.

    If you aren't careful when preparing the batter, the muffin exterior can turn out tough and chewy. Therefore, follow these guidelines when making them:

    • Mix the butter, sugar, milk, baking powder and salt with an electric mixer. Then, gently fold the flour in by hand using a spatula. and only until you no longer see any white powder. Over-mixing brings out the gluten in the flour and can cause tough, chewy muffins.
    • Gently fold in the cranberries after adding the flour, mixing as little as possible.
    • Grease the muffin tin well with butter or non-stick baking spray before pouring in the batter. I used a regular sized muffin pan that makes 12 muffins. It was the exact right size for the amount of batter this makes.
    • Don't bake longer than necessary. Keep an eye on the muffins, and as soon as they turn golden take them out. For a 12-tin muffin pan, 20 minutes or so should be sufficient. You will need 25-30 minutes if you're making larger muffins. When a wooden toothpick inserted in the center comes out clean or with only a few crumbs they're ready.
    • Remove the muffins from their pan after they have been out of the oven for 5 minutes. Leaving them in the pan longer can cause them to stick.

    Quick & Easy Butter Sauce For Cranberry Pudding

    The butter sauce only takes about five minutes to make. You should make it right before serving and serve it hot over the muffins.

    • Melt the butter first, then add in the cream and vanilla and stir for 30 seconds before adding sugar.
    • Stir in sugar, bring it to a boil and keep stirring until it is a thick, smooth consistency, like syrup.
    • Serve immediately, while hot. Place in a serving pitcher to pour, or in a bowl to ladle over the cranberry muffins. You can store it covered in the refrigerator, then reheat it on the stovetop before serving.

    Enjoy your cranberry pudding!

    If you love cranberries, also try our recipes for Bourbon Cranberry Sauce and Cranberry Orange Quick Bread.

    Dish of cranberry muffins with hot butter sauce being poured over the top.

    Cranberry Pudding With Butter Sauce - A Tasty British Dessert

    Nancy Blackstone
    Tart cranberry muffins with a hot, sticky, sweet butter sauce come together in a delicious cranberry pudding holiday dessert (or breakfast!) that is impossible to resist!
    4.50 from 2 votes
    Print Recipe Pin Recipe
    Prep Time 15 minutes mins
    Cook Time 20 minutes mins
    Total Time 35 minutes mins
    Course Dessert
    Cuisine British
    Servings 12 Servings
    Calories 439 kcal

    Ingredients


    Cranberry Pudding

    • 3 tablespoons butter
    • 1 cup sugar
    • 1 cup evaporated milk
    • 3 tablespoons baking powder
    • 1 teaspoon salt
    • 2 cups flour
    • 2 cups fresh whole cranberries

    Hot Butter Sauce

    • ½ pound butter 16 tablespoons
    • ½ cup cream
    • 1 teaspoon vanilla
    • 1 cup sugar

    Instructions
     

    Cranberry Muffins

    • Preheat oven to 350 degrees. Generously grease a 12-muffin pan with butter or non-stick baking spray.
    • Bring butter to room temperature. In a large mixing bowl, use an electric mixer to beat butter and sugar until fluffy. 
    • Add in evaporated milk, baking powder, and salt. Mix until fully combined.
    • Using a spatula, gently fold in the two cups of flour by hand, just until all of the white powder disappears. Do not over mix or muffins will be tough and chewy.
    • Very gently fold in the cranberries just until combined.
    • Pour into greased muffin pan and bake approximately 20 minutes, until a wooden toothpick comes out clean or with just a few crumbs. 
    • Cool for 5 minutes, then remove muffins and place in a serving basket. 

    Butter Sauce

    • Melt ½ pound (16 tablespoons) butter in a non-stick pan over low heat. 
    • When melted, add cream and vanilla, and stir for 30 seconds.
    • Add in sugar. Turn up heat and bring to a boil, stirring constantly. Sauce will be ready in about 5 minutes, when the sugar has melted and it is a thick and creamy consistency. 
    • Pour into a small pitcher or a bowl with a ladle and serve immediately, while hot. 

    Notes

    Carefully watch muffins and do not over bake or they become tough on the outside.
    Promptly remove muffins from muffin tin after 5 minutes of cooling. Waiting longer can result in them sticking to the pan. 
    Store cooled muffins in an airtight container.
    Store leftover butter sauce in an airtight container. Reheat on stovetop.

    Nutrition

    Calories: 439kcalCarbohydrates: 55gProtein: 4gFat: 24gSaturated Fat: 15gPolyunsaturated Fat: 1gMonounsaturated Fat: 6gTrans Fat: 1gCholesterol: 68mgSodium: 699mgPotassium: 116mgFiber: 1gSugar: 36gVitamin A: 767IUVitamin C: 3mgCalcium: 249mgIron: 1mg
    Keyword British Desserts, British Pudding, cranberry breakfasts, cranberry desserts, English Desserts, English Pudding, fresh cranberry recipes, holiday breakfasts, holiday desserts
    Tried this recipe?Let us know how it was!

    How to Make The Best Hot Buttered Bourbon Cocktail

    November 20, 2020

    Clear mug of hot buttered bourbon

    If you're looking for a delicious hot cocktail to keep you toasty as temperatures drop during winter nights, look no further than an old fashioned spicy Butter Bourbon cocktail. This mixture of just the right whiskey (Bourbon), and a hot butter batter is a favorite of whiskey lovers--especially during holiday gatherings.

    Clear mug of hot buttered bourbon

    Hot Butter Bourbon is Part of American History

    In Colonial America it was not unusual to serve up a hearty, hot buttered rum drink for its perceived health benefits. Over the years this classic cocktail evolved, featuring different spirits including rye whiskey, and my favorite, Bourbon. It is a customary drink to warm up with on chilly nights, and has become one of our favorite Christmas cocktails. After you taste it, you'll put down the hot chocolate and hot toddies on a cold winter night, and make one of these instead.

    Hot buttered drinks came back in favor in the mid century era after the 1937 novel Northwest Passage was published, which referenced it several times. It became a staple in the Tiki drink era, too. But this hot buttered Bourbon recipe is a classic winter cocktail and will give the hot apple cider and classic hot toddy recipe some competition.

    Ingredients Needed

    Ingredients needed for hot buttered bourbon, bottle of buffalo trace, butter, brown sugar, nutmeg, cloves and cinnamon and stick

    There are several key ingredients for this drink. Some of the flavors may change depending on which recipe for the spiced butter batter you try, but here are the basics:

    • Stick (8 tbsp) Butter (unsalted butter works well)
    • Bourbon (there are many great choices; I like Four Roses Bourbon)
    • ½ cup brown sugar
    • 1 teaspoon cinnamon
    • ¼ teaspoon ground cloves
    • ¼ teaspoon nutmeg
    • Hot water
    • Cinnamon stick

    You can also add some additional spices such as Star Anise or a dash of Angostura bitters, but I prefer to keep it simple. Some people add a dash of maple syrup, but I think that tends to overpower the other spices.

    Tools Needed for a Buttered Bourbon

    You don't need any fancy bar tools to make this cocktail, but you will need to borrow some kitchen basics along with your favorite mug:

    • Small quart saucepan, pot, or electric kettle for heating the water
    • Wooden spoon
    • Mixing bowl
    • Bar spoon
    • Jigger

    How to make a Hot Buttered Bourbon Cocktail

    There are a couple of steps to making any hot buttered whiskey recipe. First, you will need to make the butter mixture. After that, it is merely a matter of scooping it out and mixing with the spirit and hot water.

    Step 1: Making the Hot Buttered Whiskey Recipe Batter

    Butter, Sugar and Spices
    These photos show the ingredients need to make the 'batter' for the drink.
    Fully mixed, warm batter.

    Making this drink requires a little advanced planning as well as some cooking:

    1. Place a softened stick of butter in a mixing bowl.
    2. Add the brown sugar and spices, and mix together until it becomes a batter. You can use a hand mixer or just a wooden spoon.
    3. Pour the batter into small covered dish and let it chill in the refrigerator for an hour or so. Each serving of batter is 1 tablespoon, so this recipe will yield 8 servings (or 8 drinks). It can be kept covered in the refrigerator for up to 2 weeks.

    Step 2: Making the Drink

    Chilled batter
    Tablespoon in each mug
    Clear mug of hot buttered bourbon
    Add hot water

    Now for the simple part. Making the drink is one of the easy recipes:

    1. Scoop 1 tablespoon of the batter mixture into a mug.
    2. Pour in some hot water and stir with a bar spoon to dissolve the batter.
    3. Add your Bourbon of choice.
    4. Stir with a cinnamon stick to mix everything up.

    Some folks like to add a dollop of whipped cream, lemon juice or an extra pat of butter, but I stick to the basics on this one. No need to mess with perfection!

    Tips for Success

    This recipe requires a bit more time and cooking than most cocktails need, but it's well worth the bit of extra effort.

    • Soften the butter to room temperature by letting it sit out on the counter for an hour. You can warm it slightly in the microwave or over a low heat (if necessary) if you're in a hurry. Do not use a medium heat as you risk melting or scorching the butter. No slow cooker required.
    • Use your favorite Bourbon such as Maker's Mark or Old Forester for a good spicy balance to the sugar.
    • Use a mixing glass to combine all of the ingredients together before pouring into sipping cups.

    Frequently Asked Questions

    What type of Bourbon should I use?

    Often it will boil down to personal preference, but I like to mix with Buffalo Trace or Maker's Mark Bourbon. They are not overly strong, and therefore do not overpower the spices of the drink.

    Which alcohol is better to make a Hot Buttered Bourbon with?

    It is said that the originals were probably made with rum, so I will sometimes use a nice rum like Pusser's Royal Navy Rum which has a very sweet taste. My personal preference is to use Bourbon. Some people like to use Irish Whiskey to make this drink with as well.

    Similar Cocktails

    If you're looking for other drinks to warm up with, try our Authentic Irish Coffee Recipe. And you can't go wrong with a Bourbon and Honey Hot Toddy -- the perfect classic hot toddy recipe.

    The Hot Buttered Bourbon Cocktail is a true classic among hot drinks, perfect for cozying up by the fire, singing a Christmas carol, or just enjoying a little warmth during the winter season. It's my personal favorite, and I hope it becomes yours, too. Here's to a season filled with good Bourbon, warm spices, and the comfort of a roaring fireplace!

    Which spirit do you like to use? Dark rum, Rye or one of the Irish Whiskeys?

    Before you go, did you try this cocktail? Why not leave a comment in the comments section along with a rating? I always appreciate hearing from you and getting your feedback.

    Clear mug of hot buttered bourbon

    How to Make The Best Hot Buttered Bourbon Cocktail

    Kevin Mayfield
    Warm, smooth, Hot Buttered Bourbon is the perfect cocktail to sip on cold winter nights.
    5 from 1 vote
    Print Recipe Pin Recipe
    Prep Time 1 hour hr 20 minutes mins
    Cook Time 5 minutes mins
    Total Time 1 hour hr 25 minutes mins
    Course Classic Cocktails
    Cuisine American
    Servings 1 Mug
    Calories 327 kcal

    Ingredients


    The Batter:

    • 8 tablespoons unsalted butter
    • ½ cup brown sugar it doesn't have to be exact
    • 1 teaspoon cinnamon
    • ¼ teaspoon nutmeg
    • ¼ teaspoon ground cloves

    The Drink:

    • 1 tablespoon pre-made batter
    • 1-½ ounces Bourbon
    • 6-8 ounces hot water
    • 1 cinnamon stick

    Instructions
     

    To make the batter:

    • Place a stick of softened (room temperature) butter in a mixing bowl
    • Add the brown sugar, cinnamon, ground cloves and nutmeg 
    • Use a wooden spoon to mix until it forms a smooth batter
    • Once the batter is thoroughly mixed, spoon into a covered container and chill

    To make the drink:

    • Scoop out the batter and place into a mug
    • Add the hot water and stir
    • Add the Bourbon and stir with a cinnamon stick

    Notes

    Feel free to use other spirits such as Rye or Rum
    Remember to bring the butter to room temperature first
    The batter will stay fresh in the refrigerator for 2 weeks--if it lasts that long!

    Nutrition

    Serving: 8ozCalories: 327kcalCarbohydrates: 1gProtein: 1gSodium: 8mgPotassium: 1mgCalcium: 3mgIron: 1mg
    Keyword Fall Drinks, Hot Bourbon, Hot Butter, hot cocktails, hot toddy, madmen cocktails, mid century cocktails, Winter Cocktails, winter drinks
    Tried this recipe?Let us know how it was!

    Best Sweet Vinegar and Oil Salad Dressing Recipe

    November 16, 2020

    Pouring salad dressing over a salad from a jar with a tight-fitting lid.

    Sweet vinegar and oil salad dressing is ideal for enhancing fruit salads, as well as sweetening up bitter greens. The subtle sweetness comes from honey, which not only balances out the acidity of the vinegar but also add a subtle, comforting sweetness to each bite.

    A bottle of sweet vinegar and oil salad dressing next to a bowl of strawberry salad on a dining table.

    Vinegar and oil salad dressing has been around for centuries. I love it because it has such a fresh taste and there are so many variations that can be created using simple ingredients. You can make it plain, peppery, with garlic, or this version, which is sweet. Depending on what you're serving it with, each one is right at different times.

    A basic vinegar and oil salad dressing is 3 parts oil to 1 part vinegar -- the perfect balance for a vinegar dressing recipe. Herbal seasonings, fresh garlic, dijon mustard, sea salt, lemon juice, and sweeteners like honey or white balsamic vinegar can be added to create the flavor profile to fit what you're serving. The first time I made it I stuck to the basics. The next time, I began experimenting with making homemade vinaigrettes with different flavorings. This sweet balsamic vinaigrette dressing has a mild, rich flavor and is one of my favorite recipes!

    Homemade Salad Dressing vs. Store Bought

    My mother did not buy bottles of salad dressing. She thought store-bought dressings were expensive and wasteful, and whipping up homemade salad dressing was so easy. But for me, the real case for homemade dressings is the fresh taste (so much flavor!) and no preservatives (healthy recipes!) Also, you can adjust the ingredients according to your personal preferences when you make your own dressing. I can guarantee that once you make your own salad dressing, you'll never buy it from the store again. Homemade is the only thing your family will want!

    I use a light vegetable oil for this recipe, as it is a rather flavorless oil. You can choose the kind of oil you use to make this dressing based on your personal preferences. Canola oil, walnut oil and soybean oil are options that will change the flavor a bit. I have tried it with extra virgin olive oil and I find the olive taste overpowering. If you prefer to use olive oil, I recommend using a light version such as this one rather than a regular, heavier extra-virgin olive oil if you want the best balsamic vinaigrette flavor.

    Ingredients You'll Need

    All ingredients needed to make sweet vinegar and oil salad dressing; shown on a black background.

    You only need 5 minutes and a few basic ingredients to make this simple salad dressing:

    • Vegetable oil
    • White balsamic vinegar
    • Fresh lemon juice
    • Dijon mustard
    • Minced garlic
    • Honey
    • Kosher salt
    • Black pepper

    How to Make this Balsamic Vinaigrette Recipe

    Bowl with all ingredients for salad dressing inside, and a wire whisk to whisky them all together.
    1. Start with a Sealable Jar: To make this dressing, you'll need a mason jar or something similar with a tight-fitting lid. This not only makes mixing a breeze, but also allows you to store any leftover dressing and shake before serving with ease.
    2. Combine the Ingredients: In a small bowl, whisk together all of the ingredients.
    3. Emulsify: The trick to a perfect homemade dressing is the emulsification process. To achieve this, my favorite method is to pour the mixture into the sealable jar, tighten the lid, and shake vigorously until it is fully combined. (No need for a food processor or other equipment!)
    4. Taste and Adjust: Taste your dressing and adjust the sweetness or tartness to your liking.
    5. Store and Serve: Your Sweet Vinegar and Oil Salad Dressing is ready to go! When you're ready to use it, give the jar a good shake to re-emulsify the dressing, then drizzle it over your fresh greens or favorite salad.
    Pouring salad dressing over a salad from a jar with a tight-fitting lid.
    Kitchen tip: A jar with a tight fitting lid makes it easy to store dressing and shake it before pouring into your salad bowl.

    Salad Suggestions for Sweet Salad Dressing

    A sweet salad dressing is a great way to sweeten a bitter green salad or enhance a sweet one. Here are some ideas for salads that work great with this sweet dressing:

    • Strawberry Spinach Salad: Toss this dressing with fresh strawberries, baby spinach, and some sliced red onion for a sweet and tangy delight.
    • Kale Salads: Pouring this dressing onto kale leaves turns even the toughest greens into a tender, flavorful treat.
    • Warm Salads: Try it with warm Brussels sprouts or roasted vegetable salads to complement their savory flavors.
    • Grilled Chicken Marinade: Use this dressing as a great marinade for grilled chicken, imparting a sweet and savory glaze to your meal.
    • Caprese Salad: Enhance the flavor of cherry tomatoes, mozzarella, and fresh basil in a Caprese salad.

    Salads made with kale, broccoli rabe, and turnip greens have a bitter bite to them. Countering it with a sweet salad dressing can calm that bitterness and make it more palatable. And if you're serving a salad with fruit, such as a strawberry or mandarin orange salad, this sweet vinegar and oil salad dressing will enhance the sweetness of the fruit.

    Variations for Sweet Vinegar and Oil Dressing

    If you enjoy making your own salad dressings, you have many different options! Following are some versions you might want to try:

    • Use apple cider vinegar in place of white balsamic vinegar (for a more tangy flavor).
    • Use red wine vinegar in place of white balsamic for a sweet red wine vinaigrette.
    • Use sherry vinegar or white wine vinegar (any wine vinegars) in place of white balsamic vinegar for a flavor twist.
    • Use rice vinegar to give it an Asian flair - perfect for Asian fruit salads.
    • Substitute maple syrup in place of honey for a slightly less sweet dressing.
    • Add pureed berries such as strawberries or raspberries for a fruity dressing.

    Experiment with different flavorings and let me know what your favorite version is!

    Storing Vinaigrette Dressing

    While vinegar and oil alone are okay to store at room temperature, once you add something to the mix you are changing the acidity and introducing items that turn rancid. Therefore, I highly recommend that you store this white balsamic vinaigrette salad dressing in an airtight container in the refrigerator for up to 14 days. It will solidify a bit when cold, so be sure to set it out at room temperature for 15-20 minutes, then shake well to fully emulsify before serving.

    We hope you enjoy this sweet honey balsamic vinaigrette and put it into your regular rotation of favorite salad dressings!

    If you love fresh salad and homemade dressing, also try our homemade Thousand Island salad dressing and our candy apple salad with apple cider vinaigrette.

    Have a comment or a vintage recipe you'd like to share? We'd love to hear from you! Please rate, comment, or send me an email at [email protected]!

    Pouring salad dressing over a salad from a jar with a tight-fitting lid.

    Best Sweet Vinegar and Oil Salad Dressing Recipe

    Nancy Blackstone
    Sweet vinegar and oil salad dressing is a twist on the classic version. It's ideal for enhancing fruit salads, as well as sweetening up bitter ingredients.
    4.81 from 100 votes
    Print Recipe Pin Recipe
    Prep Time 5 minutes mins
    Total Time 5 minutes mins
    Course Salad
    Cuisine American
    Servings 12 Servings
    Calories 92 kcal

    Ingredients


    • ½ cup vegetable oil
    • ¼ cup white balsamic vinegar
    • 2 tablespoons lemon juice fresh squeezed
    • 1 tablespoon dijon mustard
    • 1 clove minced garlic
    • 1 tablespoon honey
    • ¼ teaspoon kosher salt
    • ¼ teaspoon pepper

    Instructions
     

    • Add all ingredients to a small mixing bowl
    • Stir vigorously with a whisk until fully combined
    • Taste on a piece of lettuce and adjust ingredients to your liking.
    • Pour into a mason jar or cruet with a tight fitting lid; shake vigorously before pouring on to salad.
    • Store in the refrigerator in a jar with a tight fitting lid or other airtight container for up to 2 weeks.

    Notes

     
    • Variations: 
    • Use apple cider vinegar in place of white balsamic vinegar
    • Use red wine vinegar, sherry vinegar or any wine vinegar in place of white balsamic vinegar. 
    • Substitute maple syrup in place of honey for a slightly less sweet taste.
    • Add some pureed berries such as raspberries or strawberries for a fruity flavor.

    Nutrition

    Serving: 2tbsCalories: 92kcalCarbohydrates: 3gProtein: 0.1gFat: 9gSaturated Fat: 1gPolyunsaturated Fat: 5gMonounsaturated Fat: 2gTrans Fat: 0.1gSodium: 64mgPotassium: 13mgFiber: 0.1gSugar: 2gVitamin A: 1IUVitamin C: 1mgCalcium: 3mgIron: 0.1mg
    Keyword balsamic vinaigrette, fruit salad dressing, homemade salad dressing, fresh salad dressing, old fashioned salad dressing, sweet salad dressing, vinaigrette, vinegar and oil
    Tried this recipe?Let us know how it was!

    Bourbon Eggnog Is a Holiday Tradition

    November 13, 2020

    A closeup of a roll polly glass of eggnog

    Smooth and creamy with a slightly spicy finish, Bourbon Eggnog is the perfect drink as the weather turns chilly and holiday traditions begin.

    Two roll poly glasses filled with eggnog
    Rich, thick eggnog is a holiday tradition for good reason

    What on Earth is Nog?

    Eggnog, like many drinks, has a very cloudy origin story. It is said that eggnog may have been created in the mid to late 1700's. It was a favorite in taverns back in that era, and was a staple in colonial America. The word nog probably comes from the word "noggin," which referred to a small cup. Those small cups were used to serve rum, so it probably evolved from there. Eggnog was such a part of early American life that there's even a recipe from our first President, George Washington -- it's not very different from the one below, except the quantities are much larger. He wasn't a great leader for nothing!

    Ingredients for Eggnog

    Many recipes for eggnog are sized for a party or large gathering. In my family, we always made 'small batch' eggnog. After all, sometimes you just want to enjoy a seasonal drink or two while watching Christmas Vacation for the zillionth time, and you don't have a crowd to serve.

    When selecting a spirit, some prefer a more spicy choice such as rye or rum. I go for the best of both worlds with a quality bourbon such as Basel Hayden's or Maker's Mark. A barrel strength bourbon will also give you a bit more spice. Experiment with your favorites to find a taste you like.

    I see folks add whipped cream to their drink and insert cinnamon sticks, but I prefer the egg white version my dad made in the 1960's. Using egg whites adds a smoothness and silkiness similar to whipped cream. Egg whites also give a drink a bit more texture and thickness, and are commonly used in drinks such as the Whiskey Sour.

    A Word About Egg Whites

    Some people are nervous about using raw egg whites. Nowadays most chickens are vaccinated for salmonella to prevent transmission to humans. Be sure to buy fresh, cold pasteurized eggs that are Grade AA USDA certified and have no cracked shells. Thoroughly wash the eggs before cracking them to prevent any bacteria that might be on the outer shell from getting into the drink. This should ensure the safety of your drink, but if you have any concerns, check with your doctor.

    Ingredients

    Here's what you'll need to get into the holiday spirit:

    • Eggs
    • Sugar
    • Bourbon
    • Milk
    • Whipping cream
    • Nutmeg
    • Cinnamon (optional)

    These are basic ingredients usually kept on hand during the holidays. So that makes it easy to whip up this drink when you're in the mood!

    Tips for Successful Bourbon Eggnog

    This is not a difficult drink to make, but it does require a bit more 'cooking' technique than home mixologists are used to.

    • Go easy on the bourbon until you taste it -- you can always add more
    • Use an electric mixer to whip the egg whites to the proper doneness
    • Allow about an hour for chilling if you like it cold

    Which spirit do you make your Eggnog with? Rum? Rye? Or all the above like our first president used to do?!

    A closeup of a roll polly glass of eggnog

    Bourbon Eggnog Is a Holiday Tradition

    Kevin Mayfield
    Smooth, rich, spicy eggnog is an American holiday tradition.
    5 from 1 vote
    Print Recipe Pin Recipe
    Prep Time 15 minutes mins
    Total Time 15 minutes mins
    Course Classic Cocktails
    Cuisine American
    Servings 4 servings
    Calories 292 kcal

    Ingredients


    • 2 large eggs
    • 4 tablespoons sugar
    • 4-6 ounces bourbon
    • 10-12 ounces milk
    • 4 ounces heavy whipping cream
    • ¼ tablespoon nutmeg
    • ¼ tablespoon cinnamon optional

    Instructions
     

    • Separate the eggs and place the yolks in a mixing bowl. Set the egg whites aside for later.
    • Add the sugar to the egg yolks and whisk until the mixture is thick and full.
    • Add the bourbon, milk and cream; whisking lightly as you go. Set aside.
    • Using a hand mixer at medium-high speed, whip the egg whites until they thicken in volume and form soft peaks. (When you turn your whisk or beater upside down, peaks form but soon melt back into themselves. The peaks do not hold for long.)
    • Fold the egg whites into the bourbon mixture, then gently whisk together to mix well.
    • Chill for at least an hour before serving. Serve in a roly poly or punch glass.
    • Garnish with a dusting of nutmeg.

    Notes

    Experiment with the spirit. I prefer bourbon, but feel free to use a rye or rum.
    I gave a range for how much bourbon to use because I prefer a bit more, but others may not. So start off small and add more if desired. If you add more bourbon, you may also want to add a little more milk for the right consistency.
    Mixed eggnog will keep in the refrigerator for 3 days.

    Nutrition

    Serving: 4ozCalories: 292kcalCarbohydrates: 17gProtein: 6gFat: 15gSaturated Fat: 9gPolyunsaturated Fat: 1gMonounsaturated Fat: 5gTrans Fat: 1gCholesterol: 139mgSodium: 77mgPotassium: 154mgFiber: 1gSugar: 16gVitamin A: 668IUVitamin C: 1mgCalcium: 118mgIron: 1mg
    Keyword 1950's cocktails, 1960's cocktails, 1970's cocktails, Christmas Cocktails, Eggnog, Fall Drinks, Holiday Cocktails, Holiday Drinks, Mad Men Cocktails, mid century cocktails, Thanksgiving Cocktails
    Tried this recipe?Let us know how it was!

    Green Beans Dijon make a tasty side dish

    November 11, 2020

    Bowl of fresh green beans dijon in a blue serving bowl

    Tangy dijon mustard, minced garlic, fresh green onions and bits of crispy chopped bacon give a welcome pop of flavor to fresh green beans. This mid century side dish pairs well with almost everything!

    Bowl of fresh green beans dijon in a blue serving bowl

    I'm always looking for ways to dress up vegetables, so when when my friend Susan gave me her 96-year old aunt's recipes, this one caught my eye. The irresistible flavor combination got me running to the kitchen right away!

    Susan's Aunt Helen was born in 1923 and was the quintessential mid century housewife. She is still living in LA, although she no longer cooks. But back in the day, this dish made frequent appearances at her dinner table. It's a great item to serve at holiday gatherings when you are looking for a tasty side dish to complement the main meal.

    • Green beans dijon original handwritten recipe
    Aunt Helen's original handwritten recipe

    Start By Pan Frying Bacon

    If you're a modern cook who has gotten used to cooking bacon in the microwave, you'll need to revert to old fashioned pan frying for this recipe. The flavor depends on the other items cooking in the bacon drippings. You will eventually drain it off, but the flavor will be retained and will coat the beans.

    Hints For Cooking Green Beans Dijon

    1. Prep your green beans before you start cooking anything else -- it takes a few minutes to trim the ends of the beans before you can start cooking them.
    2. Cook the bacon until very crisp -- probably longer than you would normally cook it if you were making breakfast. You want it to be crispy enough to crumble or chop easily.
    3. Carefully monitor green onions and garlic while sautéing in bacon drippings, as they can burn easily. Keep temperature low and watch them closely.

    Looking for other delicious mid century vegetable recipes? Try our Broccoli and Cheese Casserole with Buttery Cracker Topping and Southern Sweet Creamed Corn in a Skillet.

    Image of green beans dijon ready to serve in a blue bowl

    Green Beans Dijon

    Nancy Blackstone
    Tangy dijon mustard, minced garlic, fresh green onions and bits of crispy chopped bacon give a welcome pop of flavor to fresh green beans. This mid century side dish pairs well with almost everything!
    5 from 1 vote
    Print Recipe Pin Recipe
    Prep Time 20 minutes mins
    Cook Time 15 minutes mins
    Total Time 35 minutes mins
    Course Side Dish
    Cuisine American
    Servings 6 -8 Servings
    Calories 59 kcal

    Ingredients


    • 2 pounds fresh green beans
    • 4 slices bacon
    • 1 bunch chopped green onions ¼ cup
    • 2 garlic cloves minced
    • 2 tablespoons dijon mustard
    • ¼ cup chicken broth
    • salt
    • pepper

    Instructions
     

    • Wash green beans, then trim both ends. Place in a deep skillet with ½ cup water, ¼ teaspoon salt and ¼ teaspoon pepper. Cover with a lid and bring to a boil; cook to desired doneness. If you like them very crispy, cook 4-6 minutes, crisp-tender 6-8 minutes, and tender 8-10 minutes. I usually cook mine for about 7-8 minutes.
    • While beans are cooking, pan fry 4 slices of bacon in a skillet until they are nice and crispy. Remove to a cutting board and chop; do not discard bacon grease from pan.
    • Add green onions and garlic to pan and saute until tender, about 2-3 minutes.
    • Drain excess grease from pan, then stir in dijon mustard and chopped bacon.
    • Gradually add chicken broth, stirring constantly. Heat until thickened. If sauce gets too thick, thin with additional chicken broth.
    • Pour sauce over cooked beans, tossing until coated. Season with salt and pepper to taste.

    Notes

    Prep beans by washing and cutting ends before you start any cooking
    Cook bacon until very crispy

    Nutrition

    Calories: 59kcalCarbohydrates: 11gProtein: 3gFat: 1gSaturated Fat: 1gPolyunsaturated Fat: 1gMonounsaturated Fat: 1gCholesterol: 1mgSodium: 103mgPotassium: 349mgFiber: 4gSugar: 5gVitamin A: 1087IUVitamin C: 20mgCalcium: 64mgIron: 2mg
    Keyword Christmas side dishes, dijon mustard, green beans, Holiday side dishes, Thanksgiving side dishes, vegetable side dishes
    Tried this recipe?Let us know how it was!

    Homemade Southern Style Cornbread Dressing Recipe

    November 10, 2020

    Cornbread stuffing in a white casserole dish with a spoonful being lifted out.

    This homemade Southern style Cornbread dressing recipe gets its rich flavor from a combination of butter, sage, onion, celery, and from-scratch savory cornbread. It's the perfect side dish for poultry, and a must-have for every Thanksgiving dinner.

    Kentucky cornbread stuffing in a casserole dish
    The perfect side dish for your Thanksgiving table
    [feast_advanced_jump_to]

    Family Recipe For Southern Style Cornbread Dressing

    My husband's southern grandmother grew up in the hills of Appalachian Kentucky. In the South, a seasoned cornbread stuffing is a long-held traditional holiday side dish. This moist dressing took center stage on every Thanksgiving menu, as well as at many Sunday suppers.

    It was always a challenge learning to cook from my husband's Southern family. They didn't own cookbooks. They never used recipes. Cooking was a tradition passed down from generation to generation simply by working together in the kitchen. As charming as that was, it was awfully frustrating for me when I wanted to recreate a dish. I ended up spending years learning some of their recipes through repeat visits, cooking with family members who thought I was much too worried about measuring and timing things. After years of practice, I was able to break down this homemade southern cornbread dressing into a step-by-step recipe.

    Alternatives to Stuffing the Turkey

    In mid century, the cavity of the turkey was stuffed, infusing the flavors and juices of the bird into the breading mixture. While some people still stuff the turkey, concerns over contracting salmonella have turned many away from this tradition. Turkey needs to reach an internal temperature of 165 degrees to be safe; that means the stuffing does, too. In order for the stuffing to reach 165 degrees, the external temperature of the turkey has to reach about 180 degrees, which results in dry turkey.

    I have had salmonella poisoning and wouldn't wish it on my worst enemy. Therefore, I am ultra cautious and I opt for not stuffing the turkey. Instead, I bake the dressing in a greased casserole dish, then pour over a few tablespoons of drippings that have run off the turkey after it has cooked. These are the same drippings I use to make turkey gravy.

    Another option is to make patties from the dressing. I usually make a tray of these in addition to a casserole dish of stuffing. Simply take the stuffing when it's ready to be cooked, form them into small patties and place them on a greased 9 x 13 baking sheet. Bake them at 350 degrees for 20-25 minutes or until their color turns golden brown.

    Southern Style Cornbread Dressing Ingredients

    To make cornbread stuffing, you'll just need some simple ingredients:

    • cornbread prepared without sugar - the sturdy, savory base of the dressing
    • butter - tenderizes the vegetables, adds richness to the flavor and moisture to the texture
    • yellow onions - add a strong flavor
    • celery - adds a classic, savory flavor
    • seasoned stuffing cubes - aromatic seasoned bread cubes that add flavor and softness to the dressing
    • rubbed sage - an herb that compliments the flavor of the poultry
    • black pepper - adds a bit of spice
    • chicken broth (or turkey broth) - adds moisture and poultry flavor
    All of the ingredients in Southern-style cornbread dressing on a black background.

    Steps For Making Traditional Cornbread Dressing

    Make the cornbread

    To make homemade Southern cornbread dressing, you need to start with homemade Southern cornbread. Begin by making a pan of super fast and easy homemade cornbread without sugar -- follow the steps in our Southern cornbread recipe here.

    Once the cornbread is baked and cooled, it's time to make the dressing mixture:

    Step-by-Step Cooking Instructions

    Butter melting in skillet
    1. Melt butter in a large skillet
    celery and onion added to butter in skillet
    2. Add celery and onion
    celery and onion simmering in skillet
    3. Simmer
    cornbread broken up into crumbs in bowl
    4. Break up corn bread in a large mixing bowl
    stuffing cubes with pepper and sage added to cornbread crumbs
    5. Add bread cubes, sage, and pepper to crumbled cornbread
    adding celery, onion and butter mixture to crumb mixture
    6. Stir in celery & onion vegetable mixture
    pouring diluted chicken broth into Kentucky cornbread stuffing mix
    7. Add diluted chicken broth
    ingredients all mixed together
    8. Mix until fully combined
    cornbread stuffing transferred to a baking dish
    9. Transfer dressing from large bowl to baking dish
    Cornbread stuffing in a white casserole dish with a spoonful being lifted out.
    From the oven to the dinner table in a mid century casserole dish

    Tip For Success

    • Use salted butter for cooking
    • Use regular chicken broth or chicken stock rather than reduced-sodium for best flavor
    • Dice onions and celery into petite pieces for proper consistency. I use a handy chopper to make it fast and easy.
    • Store in an airtight container or cover tightly with plastic wrap and set in the refrigerator for up to 4 days. (Southern dressing usually tastes best the next day, after flavors have melded together overnight.)

    Every bite of this delicious, moist dressing compliments the turkey, without overpowering it with too many strong flavors. It's easy to see why this classic dish has become a family favorite, especially during the holiday season. I hope you'll add it to your family's holiday table this year!

    • A piece of cornbread sliced in half on a small blue bread plate, with a pat of butter on one piece. A basket of cornbread is in the background.
      Southern Style Cornbread
    • A wooden spoon lifting a scoop of cream corn from a casserole dish.
      Easy Homemade Southern Sweet Creamed Corn Recipe
    • A slice of Sinatra spicy pumpkin pie with a dollop of whipped cream, on a white dessert plate.
      Frank Sinatra's Favorite Spicy Pumpkin Pie Recipe
    • Chai Sugar Cookies on a white plate on top of a green red placemat, with pinecones and cinnamon sticks in the background
      Taylor Swift's Holiday Recipe for Chai Sugar Cookies

    Have a comment or a vintage recipe you'd like to share? We'd love to hear from you! Please rate, comment, or send me an email at [email protected].

    Cornbread stuffing in a white casserole dish with a spoonful being lifted out.

    Homemade Southern Style Cornbread Dressing Recipe

    This Southern Cornbread dressing recipe gets its homemade flavor from a combination of butter, sage, onion, celery, and from-scratch savory cornbread. It's the perfect side dish for poultry, and a must-have for every Thanksgiving dinner.
    5 from 2 votes
    Print Recipe Pin Recipe
    Prep Time 20 minutes mins
    Cook Time 30 minutes mins
    Total Time 50 minutes mins
    Course Side Dish
    Cuisine American
    Servings 8 Servings
    Calories 427 kcal

    Ingredients


    • ½ pound butter
    • 2 medium yellow onions diced
    • 3 stalks celery diced
    • 1 pan cornbread (8x8) prepared without sugar
    • 6 ounces seasoned stuffing cubes
    • ½ teaspoon rubbed sage
    • ¼ teaspoon pepper
    • 14.5 ounces chicken broth
    • 14.5 ounces water fill your can of broth with water

    Instructions
     

    • In a large skillet, melt butter. When butter is melted, add diced onion and celery. Simmer in butter until softened, about 5 minutes. 
    • In a large bowl, break cornbread up into crumbs. Add stuffing cubes, sage and pepper.
    • Using a wooden spoon or spatula, mix the celery and onion mixture into the bowl of stuffing.
    • Mix the can of chicken broth with 1 can of water, then add to the stuffing mix. Using your hands or a wooden spoon/spatula, mix the ingredients until fully combined and moist.
    • Place in a greased casserole dish and bake at 350 degrees for 30 minutes or until golden.
    • Pour a couple of tablespoons of turkey drippings over the stuffing before serving, if desired. 

    Notes

    You can make the stuffing a day ahead and store it covered in the refrigerator until you're ready to bake. Allow an extra 10 minutes for baking if it's cold.

    Nutrition

    Calories: 427kcalCarbohydrates: 40gProtein: 5gFat: 28gSaturated Fat: 16gPolyunsaturated Fat: 2gMonounsaturated Fat: 8gTrans Fat: 1gCholesterol: 62mgSodium: 951mgPotassium: 214mgFiber: 3gSugar: 9gVitamin A: 813IUVitamin C: 6mgCalcium: 62mgIron: 2mg
    Keyword cornbread dressing, cornbread stuffing, Kentucky Thanksgiving dressing, Thanksgiving dressing, Thanksgiving side dishes
    Tried this recipe?Let us know how it was!

    Southern Style Cornbread

    November 9, 2020

    A piece of cornbread sliced in half on a small blue bread plate, with a pat of butter on one piece. A basket of cornbread is in the background.

    There's nothing like Southern Style Cornbread served hot from the oven! This sweet, crumbly bread with a pat of butter compliments everything from fried chicken to chili to taco casserole. Yum!

    A piece of cornbread sliced in half on a small blue bread plate, with a pat of butter on one piece. A basket of cornbread is in the background.
    Southern style cornbread

    Maybe I lived under a rock, but I had never tasted cornbread until I was in college. Kevin took me home to meet his parents, and his native Kentuckian mother made a chicken dinner with homemade southern style cornbread on the side. I thought I had gone to heaven!

    In all fairness, I was raised in Chicago where it wasn't a common food, and this was long before Cracker Barrel restaurants could be found in the North. I was fascinated with the grainy texture of the bread and the delicious taste of butter melding in with the distinct flavor of corn.

    Couldn't Be Easier To Make

    Ingredients for southern style cornbread
    Top row: wet cornbread ingredients Bottom row: dry cornbread ingredients

    Because Kevin and I love cornbread, I often serve it when we have guests over for dinner. I'm always surprised at the number of people who are startled that I made it from scratch. Most of my friends have never made homemade cornbread, and there's a high level of perceived difficulty. But this dish mixes up in 5 minutes and bakes in only 20 minutes! In one bowl you simply mix 5 dry ingredients, in another you mix 3 wet ingredients, stir them together then pour in a greased baking pan and bake. It doesn't get much easier than that!

    When she learned to make this in the 1950's, Kevin's mom didn't use a recipe or measure ingredients. Also, she always made her cornbread in a cast iron skillet. I often do too, but I didn't have one handy when I made this batch. If you would like to use a cast iron skillet, simply substitute an 8" round skillet for an 8 x 8 pan. Make sure the pan is well coated with vegetable oil before pouring the cornbread batter inside.

    • bowl of dry ingredients mixed on the bottom, bowl of wet ingredients mixed on the top
      Bowl of wet ingredients mixed, bowl of dry ingredients mixed
    • bowls of wet and dry ingredients mixed together to form batter
      Wet & dry ingredients mixed together
    • batter poured in the 8 x 8 baking pan, ready for the oven
      Batter poured into 8 x 8 pan
    • Southern Style Golden cornbread in baking pan just after it is removed from the oven
      Baked Southern style cornbread

    What is Corn meal?

    Corn meal is a yellow or white corn that has been dried and ground. It has a fairly course texture and a distinct corn flavor. It can be found in the baking aisle of your grocery store, near the flour. Make sure to pay attention to what you are buying -- corn meal should not be confused with corn flour or corn starch, which are different products. Corn flour is ground to a much finer powder texture than cornmeal, and its corn flavor is not as strong. Cornstarch is a flavorless powder made from the endosperm of the corn and is most often used as a thickener; it has 3 times the the thickening power of flour.

    Sugar or No Sugar?

    I love sweet cornbread and I always make it to serve with spicy dishes like chili and taco casserole. But cornbread was not originally made with sugar, and to this day you will often find that Southern cooks do not sweeten their cornbread. Northerners tend to like it sweetened. True to our regions, Kevin's mom did not put sugar in her cornbread, but I do! Give it a try both ways and let me know your preference!

    A piece of cornbread sliced in half on a small blue bread plate, with a pat of butter on one piece. A basket of cornbread is in the background.

    Southern Style Cornbread

    Nancy Blackstone
    There's nothing like Southern Style Cornbread served hot from the oven! This sweet, crumbly bread tastes incredible and is ready in 25 minutes!
    4.75 from 4 votes
    Print Recipe Pin Recipe
    Prep Time 5 minutes mins
    Cook Time 20 minutes mins
    Total Time 25 minutes mins
    Course Side Dish
    Cuisine American
    Servings 6 Servings
    Calories 355 kcal

    Ingredients


    • 1 cup yellow corn meal
    • 1 cup all purpose flour
    • ¼ cup sugar optional
    • 1 tablespoon baking powder
    • 1 teaspoon salt
    • 1 cup milk
    • ⅓ cup vegetable oil
    • 1 large egg

    Instructions
     

    • Preheat oven to 400 degrees. Generously grease an 8 x 8 baking pan.
    • In a large bowl, mix together corn meal, flour, sugar (if using), baking powder and salt.
    • In a small bowl, mix together milk, oil and egg. 
    • Pour milk mixture into dry ingredients, stirring only until fully combined. Do not overmix. 
    • Transfer to greased 8 x 8 pan. Bake at 400 degrees 20 minutes or until wooden toothpick inserted in center comes out clean.

    Notes

    You can substitute a well-oiled 8" round cast iron skillet for the 8 x 8 baking pan
    You can also substitute a greased muffin pan to make individual corn muffins

    Nutrition

    Calories: 355kcalCarbohydrates: 46gProtein: 7gFat: 16gSaturated Fat: 3gPolyunsaturated Fat: 8gMonounsaturated Fat: 4gTrans Fat: 1gCholesterol: 35mgSodium: 630mgPotassium: 173mgFiber: 3gSugar: 11gVitamin A: 111IUCalcium: 173mgIron: 2mg
    Keyword Chili side dish, corn meal, cornbread dressing, Mexican side dish, Southern side dish
    Tried this recipe?Let us know how it was!

    The Champagne Mimosa Cocktail is Brunch Royalty

    November 6, 2020

    A Champagne cocktail served in a flute.

    The Champagne Mimosa is a favorite drink to liven up any occasion, and has become the go-to drink for bunches everywhere.

    A Champagne cocktail served in a flute.
    Nothing adds a touch of class to your brunch like the light and lovely Mimosa.

    Nancy and I enjoy having a mimosa brunch every now and then. We'll cook up a big Sunday breakfast of eggs benedict, squeeze some fresh oranges, and uncork a bottle of dry champagne. The only problem is that they go down so easily that we're usually asleep on the couch for the rest of the afternoon!

    It took the British Royal Family to make the Champagne Mimosa so Popular

    The Mimosa is a refreshing drink that mixes delicious orange juice with the bubbly fun of Champagne. It was probably invented as a way to encourage daytime drinking by incorporating fruit juice.

    The Mimosa was most likely created in England in the 1920's by a bartender at one of London's tony clubs. Or perhaps it was Paris? Like most cocktails, it's a little murky on who mixed it first and when. Most agree that it is probably a variation of a Buck's Fizz, which was created in London in the 1920's. The Buck's Fizz uses Champagne and orange juice, but in different quantities than a Mimosa.

    Frank Meier at the Ritz Hotel in Paris is credited for coming up with the name Mimosa in 1925. His version uses similar quantities of Champagne and juice. Oh, and it's also named after the lovely yellow flowering plant, the Mimosa. So like many things, it probably comes down to 'marketing'.

    Legend has it that it took the British Royal Family to popularize the drink in the 1960's. They were quoted as saying they loved their "Champagne oranges to sip on," and that likely influenced others to do the same.

    It took a while to make the leap from Royal table to brunch stations everywhere, but by the late 1970's it was a staple of quality brunch celebrations. The Hyatt Regency O'Hare in Chicago used to have the most exotic bottomless Champagne brunch buffet I've ever seen, and growing up it was my family's tradition to have Mother's Day brunch there every year.

    Ingredients for a Refreshing Champagne Mimosa

    This drink is pretty simple, with only two ingredients needed to drink like a Royal:

    • Dry Champagne or sparkling wine
    • Fresh squeezed orange juice

    Tips for Success

    There are not any secrets for making great Mimosa, but keep these things in mind to take yours to the next level.

    • I prefer to use a dry or yeasty champagne to counter the sweet orange juice. Korbel Extra Dry will do just fine.
    • Of course you can use orange juice from a carton, but drinks always taste better with freshly squeezed juice.

    Do you use orange juice or another fruit juice for yours?

    A Champagne cocktail served in a flute.

    The Champagne Mimosa Cocktail is Brunch Royalty

    Kevin Mayfield
    The light and lively Mimosa is a brunch staple.
    5 from 1 vote
    Print Recipe Pin Recipe
    Prep Time 1 minute min
    Total Time 1 minute min
    Course Classic Cocktails
    Cuisine French
    Servings 1 Cocktail
    Calories 27 kcal

    Ingredients
      

    • Dry Champagne or sparking wine
    • Orange juice

    Instructions
     

    • Pour about an ounce of orange juice into a champagne flute glass
    • Add about an ounce of champagne to the glass 
    •  Garnish with fruit of your choice

    Notes

    There really are no precise measurements for this one. Feel free to 'eyeball' the amounts you pour based on the champagne-to-juice ratio you like in your mimosa. 
    Use a dry champagne to prevent the drink from being too sweet.

    Nutrition

    Calories: 27kcalCarbohydrates: 3gProtein: 1gFat: 1gSaturated Fat: 1gPolyunsaturated Fat: 1gMonounsaturated Fat: 1gSodium: 2mgPotassium: 82mgFiber: 1gSugar: 3gVitamin A: 57IUVitamin C: 14mgCalcium: 6mgIron: 1mg
    Keyword British cocktails, Brunch drinks, celebration drinks, champagne, Champagne drinks, Christmas drinks, French cocktails, Holiday Drinks, orange juice drinks, Ritz Paris cocktail drinks, royal family cocktails
    Tried this recipe?Let us know how it was!

    Cranberry Orange Quick Bread is a Festive Holiday Treat

    November 3, 2020

    A loaf of cranberry orange quick bread on a cutting board with 3 slices cut off

    Tart, juicy cranberries, fresh orange juice and orange zest in a sweet batter give this colorful cranberry orange quick bread its festive flavor. It looks great on a holiday dessert table and also makes a lovely breakfast treat.

    A loaf of cranberry orange quick bread on a cutting board with 3 slices cut off

    I'm a fan of fresh cranberries because I always associate them with the November/December holiday season. That's because it's difficult to find them in the grocery store at any other time. I searched the produce department of various area grocery stores throughout the month of October to no avail. Finally at the beginning of November bags of fresh cranberries appeared.

    Of course, you can use frozen cranberries in place of fresh ones in most recipes, including this one. But there's something about the hunt for fresh cranberries in the fall that makes it more fun. It's a sign that the holidays are upon us!

    photo of handwritten recipe for cranberry orange quick bread
    Original handwritten recipe

    A Great Bread For Beginning Bakers

    Quick breads have been around since the 19th century, but they were very popular in the 1950's and 60's cookbooks due to their efficient use of ingredients and ease for the mid century modern baker. They don't require kneading or rising; they're simply mixed in a bowl, transferred to a baking pan and baked. This one is made with fruit and juice and it comes out very moist on the inside, even if you accidentally leave it in the oven a little too long (ahem...speaking from experience.) They make great gifts for neighbors at the holidays -- just wrap them up in a little cellophane with a bow on top as a gift the whole family can enjoy.

    Made With Basic Ingredients

    Cranberry Orange Bread ingredients in prep bowls
    Ingredients for cranberry orange bread

    Except for the seasonal cranberries, this cranberry orange quick bread is made with basic ingredients you usually have in the house:

    • Flour
    • Sugar
    • Baking powder
    • Baking soda
    • Salt
    • Butter
    • Orange juice
    • Orange zest
    • Egg
    • Cranberries
    • Walnuts (optional)

    Five Easy Steps

    1. Start by mixing the first five dry ingredients in a large mixing bowl, then cutting in the butter until it resembles small crumbles.
    2. In a smaller bowl mix the orange juice, orange zest and egg.
    3. Pour the juice mixture into the dry ingredients and mix them together.
    4. Fold in the cranberries, and if you're adding nuts, fold them in, too.
    5. Transfer to a well greased 8 x 4 x 2 loaf pan and bake!
    • Batter mixture and juice mixture  in side-by-side bowls
      Steps 1 & 2
    • Combining batter and juice in one bowl
      Step 3
    • Mixing cranberries and optional nuts into the batter
      Step 4
    • Cranberry orange quickbread ready for the oven
      Step 5

    How to Know When Cranberry Orange Bread Is Done Baking

    Test for doneness by inserting a wooden toothpick into the center. If it comes out clean, it's ready, and if it doesn't, it needs more time.

    This bread is very dense, so you can't judge doneness just by looking at it or touching the top. Even if it looks nice and brown on the outside, it still may need time on the inside. Removing it too soon will likely cause it to fall in the center during the cooling process and be gooey on the inside when you cut it (again...speaking from experience.) Therefore, make sure you do the toothpick test regardless of appearance. If you feel that your bread is getting too brown before it passes the toothpick test, slide a piece of foil loosely over the top to prevent it from browning further.

    If you love quick breads, check out our banana nut bread and Hollywood monastery pumpkin bread.

    A loaf of cranberry orange quick bread on a cutting board with 3 slices cut off

    Cranberry Orange Quick Bread

    Nancy Blackstone
    Tart, juicy cranberries, fresh orange juice and orange zest in a sweet batter give this colorful cranberry orange quick bread its festive flavor. It looks great on a holiday dessert table and also makes a lovely breakfast treat.
    5 from 1 vote
    Print Recipe Pin Recipe
    Prep Time 10 minutes mins
    Cook Time 50 minutes mins
    Total Time 1 hour hr
    Course Breakfast
    Cuisine American
    Servings 8 Servings
    Calories 338 kcal

    Ingredients


    • 2 cups all purpose flour
    • 1 cup sugar
    • 1 ½ teaspoons baking powder
    • 1 teaspoon salt
    • ½ teaspoon baking soda
    • 4 tablespoons butter
    • 1 large egg
    • ¾ cup orange juice
    • 1 tablespoon orange zest
    • 1 ½ cups fresh or frozen cranberries
    • ½ cup chopped walnuts optional

    Instructions
     

    • Preheat oven to 350 degrees. Grease an 8 x 4 x 2 loaf pan.
    • In a large bowl, combine flour, sugar, baking powder, salt and baking soda.
    • Cut in butter until mixture resembles coarse crumbs.
    • In a small bowl beat egg, orange juice and orange zest.
    • Add juice mixture to dry ingredients and mix just until blended. 
    • Fold in cranberries. If you are adding nuts, fold them in at the same time.
    • Transfer to a greased 8 x 4 x 2 loaf pan. Bake at 350 degrees for 50-55 minutes or until toothpick inserted in the center comes out clean.
    • Cool in pan 10 minutes, then remove bread and cool completely on a wire rack.

    Notes

    For extra fresh taste, hand squeeze your orange juice
    You can substitute pecans in place of walnuts if you prefer

    Nutrition

    Calories: 338kcalCarbohydrates: 55gProtein: 5gFat: 11gSaturated Fat: 4gPolyunsaturated Fat: 4gMonounsaturated Fat: 2gTrans Fat: 1gCholesterol: 38mgSodium: 499mgPotassium: 141mgFiber: 2gSugar: 28gVitamin A: 271IUVitamin C: 15mgCalcium: 67mgIron: 2mg
    Keyword Christmas breakfast food, Cranberry, holiday breads, holiday desserts, holiday food gifts, Quick breads, Thanksgiving breakfast food
    Tried this recipe?Let us know how it was!

    World's Best Sweet Potato Casserole with Pecan Topping

    November 2, 2020

    sweet potato casserole with pecan topping in a white cast iron casserole dish, with a large spoon lifting out a serving.

    Sweet and creamy, hot and buttery, crunchy and nutty...an irresistible blend of flavors and textures makes this the world's best sweet potato casserole recipe!

    sweet potato casserole topped with pecans in a white le Creuset cast iron casserole dish

    Win Over the Sweet Potato Critics

    Every holiday season I bring this amazing sweet potato casserole to potluck dinners and inevitably I get the "Eww, I don't like sweet potatoes" comment. I respond "I don't either," and then verbally spar back and forth attempting to persuade the offended party to just try it. Finally, just to shut me up they will take a spoonful. And then another. And then another!

    This classic sweet potato casserole recipe is SO GOOD, whether or not you like sweet potatoes. It has been a family favorite for a long time, exclusively as a November/December dish. The first thing I do when I'm making Thanksgiving dinner and Christmas dinner is reach for this recipe card!

    Ingredients for sweet potato casserole
    Ingredients for sweet potato casserole topping

    What You'll Love About This Recipe

    • You can prepare it a day or two in advance of your holiday meal and refrigerate it. Just leave off the streusel topping until right before you're ready to put it in the oven. Getting a little head start on the big day is always helpful!
    • The vibrant orange color of this classic Thanksgiving side dish looks beautiful on your holiday table.
    • The topping is easy to make with or without marshmallows (instructions are included for both), so you can adjust according to your preference.

    Sweet Potato Recipe Ingredients

    This easy recipe consists of two parts. First, making the sweet potato base, then making the crunchy pecan streusel topping.

    Sweet Potato Mixture Ingredients:

    • Fresh sweet potatoes - You'll need 4 pounds of large sweet potatoes or yams (about 5 whole sweet potatoes) -- peeled and diced.
    • Milk - ½ Cup. For cooking I always prefer whole milk, but reduced fat milk is fine.
    • Vanilla extract - I like a high quality pure vanilla extract -- the Nielsen-Massey Madagascar Bourbon is my favorite.
    • Butter - Salted butter at room temperature is preferred, but you can use unsalted butter, too. (You want soft butter but not melted butter.)
    • Kosher salt - You'll need 1 teaspoon - Diamond Crystal Kosher Salt is the restaurant industry standard for cooking & baking.
    • Sugar - One cup of granulated sugar.
    • Eggs - 3 large eggs; you'll use the whole egg.

    Pecan Topping Ingredients:

    • Flour - ¼ cup all purpose flour is what you'll need.
    • Brown Sugar - 1 cup -- I prefer dark brown sugar for its more intense flavor, but either light or dark brown sugar will work in this recipe.
    • Chopped Pecans - Chop ½ cup of your own, or buy them chopped.
    • Butter - 2 tablespoons -- should be cold for cutting into the flour mixture.
    • OPTIONAL - 2 cups of mini marshmallows if you want a marshmallow topping.

    Steps to Prepare

    A collage of 3 photos showing the process for making sweet potato casserole. First shows the sweet potato mixture, second shows the pecan topping on top, and the third shows what it looks like coming out of the oven baked to golden brown.
    1. Sweet Potato filling. 2. Pecan topping over filling. 3. Just out of oven, golden brown.

    Prepare Mashed Sweet Potatoes

    1. Bring a large stockpot of water to a boil.
    2. Peel and cube sweet potatoes. Place potatoes in boiling water, making sure there's enough water to cover them completely. Boil 20-30 minutes until fork tender.
    3. Drain cooked sweet potatoes from large pot into a colander, then transfer to a large mixing bowl and mash with a potato masher.

    Mix Up the Sweet Potato Filling

    1. In the large bowl with the warm mashed potatoes, add sugar, milk, butter, salt and vanilla.
    2. With an electric mixer (a hand mixer is fine), beat on low until fully combined.
    3. Add one large egg at a time, mixing well after each addition.
    4. Grease a 2 quart casserole dish with butter or cooking spray (I prefer butter for the added flavor.)
    5. Add the sweet potato mixture to the buttered baking dish. (If you have prepared it in advance, cover it with plastic wrap and store in the refrigerator, leaving the pecan crumble topping off until you are ready to bake.)

    Make the Crunchy Topping

    1. In a small bowl, mix the flour and sugar together. Cut in the cold butter, then mix in the pecans. This step does not require a lot of effort, so a food processor is not necessary. (If you're not baking the casserole right away, store the mixture in a plastic bag or airtight container and refrigerate. Take out an hour before bake time and bring to room temperature before sprinkling on top of the casserole.)
    2. When it's time to bake, sprinkle the topping over the casserole, then bake at 350 degrees for 45 minutes, until the top is golden brown. Now it's ready for your Thanksgiving table!

    Alternative Marshmallow Topping

    For the perfect balance of gooey marshmallows and crunchy pecans, try this topping:

    1. Bake the sweet potato casserole with no topping at 325 degrees for 30 minutes.
    2. Remove partially baked sweet potato casserole from oven. Make the topping as described in the original recipe above. Layer ½ the pecan topping over the sweet potatoes, then layer a cup of miniature marshmallows on top. Repeat the layers. Return to the oven and bake for 20-25 minutes until the marshmallows are golden brown. (If you prefer the sweet marshmallows without the pecans, then simply add 2-3 cups of marshmallows on top for the last 20 minutes of baking time.)

    This is the most amazing and easy sweet potato casserole recipe. The best part is that it tastes like pumpkin pie without the whipped cream! It's the perfect side dish for Thanksgiving Day or any other special occasion.

    sweet potato casserole with pecan topping in a white cast iron casserole dish, with a large spoon lifting out a serving.

    FAQ's

    What is the difference between sweet potatoes and yams?

    There's a short and a long answer to this. The short answer is that in the United States, there is virtually no difference between the sweet potatoes and yams found at your grocery store, and you can use either for this recipe.

    The long answer is that in other countries, sweet potatoes and yams are actually quite different from each other in plant species, color and flavor. For a detailed explanation, see this article by Southern Living.

    Can I add cinnamon to this recipe?

    Yes! Cinnamon is a powerful spice, so a little goes a long way. If you would like to add a bit of warm cinnamon flavor to the casserole, you can add ¼ teaspoon to the sweet potato casserole, and again to the brown sugar streusel topping.

    Can I substitute maple syrup for the sugar?

    Yes, it's a great way to add maple flavor to the sweet potato layer! When making the sweet potato filling, eliminate the granulated sugar and add ¾ cup of maple syrup. For best results remove a little milk from the ½ cup -- about 2 tablespoons. For detailed instructions on substituting maple syrup for sugar, see these instructions from the Vermont Maple Sugar Makers.

    I'm making this for the first time. How do I reheat it the next day?

    Sweet potato casserole can be kept covered in the refrigerator for 3 days. To reheat it, preheat oven to 350 degrees. Cover loosely with aluminum foil and bake for 25-30 minutes until it's warm inside.

    Looking for other holiday-friendly side dishes? Try our Southern cornbread dressing, broccoli and cheese casserole, Bourbon cranberry sauce, and Southern Sweet Corn Casserole.

    Have a comment or a vintage recipe you'd like to share? We'd love to hear from you! Please rate, comment, or send me an email at [email protected]!

    2) In a large mixing bowl, beat sweet potatoes, sugar, milk, butter, eggs, salt and vanilla until smooth. Place in the greased casserole dish.

    sweet potato casserole with pecan topping in a white cast iron casserole dish, with a large spoon lifting out a serving.

    World's Best Sweet Potato Casserole with Pecan Topping

    Nancy Blackstone
    Sweet and creamy, hot and buttery, crunchy and nutty...an irresistible blend of flavors makes this the world's best sweet potato casserole.
    5 from 2 votes
    Print Recipe Pin Recipe
    Prep Time 15 minutes mins
    Cook Time 45 minutes mins
    Total Time 1 hour hr
    Course Side Dish
    Cuisine American
    Servings 8 Servings
    Calories 366 kcal

    Ingredients


    Sweet Potato Casserole

    • 4 lbs plain mashed sweet potatoes About 5 large sweet potatoes.
    • 1 cup sugar
    • ½ cup milk
    • 4 tablespoons butter softened
    • 1 teaspoon salt
    • 1 teaspoon vanilla extract
    • 3 large eggs

    Topping

    • ¼ cup all purpose flour
    • ½ cup packed light brown sugar
    • ½ cup chopped pecans
    • 2 tablespoons cold butter

    Instructions
     

    • Preheat oven to 325 degrees. Grease a 2 quart casserole dish with butter.
    • Peel and cube sweet potatoes. Bring a large pot of water to a boil. Add sweet potatoes and cook at a low boil for 20-30 minutes until fork tender.
    • Drain in colander. When drained, place hot sweet potatoes in a large mixing bowl.
    • Beat sweet potatoes, sugar, milk, butter, eggs, salt and vanilla with a hand mixer until smooth. Place in the greased casserole dish.
    • In a small bowl combine the brown sugar, chopped pecans, and flour. Cut in butter until mixture is crumbly. Sprinkle over potato mixture.
    • Bake uncovered for 45 minutes, until top of casserole is golden brown. Serve immediately.

    Notes

    For the perfect balance of gooey marshmallows and crunchy pecans, try this alternative topping:
      1. Bake the sweet potato casserole with no topping at 325 degrees for 30 minutes.
    1. Remove partially baked sweet potato casserole from oven. Make the topping as described in the original recipe above. Layer ½ the pecan topping over the sweet potatoes, then layer a cup of miniature marshmallows on top. Repeat the layers. Return to the oven and bake for 20-25 minutes until the marshmallows are golden brown.
    For a plain marshmallow topping:
    If you prefer the sweet marshmallows without the pecans, then simply add 2-3 cups of marshmallows on top for the last 20 minutes of baking time.)
    Storage Instructions:
    Cover tightly with plastic wrap or place in an airtight container and refrigerate for up to 3 days. 
    Reheating Instructions:
    Preheat oven to 350 degrees. Cover casserole loosely with foil and bake 25-30 minutes until warm. 

    Nutrition

    Calories: 366kcalCarbohydrates: 53gProtein: 5gFat: 16gSaturated Fat: 7gPolyunsaturated Fat: 2gMonounsaturated Fat: 6gTrans Fat: 1gCholesterol: 94mgSodium: 430mgPotassium: 268mgFiber: 2gSugar: 42gVitamin A: 7468IUVitamin C: 1mgCalcium: 62mgIron: 1mg
    Keyword Holiday side dishes, no marshmallow sweet potato casserole, sweet potatoes, sweet side dish
    Tried this recipe?Let us know how it was!

    The Classic Champagne Cocktail

    October 30, 2020

    Champagne Cocktail with a white sparkly background

    Featured in Atomic-Ranch.com

    The Champagne Cocktail never goes out of style. Combining the fun of Champagne and the luxury of Cognac, this drink became a mid century favorite.

    Champagne Cocktail with a white sparkly background
    The always lively Champagne Cocktail is a celebration in a glass!

    Celebrate Good Times, Come On!

    This cocktail more than any other is associated with parties, holidays and special occasions. It was a popular mid century cocktail because it embodied the optimistic, affluent lifestyle of tail fins and luxury. The dashing Victor Laszlo ordered one while sitting at the bar of Rick's Café Americain in Casablanca.

    It is one of the original cocktails, and a version first appeared in the 'Bon Vivant's Companion' in 1862. Like most drinks, it has changed over the years and ingredients have come and gone, but this paired down, simple version is the one I prefer. Some people leave out the Cognac, but I feel it takes away some of the smooth, nutty flavor of the drink and turns it into a sweet glass of Champagne.

    This drink made a comeback in the mid century and was especially popular with ladies of that era. There's a funny scene in the 1960's-set comedy Blast from the Past, where Brendan Frazer's character declares it was his mom's (Sissy Spacek's) favorite drink.

    Mixed Feelings

    Some Champagne purists may scoff at adding anything to a fine champagne, but people keep coming back to this fun classic. There are many recommendations to use a Prosecco or other sparkling wine, but I find those to be too sweet, and adding a sugar doesn't make them better. I prefer mixing with a Brut or Dry California sparkling white wine for a crisp, light drink with just the right amount of sweetness.

    A champagne cocktail featuring the sugar cube.

    A quick word about the sugar cube is probably in order. It really should be a sugar cube and not just a measure of granulated sugar. As you can see in the picture above, that dark cube floating just off the bottom of the glass generates the bubbles that keep the drink lively and fun.

    Champagne Cocktail Ingredients

    This is not a complicated drink to mix up but it helps to have the right ingredients.

    • A quality Brut or Dry Champagne
    • Cognac
    • Angostura bitters
    • Sugar cube
    • Lemon twist

    It's up to you which Champagne glass to serve it in, either a flute or a saucer. I prefer a flute, because the dramatic rise of the bubbles is part of the fun.

    Tips for a Successful Champagne Cocktail

    Just a few pointers to ensure this cocktail makes a splash:

    • Use a Dry Champagne so that the drink does not come out too sweet.
    • It is important to note that you really do need to use a sugar cube rather than just spooning some granulated sugar into the bottom of the glass.

    Before you go, did you try this cocktail? Why not leave a comment in the comments section along with a rating? I always appreciate hearing from you and getting your feedback.

    Champagne Cocktail with a white sparkly background

    Champaign Cocktail is a Blast from the Past

    Kevin Mayfield
    The fun, classy and tasty Champagne Cocktail was a mid century favorite.
    5 from 1 vote
    Print Recipe Pin Recipe
    Prep Time 3 minutes mins
    Total Time 3 minutes mins
    Course Classic Cocktail
    Cuisine American
    Servings 1 Cocktail
    Calories 137 kcal

    Ingredients


    • 3-4 Ounces Dry Champagne
    • 1 Ounce Cognac
    • 1 Sugar Cube
    • 3-4 dashes Angostura bitters
    • Lemon twist

    Instructions
     

    • Place a sugar cube on a cocktail napkin and add 3-4 dashes of Angostura bitters to soak the cube.
    • Add sugar cube to Champagne flute.
    • Add Cognac to glass.
    • Fill glass with 3-4 ounces of Dry Champagne or until appropriately full.
    • Express the lemon twist over the rim of the glass and discard.

    Notes

    Ensure you chill the Cognac before adding, otherwise warm Cognac can 'kill' the drink and make it flat.
    You can experiment with the sugar cubes and use a Demerara sugar cube if you like.

    Nutrition

    Calories: 137kcalCarbohydrates: 6gProtein: 1gSodium: 6mgPotassium: 75mgSugar: 5gCalcium: 8mgIron: 1mg
    Keyword Bitters, champagne, Champagne Cocktail, Champagne drinks, Cognac
    Tried this recipe?Let us know how it was!

    How to Make Bourbon Cranberry Sauce with Orange Zest

    October 29, 2020

    Cranberry sauce in a white bowl.

    This Bourbon cranberry sauce is a delightful twist on the classic recipe, bringing together a blend of Bourbon, orange, and spices to create a sauce that's both sweet and tart with a hint of spicy warmth. It's the perfect complement to the rich and savory flavors of a turkey, ham, pork roast, or charcuterie.

    White bowl of cranberry sauce with orange zest with bottle of bourbon in background
    Bourbon Cranberry Sauce with Orange zest is one of the fabulous recipes you'll want to add to your Thanksgiving feast.

    This Amazing Cranberry Sauce Is Sure to Become A Favorite Holiday Recipe

    Holiday time is nearly here, and it's time to prepare for some of the most awaited meals of the year. This amazing holiday dish will have everyone at your Thanksgiving table asking for seconds. Bourbon Cranberry Sauce is the perfect side dish to complement your Thanksgiving feast, and it's sure to become one of your favorite cranberry recipes. Let's face it, the side dishes are everyone's favorite things in a holiday meal! All Thanksgiving week I look forward to the dressing and the sweet potatoes as much as the main dish!

    One of the best things about the holidays is the food, and cranberry sauce is a must-have on the dinner table. But forget about that canned stuff – we're taking a step up with our own cranberry sauce, and we're adding a little bit of Kentucky Bourbon to make it extra special. This easy recipe is full of simple ingredients that will complement your other side dishes and may become a new family tradition.

    It's as American as Apple Pie

    The earliest recipe for homemade cranberry sauce appears in the first known cookbook written by an American author in the late 1700's. It has been a holiday staple side dish in the U.S. as well as in the U.K. and Europe for many years. The canned variety of cranberry sauce became available in the 1940's, and was a popular side dish of mid century Thanksgiving dinners. However, the canned sauce fell out of favor and kept many from being a fan of cranberry sauce.

    This twist on a traditional cranberry sauce marries a hint of citrus flavor with a hint of Bourbon flavor, and will make a welcome addition to your holiday table.

    Ingredients Needed for Making Bourbon Cranberry Sauce

    Ingredients for bourbon cranberry sauce

    This easy Bourbon Cranberry Sauce combines tart cranberries with the zesty flavor of fresh orange zest and the sweetness of brown sugar. It only take a few ingredients to make this delicious sauce:

    • Cranberries
    • Kentucky Bourbon (I like Buffalo Trace for a good everyday Bourbon--it doesn't have to be top shelf)
    • White sugar (cane sugar)
    • Water
    • Cinnamon stick (or 1 teaspoon of ground cinnamon if you don't have a stick)
    • Orange

    Some cooks prefer to add some orange juice, lime zest or orange slices, but I like to keep it simple. Last year I tried the lime zest and it was too bitter for me; I prefer the recipe as written, with orange. Stick with the basics when you're cooking a holiday meal -- it gives you one less thing to worry about!

    The alcohol cooks off, leaving behind the incredible caramel flavor of the Bourbon (the best part!) that will take your cranberry sauce to the next level.

    How to Make the Sauce

    This delicious side dish is actually pretty simple to make, even if it's your first time. Just follow these simple steps for success:

    1. Wash and rinse the fresh cranberries in a little bit of water and set aside to dry.
    2. Pour the water into a 1-quart saucepan and heat on medium heat to bring to a boil.
    3. Add the sugar and stir to ensure it gets dissolved all the way. Set to medium-low heat to simmer.
    4. Add the cinnamon sticks and Bourbon and continue stirring.
    5. Add the whole cranberries. After a few minutes you'll hear the cranberries pop while cooking down. Reduce the heat to a simmer and keep cooking and stirring.
    6. Add in some orange zest, keeping some aside for later.
    7. Cook 15-20 minutes or until all of the cranberries have broken up and the sauce thickens (if it gets too thick, you can always add a little water.) The cranberries will naturally burst as they cook, so no need to use a potato masher or food processor.
    8. Remove from heat and let sit until the sauce cools. Drain any excess cranberry juice. Place in a baking dish or bowl to serve.

    Tips for a Successful Bourbon Cranberry Sauce Recipe

    Here are a few things to keep in mind as you make this side dish:

    • Cook with fresh cranberries if possible. It can be a challenge to find them in grocery stores out of season, so substitute with frozen if necessary.
    • Always use quality Bourbon when cooking. Our rule of thumb is that if you wouldn't drink it, don't cook with it. Inferior whiskeys can taste harsh and leave an unpleasant taste rather than complementing your dish.
    • Serve orange Bourbon cranberry sauce over some vanilla ice cream for a delicious desert treat at the end of a long Thanksgiving day.
    • Store leftover cranberry sauce in an airtight container and refrigerate for up to 5 days. It can be served warm, chilled, or at room temperature.

    Frequently Asked Questions

    What is a good Bourbon to use in this recipe?

    There is no best Bourbon to use. I prefer a smooth, wheated bourbon like Maker's Mark or Buffalo Trace for cooking. Any Bourbon that you personally enjoy will make the best cranberry sauce. Blanton's makes an export-only Gold edition that, if you can find it, is very smooth. Feel free to experiment with other types of whiskey to find one you prefer -- you don't have to use the expensive stuff!

    Can you use a different type of alcohol in this recipe?

    Yes, you could use a rye whiskey which would give the dish a spicier taste. I'd stay away from rum since it will already have enough sugar added to the recipe and can affect the flavor profile by making it taste on the sweet side.

    Are there variations of Bourbon Cranberry Sauce?

    Yes, there are many delicious recipes! Some people like to create a vanilla Bourbon cranberry sauce by adding vanilla extract and using vanilla bean pods as a garnish. Others like to add extra Bourbon to make boozy cranberry sauces. You can also make a maple Bourbon cranberry sauce with maple syrup as the sweetener rather than sugar. I prefer this simple recipe because it's fast and easy for the holidays, but go ahead and put your own spin on it!

    We hope this Bourbon orange cranberry sauce will be a favorite addition to your Thanksgiving dinner. While you're at it, try these other popular holiday dishes: roasted pork tenderloin, broccoli and cheese casserole, and Southern cornbread dressing.


    Cranberry sauce in a white bowl.

    Bourbon Cranberry Sauce With Orange Zest

    Kevin Mayfield
    This Bourbon cranberry sauce is a delightful twist on the classic recipe, bringing together a tasty blend of Bourbon, orange, and spices.
    5 from 2 votes
    Print Recipe Pin Recipe
    Prep Time 5 minutes mins
    Cook Time 30 minutes mins
    Total Time 35 minutes mins
    Course Side Dish
    Cuisine American
    Servings 12 servings
    Calories 186 kcal

    Ingredients


    • 4 cups cranberries
    • 1 cup water
    • 2 ½ cups sugar
    • 2 cinnamon sticks
    • 1.5 ounces Bourbon
    • 1 tablespoon orange zest

    Instructions
     

    • Wash and rinse the cranberries and set aside to dry.
    • Pour the water into a large saucepan. Stir in 2-½ cups of sugar.
    • Add the cinnamon sticks. Bring to boil and stir until all sugar has been dissolved. 
    • Add the Bourbon.
    • Add the cranberries to the boiling water. After about 3-5 minutes you should hear the cranberries start to 'pop'. Reduce the heat and simmer, and the sauce will begin to thicken. Stir frequently to ensure the sauce does not stick to the pan.
    • Add in the orange zest, leaving a small amount aside to use as garnish.
    • Cook 25-30 minutes, until the cranberries have broken down and the sauce has thickened. Remove from heat and take out the cinnamon sticks. Let cool.
    • Place in a serving dish and garnish with orange zest.

    Notes

    You can add 1 teaspoon of vanilla extract to the mix for additional flavor.
    This dish can be served warm or chilled. The chilled version will have a gelatin-like consistency.
    This cranberry sauce is sweet; if you prefer a more tart cranberry sauce, cut the sugar back to 1-½ to 2 cups.

    Nutrition

    Calories: 186kcalCarbohydrates: 46gProtein: 0.2gFat: 0.2gSaturated Fat: 0.004gPolyunsaturated Fat: 0.02gMonounsaturated Fat: 0.01gSodium: 2mgPotassium: 31mgFiber: 2gSugar: 43gVitamin A: 24IUVitamin C: 5mgCalcium: 10mgIron: 0.2mg
    Keyword Cranberry, Holidays, Sauce, Thanksgiving
    Tried this recipe?Let us know how it was!

    Key Lime Pie - Authentic Pie of the Conch Republic

    October 27, 2020

    Perfect slice of key lime pie topped high with brown-tipped meringue

    Authentic key lime pie smells like a summertime party, shines like the Florida sun, and has the bite of a tart margarita. Now if only it could sing like Jimmy Buffet!

    A lice of key lime pie on a plate with a lime wedge next to it. Pie dish in the background and a glass of coke and a fork next to the plate.

    Key lime pie, the official pie of the state of Florida, made its first appearance in cookbooks in the mid 1930's. It's most likely derived from the lemon cream pie introduced by Borden in 1931 to promote their sweetened condensed milk. In the 1950's the pie had become so popular, it was advertised as "Florida's most famous treat."

    So What Exactly is a Key Lime?

    A Key lime is a small yellow-green fruit with a bold, floral taste that produces about 1 tablespoon of juice per lime. The more common deep green Persian or Tahitian lime we find in our grocery stores is larger, milder in taste, sturdier, and produces up to 3 tablespoons of juice. Key limes originated in Asia and were first planted in the Florida Keys in the 1830's. Unfortunately, a devastating hurricane in 1926 wiped out the South Florida Key lime plantations. Growers opted to replant with the sturdier Persian limes, making Florida-grown Key limes nearly non-existent. The majority now sold in the U.S. are imported from Mexico and Central or South America.

    What Makes it Authentic?

    Kevin and I made our first trip to the Florida Keys together in 2017. We spent our time going from restaurant to restaurant eating pie, each place claiming to have the "world's best," "original" or "most authentic" recipe. Several days and several pounds later, I learned that there are many variations of Key lime pie, and they all have at least 3 things in common: Key lime juice, egg yolks, and sweetened condensed milk. The toppings vary as does the crust, although the original crust for this recipe and the one found most frequently in the Keys is made with graham crackers.

    Key lime pie with meringue topping in a polka-dot pie plate
    Key lime pie with meringue topping

    Topping: Meringue, Whipped Cream, or Nothing at All?

    My research indicates that the original topping for this pie, and therefore considered "most authentic" by the majority of cooking experts, is meringue. This makes sense for a few reasons:

    1. Key lime pie is believed to be derived from the original lemon meringue pie recipe.
    2. During the depression when this pie originated, it was not likely someone would let the egg whites go to waste after using the yolks for the filling. Making meringue with them was the responsible economic choice.
    3. In the 1930's, refrigeration was not widely available so milk and cream were hard to keep. (Mass production of the kitchen refrigerator began in the 1940's after WWII.) Meringue made with egg whites and sugar was easily made.

    That said, this pie is delicious whether you serve it with meringue, whipped cream, or no topping at all. I found all of these options at various places in the Florida Keys, and you should top it according to your personal preference. I happen to be a fan of meringue and Kevin prefers whipped cream, while our friend who gave us this recipe prefers no topping at all. Vive la différence!

    Vintage hand typed recipe for key lime pie
    Vintage hand typed key lime pie recipe

    The Origin of Our Recipe

    I'm always searching for handwritten or hand typed mid century recipes that anyone might have. (Don't invite me to your house unless you're okay with me rummaging through your kitchen drawers and cabinets in search of old family recipes!) When our Florida-native friend Steve sent us his Grandma's key lime pie recipe, I flipped! I love the business stationary and all the details she included, like her name and who gave her the recipe. I already knew it was delicious because he had made it for us several times!

    Rae Ellis, Steve's grandmother, lived with her husband, Loren, in Indiana where he was Valparaiso University's head basketball coach. They relocated to The Sunshine State where he coached for Stetson, and eventually they made their home in Hollywood, Florida. Loren liked to fish in the Keys where they made frequent visits. They became friends with a couple of prominent local residents, the O'Bryants. Horace O'Bryant was the superintendent of schools for Monroe County (Florida Keys) for many years, and his wife gave Rae this recipe in 1951. They have handed it down now through several generations.

    This is An Easy Recipe

    • Graham cracker crust ingredients
      Crust Ingredients
    • key lime pie ingredients
      Pie Filling Ingredients
    • meringue topping ingredients
      Meringue Ingredients

    The delightful thing about Key lime pie is that it's so easy to make. The crust and pie filling each take only 3 ingredients, and the meringue takes only 4! The crust combines quickly and takes only minutes to prepare. And the filling mixes up to a thick consistency very fast. Back in the old days the pie would almost be done. Originally it was not baked -- it was thought that the acidity from the Key lime juice "cooked" the egg yolks. Today we know the pie needs to be baked for a short time (20 minutes) to ensure it is safe to eat.

    The trickiest part of this pie is making the meringue. It's not difficult, but for best results the temperature of the sugar mixture needs to be measured at 240 degrees. Therefore, you will need to use a candy thermometer. You also need to be careful not to burn yourself as you're pouring the hot sugar mixture into the beaten, soft-peak egg whites.

    • Egg whites with soft peaks
      Egg whites with soft peaks
    • Measuring temperature of sugar water for key lime pie
      Measuring temp of sugar water
    • Adding meringue to the top of the pie
      Adding meringue to pie

    Expert Pie Baking Tips

    • Carefully watch your graham cracker crust in the oven, because over baking it before it's filled will give the pie a burnt taste.
    • Squeeze Key limes for freshest taste, or buy authentic Key lime juice which can be found in most grocery stores. Standard limes have a different flavor.
    • Use a stand mixer with a wire whisk attachment and pouring shield for best results when mixing meringue.
    • Use a candy thermometer to measure the temperature of the sugar syrup for meringue.
    • Be patient when beating eggs whites to stiff peaks with the sugar syrup -- this step took a full 10 minutes with my stand mixer going at medium-high speed.
    • Start by adding meringue to the center of the pie, then work your way out with the spatula, pulling it up to form peaks over the top.

    Do you have a favorite mid century handwritten or hand typed family recipe and story you would like to share? If so, please email me at [email protected].

    Perfect slice of key lime pie topped high with brown-tipped meringue

    Authentic Key Lime Pie

    Nancy Blackstone
    Authentic key lime pie smells like a summertime party, shines like the Florida sun, and has the bite of a tart margarita. Now if only it could sing like Jimmy Buffet!
    5 from 8 votes
    Print Recipe Pin Recipe
    Prep Time 20 minutes mins
    Cook Time 20 minutes mins
    Total Time 40 minutes mins
    Course Dessert
    Cuisine American
    Servings 8 servings
    Calories 442 kcal

    Ingredients


    Crust

    • 2 cups graham cracker crumbs
    • 8 tablespoons butter
    • ¼ cup sugar

    Pie

    • 4 large egg yolks reserve egg whites at room temperature for meringue
    • 8 oz sweetened condensed milk
    • ½ cup Key lime juice generous ½ cup -- a little more

    Meringue Topping

    • 4 large egg whites room temperature
    • ½ teaspoon cream of tartar
    • 1 cup sugar
    • ½ cup water

    Instructions
     

    • Preheat oven to 350 degrees.

    Crust

    • Mix graham cracker crumbs and sugar in a bowl.
    • Melt butter and pour into the graham cracker crumb mixture. Using your fingers or the back of a tablespoon, press into the bottom and up the sides of a 9-inch pie plate to ¼" thickness all around.
    • Bake 6-8 minutes until very lightly browned. 

    Pie Filling

    • Separate egg yolks, reserving the whites for meringue.
    • Mix well with sweetened condensed milk until batter has thickened.
    • Add Key lime juice and mix until thoroughly combined.
    • Pour pie filling into pie crust, and bake for 20 minutes.
    • Cool at room temperature for 45 minutes, then chill in refrigerator for 3 hours.
    • Top with meringue. Place in 450 degree oven for a few minutes, just until tips of meringue have lightly browned. (You could also serve plain or with whipped cream topping, if preferred.)

    Meringue Topping

    • Preheat oven to 450 degrees
    • Using an electric mixer, beat the egg whites with cream of tartar until soft peaks form (when tips of egg whites fall back on to peaks.)
    • Mix sugar and water in a saucepan and heat to a boil on stovetop, stirring frequently. Measuring with a candy thermometer, bring mixture to a temperature of 240 degrees Fahrenheit. 
    • Very slowly, add the sugar mixture to the egg whites, while mixing at medium speed, being careful not to splash yourself with the hot sugar. (A stand mixer with a pouring shield works well for this step.)
    • Continue mixing at medium-high speed until stiff peaks form (peaks should stand up straight when you pull a spatula up through them.) Be patient; this can take up to 10 minutes. 
    • Generously top the chilled Key lime pie with meringue. Dip the spatula up and down in the meringue to pull up decorative peaks.
    • Place pie in oven and bake, watching constantly, just until top begins to brown. When the meringue starts to brown it browns quickly, so remove it promptly or the sugar will burn. This step takes only a couple of minutes. 

    Notes

    Add a little Key lime zest to the pie filling to add to the flavor if you'd like. You can also add a little to the top of the pie for decoration.
    You can make this in a traditional pie crust if you prefer that over graham cracker.

    Nutrition

    Calories: 442kcalCarbohydrates: 64gProtein: 7gFat: 18gSaturated Fat: 10gPolyunsaturated Fat: 1gMonounsaturated Fat: 5gTrans Fat: 1gCholesterol: 132mgSodium: 307mgPotassium: 231mgFiber: 1gSugar: 52gVitamin A: 556IUVitamin C: 5mgCalcium: 115mgIron: 1mg
    Keyword key lime pie, meringue, pie crust
    Tried this recipe?Let us know how it was!

    Beef Burgundy Stew - Warm Comfort on a Cold Night

    October 26, 2020

    Two bowls of beef burgundy stew with a loaf of French bread sitting on a table

    Beef burgundy stew is filled with chunks of tender beef, potatoes, vegetables, seasonings and a splash of red wine. Served with a piping hot loaf of French bread, this meal will keep you warm for the rest of the night!

    A bowl of beef burgundy stew with chunks of meat, potatoes, and vegetables piled high. A hand is dipping a piece of French bread into the stew.
    Beef Burgundy Stew

    A Thrifty Mid Century Dinner

    This hot bowl of pure comfort is a mid century meal I grew up with in the midwest. It would simmer on the stove for hours, filling the house with an aroma that welcomed you in from the cold.

    Beef stew has been around for hundreds of years, but it was a popular mid century dish because it's a budget friendly way to feed a big family. Plus, it's nourishing and tastes delicious! You can use virtually any kind of beef, because cooking it for hours will tenderize even tough cuts.

    What Kind of Beef Should You Use?

    Most grocery stores sell pre-cut packages of stew meat, which is usually a combination of various cuts of beef scraps they have remaining. They can be a little difficult to cook because some are tender and some are tougher, which causes them to cook at a different speed. The pieces will also have a different flavor and texture in your stew. If you do use the pre-cut stew beef, look over the pieces, trim off any gristle, and cut to uniform size.

    I recommend selecting and cutting your own beef for the stew. Chuck roast is a nice pick as it is priced right and cooks into a tender and flavorful bite. Bone-in-short rib is also an excellent choice. If you're not sure, ask the butcher at your meat counter for a recommendation.

    Beef Burgundy Stew is a One Pot Meal

    This recipe goes from the stovetop to the oven, so I use a large coated cast iron dutch oven for cooking. If you don't have a dutch oven that can go from stovetop to oven, you can start the dish in a large pot on the stove, then transfer it into a greased casserole dish for baking.

    Steps For Cooking Beef Burgundy Stew

    As you can see, once your beef and vegetables are cut there's not much work to making this hearty dish. When all but the tomatoes and bouillon are in the pot, it simmers on low for two hours. Then add the remaining two items and transfer it to the oven to bake for one more hour before serving. Pop in a loaf of your favorite French bread right before it comes out of the oven, mix up a salad if you'd like, and you have a delicious dinner ready to go!

    • Beef Burgundy Stew Step 1 - Brown meat in oil
      1: Brown beef in oil
    • Beef Burgundy Stew Step 2: Add in garlic and saute 1 minute
      2: Add garlic; cook 1 min
    • Beef Burgundy Stew Step 3: Add in burgundy and saute 2 minutes
      3: Add wine; cook 2 min
    • Beef Burgundy Stew Step 4: Add water, potatoes, peas, carrots, salt and pepper.
      4: Add potatoes, onions, peas, carrots, salt & pepper
    • Beef Burgundy Stew Step 6: After simmering 2 hours, add in tomatoes and bouillon. Cover and bake in oven for 1 hour.
      5: After 2 hours, add tomatoes and bouillon; bake in oven for 1 hour

    Recipe Variations

    • Substitute ¾ cup pearl barley for the potatoes for a hearty beef barley stew.
    • Add 1 rib of chopped celery in with the other vegetables when cooking for another layer of flavor and texture.
    • Add 4 ounces of fresh sliced mushrooms when you add the tomatoes and bouillon if you're a mushroom fan.
    • Substitute beef broth for the red wine if you prefer to avoid wine.

    A Few Cooking Tips

    I simmer this dish on a very low heat, but this will vary from person to person. Stir the pot every 15 minutes or so to make sure nothing is sticking to the bottom. If too much of the water has boiled away, add more as you're cooking until it reaches your desired consistency.

    Beef stew can be stored in a sealed container in the refrigerator for 3-4 days. Re-heat in a pot on the stovetop, adding water if necessary to desired consistency.

    Stew will also keep in the freezer in airtight storage containers or freezer bags for 2-3 months.

    If you're looking for other one-pot meal ideas, try our baked potato soup or split pea and ham soup.

    Two bowls of beef burgundy stew with a loaf of French bread sitting on a table

    Beef Burgundy Stew - Warm Comfort on a Cold Night

    Nancy Blackstone
    Beef burgundy stew is filled with chunks of tender beef, potatoes, vegetables, seasonings and a splash of red wine. Served with a piping hot loaf of French bread, this meal will keep you warm for the rest of the night!
    5 from 3 votes
    Print Recipe Pin Recipe
    Prep Time 20 minutes mins
    Cook Time 3 hours hrs
    Total Time 3 hours hrs 20 minutes mins
    Course Main Dish
    Cuisine American
    Servings 8 Servings
    Calories 377 kcal

    Ingredients


    • 2 pounds beef stew meat cut into 1-inch cubes
    • 3 tablespoons canola oil
    • 4 garlic cloves minced
    • 1 cup burgundy wine or red cooking wine
    • 3 cups water more if needed during cooking
    • 3 large russet potatoes peeled and cut into 1-inch cubes
    • 1 medium yellow onion diced
    • ½ cup frozen peas
    • 4 medium carrots sliced
    • 2 teaspoons kosher salt
    • ½ teaspoon pepper
    • 1 tablespoon beef bouillon granules
    • 14.5 oz diced tomatoes

    Instructions
     

    • In a Dutch oven, brown meat in oil.
    • When meat is browned, add minced garlic; cook and stir for 1 minute.
    • Add wine; cook and stir for 2 minutes.
    • Add water, potatoes, onions, peas, carrots, salt and pepper. Cover and simmer on low for 2 hours, stirring occasionally. 
    • Mix in bouillon and tomatoes. Move to preheated 350 degree oven and bake, covered, for 1 hour.
    • Serve with loaf of hot French bread and a side salad, if desired.

    Notes

    • Substitute ¾ cup pearl barley for the potatoes if desired
    • Add 1 rib of chopped celery with the vegetables, if desired
    • Substitute beef broth for red wine if you prefer
    • Add 4 ounces of sliced fresh mushrooms when you add the tomatoes and bouillon if you'd like

    Nutrition

    Calories: 377kcalCarbohydrates: 34gProtein: 30gFat: 11gSaturated Fat: 2gPolyunsaturated Fat: 2gMonounsaturated Fat: 6gTrans Fat: 1gCholesterol: 70mgSodium: 835mgPotassium: 1240mgFiber: 4gSugar: 5gVitamin A: 5227IUVitamin C: 20mgCalcium: 80mgIron: 4mg
    Keyword Beef Stew with Wine, Cold weather dinners, comfort food dinners, old fashioned dinners, Red Wine Beef Stew, soup and stew dinners
    Tried this recipe?Let us know how it was!

    Halloween Cocktails: Death in the Afternoon is a Real Treat

    October 23, 2020

    Champagne-based drink in a tall flute.

    Created by the legendary author Ernest Hemingway, Death in the Afternoon is a literary classic, and a great Halloween themed cocktail as well.

    The Death in the Afternoon Champagne-based drink in a tall flute.
    The Death in the Afternoon cocktail combines Champagne and Absinthe for a spooky treat.

    Death in the Afternoon will make you Comfortably Numb

    Certain drinks just fit a 'moment' based on their name alone. Now that it's Halloween time, this cocktail always makes an appearance.

    Hemingway was living in Paris when he came up with this cocktail. It shares the same name as one of his bestsellers, "Death in the Afternoon." Like other great authors, who invent drinks, he includes a written recipe for how to make it. The recipe was first published in a famous author's cocktail book called, "So Red The Nose, or Breath In The Afternoon." In it, Hemingway recommended the following directions:

    "Pour one jigger absinthe into a Champagne glass. Add iced Champagne until it attains the proper opalescent milkiness. Drink three to five of these slowly."

    I'd recommend using a little caution when following "Papa's" drinking directions because this cocktail packs a punch, and three to five of these in a single day will hit you harder than a Hemingway metaphor!

    Ingredients Needed

    This is another great duo cocktail, meaning that there are only two ingredients required to make it:

    • Champagne
    • Absinthe

    And that's it!

    Tips for Success

    Since there are only two ingredients, it's a pretty easy mix. However, there are a couple of hints that can make it a better drink.

    • Some 'tips' suggest adding the absinthe last and trying to 'float' it on top of the Champagne. But by the time it's poured and served, the ingredients are all mixed anyway, so I suggest sticking with Hemingway's directions.
    • Absinthe has always had an odd reputation. At one time it was said to be addictive or hallucinatory. In 1915, it was even banned in the U.S. and certain countries in Europe. Luckily it made a comeback and is enjoyed in many popular cocktails. But do yourself and others a favor and buy a name brand like Pernod. Yes, you'll pay more money for it, but the taste and even the look are superior to lower quality spirits.

    Have you tried a Death in the Afternoon? If you like absinthe cocktails, try this Halloween cocktail too!

    Champagne-based drink in a tall flute.

    Halloween Cocktails: Death in the Afternoon is a Real Treat

    Kevin Mayfield
    This Ernest Hemingway cocktail is perfect for your Halloween Cocktail Party.
    5 from 1 vote
    Print Recipe Pin Recipe
    Prep Time 1 minute min
    Total Time 1 minute min
    Course Classic Cocktails
    Cuisine American
    Servings 1 Cocktail
    Calories 107 kcal

    Ingredients


    • 1 Ounce Absinthe
    • 3-4 Ounces Dry Champagne

    Instructions
     

    • Pour an ounce of absinthe into a chilled Champagne glass
    • Fill the rest of the glass with Champagne until the drink looks cloudy with a milky coloration

    Notes

    I only use an ounce of absinthe rather than the 'jigger' that Hemingway suggests in his recipe, because I find absinthe very overpowering in a cocktail. Feel free to add more or even reduce to suit your taste.
    Ensure the Champagne is very well chilled.
    Pick a quality absinthe such as Pernod, otherwise the drink will appear sickeningly green rather than have the cloudy, milky look that is intended.

    Nutrition

    Calories: 107kcalCarbohydrates: 1gProtein: 1gSodium: 6mgPotassium: 75mgSugar: 1gCalcium: 8mgIron: 1mg
    Keyword Absinthe, champagne, Ernest Hemingway, Halloween cocktails
    Tried this recipe?Let us know how it was!

    Let's Dish About Le Creuset's Raymond Loewy Coquelle

    October 21, 2020

    2014 Orange and Turquoise Coquelles on a travertine surface

    This Raymond Loewy designed Coquelle was originally introduced by Le Creuset in 1958. The iconic piece was given a limited edition run once again in 2014.

    Gorgeous Mid Century Modern Design By The Era's Foremost Industrial Designer

    It was love at first sight when I first saw this stunning Dutch oven in a store window in 2014. I had never seen the original piece which was long out of production, and I knew I had to have one. Or two. But hey, who's counting?

    Le Creuset commissioned Raymond Loewy to design this cast iron cookware in 1958. Available in a rainbow of mid century colors, it became a popular household item, particularly in France where Le Creuset originated. Their cast iron cookware is still made there today.

    Who Was Raymond Loewy?

    Loewy himself was born in Paris, and relocated to the United States in 1919 at the age of 26. If you are not familiar with his work, he is responsible many iconic mid century designs. Among the most notable are:

    • Studebaker Avanti automobile
    • Greyhound bus mid century re-design
    • Lucky Strike cigarette packaging
    • Shell Oil logo
    • United States Postal Service eagle logo
    • Exxon Mobile logo
    • Air Force One's blue, white and chrome exterior

    Loewy Coquelles - New & Old

    The 2014 coquelle was reissued in two colors, flame and turquoise, both of which are long sold out. Its large 5.5 quart size is perfect for cooking soups, stews, or roasts, and it goes from stovetop to oven with ease. The enamel interior makes cleanup quick & easy.

    I cook with my orange coquelle; the turquoise one has never been used. I have it as a display piece in my kitchen. It never fails to be a conversation starter when we have visitors!

    • Interior of Le Creuset Raymond Lowey Coquelle interior
      Coquelle enamel interior
    • Underside of coquelle lid

    The original 1958 coquelles can be found online, although I don't own one. It's hard to find them in excellent condition, and when you do they are extremely pricey. If you can find a reasonable deal on either an original or reissue, I highly recommend purchasing it both for its beauty and practicality. It's a mid century design you will enjoy seeing on your countertop over and over again!

    The Best Baked Potato Soup

    October 20, 2020

    A bowl of baked potato soup topped with bacon, green onions, shredded cheddar, and a dollop of sour cream

    This is the best baked potato soup - creamy buttery potatoes, crunchy bites of bacon, gooey melted cheese...need I say more? This meal in a bowl is pure comfort on a chilly night.

    A bowl of baked potato soup topped with bacon, green onions, shredded cheddar, and a dollop of sour cream

    I've been in a soup and stew mood this week as the weather turns chillier for fall. No, we don't get the crisp cold days here in L.A. that many other places get, but it's not unusual for temperatures to drop into the 40's at night, and that's cold enough for comfort food!

    Soups were popular in mid century because they were economical. You could toss vegetables in with water, add some seasonings and whatever meat or pasta was available and come up with a filling meal that could be stretched to serve many. Even if you had a tough cut of meat, boiling would tenderize it, and the seasonings would add flavor.

    Baked potato soup recipe card

    I was flipping through a box of mid century recipe cards when I came across this one for baked potato soup. Kevin loves potato soup; his mom used to make it all the time. After trying this recipe I have modified it slightly to add a little more flavor and creaminess to it. I cut the amount of milk it called for, and added in some chicken broth and half-and-half -- creamy delicious perfection!

    If You Need A Little Time Saver...

    If you're in a hurry for soup, you can save some time by dicing the potatoes, then boiling them for about 30 minutes until they are fork tender. The texture of a baked and boiled potato are different, but I don't notice a difference in the flavor or texture of the potatoes when they are mixed with everything else in the soup.

    All of the ingredients needed to make baked potato soup are set out on a table
    Ingredients for baked potato soup

    A Few Variations For Baked Potato Soup

    • Vegetarian substitutions -- eliminate the bacon, and use vegetable broth in place of chicken broth. If you'd like, you can add a tablespoon of imitation bacon bits to add a smokey flavor.
    • Add ¼ cup chopped celery when you saute the green onions for a flavor variation.
    • Use low-fat milk, low fat half and half, low fat shredded cheddar, and lower sodium chicken broth, plus cut the bacon in half for a healthier version of baked potato soup.
    • Use either mild or sharp cheddar. I prefer the milder taste of mild shredded cheddar cheese, but sharp cheddar tastes great in this recipe, too.
    • Green onions sautéing in butter
      Start by sautéing onions
    • Stirring in flour to create a roux
      Stir in flour to make a roux
    • A close up image of baked potato soup with all the toppings
      Everything else in and voila!

    Leftover baked potato soup will keep in the refrigerator for 3-4 days and can be reheated on the stovetop. It will be very thick, so add milk to desired consistency.

    If you're looking for hearty soups, also try our split pea and ham and navy bean soup recipes.

    A bowl of baked potato soup topped with bacon, green onions, shredded cheddar, and a dollop of sour cream

    Baked Potato Soup

    Nancy Blackstone
    This is the best baked potato soup - creamy buttery potatoes, crunchy bites of bacon, gooey melted cheese...need I say more? This meal in a bowl is pure comfort on a chilly night.
    5 from 1 vote
    Print Recipe Pin Recipe
    Prep Time 1 hour hr
    Cook Time 15 minutes mins
    Total Time 1 hour hr 15 minutes mins
    Course Main Dish
    Cuisine American
    Servings 8 Servings
    Calories 988 kcal

    Ingredients


    • 6 large russet potatoes
    • 8 tablespoons butter
    • 2 bunches green onions chopped & divided
    • ½ cup flour
    • 1 teaspoon salt
    • ½ teaspoon pepper
    • 14.5 oz. chicken broth
    • 1 cup half-and-half
    • 4 cups milk
    • 12 ounces bacon cooked and crumbled and divided.
    • 1 ½ cups shredded cheddar cheese divided
    • 1 cup sour cream

    Instructions
     

    • Prepare potatoes by piercing them all over with a fork and baking on a baking sheet at 350 degrees for 60-75 minutes until a sharp knife glides in easily. Cool potatoes completely, then peel and cube them.
    • In a dutch oven, melt butter, then sauté one bunch of the green onions for about 2 minutes.
    • Add flour and stir with a wooden spoon or spatula to form a roux. Stir in salt and pepper.
    • Whisk in the chicken broth. When it is fully incorporated, whisk in the half and half, and then then the milk until fully combined. 
    • Mix in the potatoes and two-thirds of the crumbled bacon. Simmer for 10 minutes.
    • Remove from heat; stir in 1 cup of the shredded cheddar cheese.
    • Serve bowls of soup with the remaining chopped bacon, green onions, shredded cheddar cheese and sour cream as toppings. 

    Notes

    If you want to cook the potatoes faster, you can cube them and boil them for about 30-35 minutes until they are fork-tender, then drain them and set aside for the soup. I have not noticed a difference in flavor between using baked or boiled potatoes. 

    Nutrition

    Calories: 988kcalCarbohydrates: 65gProtein: 18gFat: 74gSaturated Fat: 36gPolyunsaturated Fat: 6gMonounsaturated Fat: 28gTrans Fat: 1gCholesterol: 131mgSodium: 877mgPotassium: 1487mgFiber: 4gSugar: 9gVitamin A: 1110IUVitamin C: 21mgCalcium: 403mgIron: 3mg
    Keyword cold weather foods, comfort foods, Loaded baked potato soup, loaded potato soup, vegetarian potato soup
    Tried this recipe?Let us know how it was!

    Banana Nut Bread - Old Fashioned, Easy and Delicious!

    October 19, 2020

    Loaf of banana bread on cutting board, with four slices cut off of it.

    This Banana Nut Bread is just right to go with your morning coffee or for a sweet treat after dinner. It has just the right balance of bananas, sweetness and nuts -- and it's so easy to make!

    Two slices of banana walnut bread on a plate, with a fork and a cup of coffee next to it.

    I was flipping through my friend's recipes when this one caught my eye -- a mid century recipe card that her Aunt Helen wrote for banana nut bread. I love to make quick breads -- they're so easy because they don't require kneading or rising; they use baking powder or baking soda for leavening rather than yeast. And they are versatile because they can be eaten for breakfast or dessert.

    • Banana Walnut Bread original handwritten recipe card
    Aunt Helen's original recipe card for banana nut bread

    Spice it Up!

    All the ingredients for banana nut bread
    Banana nut bread ingredients

    I think this recipe is delicious as it is, but you can certainly spice it up and bring in more flavors. Try adding ¼ teaspoon of cinnamon and ¼ teaspoon nutmeg with the flour, baking soda and salt. Do you want a flavor explosion? Okay, you can also add ¼ teaspoon of cloves and a teaspoon of vanilla. Now you'll have a wonderfully spicy banana nut bread! I prefer a milder taste in the summer, and a spicy bread in the fall/winter.

    Loaf of banana nut bread on a cutting board with 4 slices sliced off

    Tips For Making Banana Nut Bread

    This bread is easy to make but there are a few rules you should follow when making it:

    1. Plan ahead -- you need to use very ripe, soft bananas for this recipe. You usually don't find them terribly ripe in the grocery store, so if you're planning to make banana bread, buy your bananas a couple of days in advance and allow them to get very ripe. Or, if you find you have overly ripe bananas on accident, it's a good excuse to make banana bread!
    2. Let your butter and eggs come to room temperature before mixing. This allows for easier blending and lower baking time.
    3. Use a 9 x 5 inch loaf pan. If you use another size pan, the baking time will vary.
    • Chopped bananas in a bowl
      Slice bananas
    • Mashed Bananas
      Mash bananas
    • Butter and sugar creamed in a bowl
      Cream butter & sugar
    • Adding eggs to batter
      Mix in eggs
    • Add dry ingredients
    • Bananas added to the batter
      Add bananas
    • Batter ready to be poured into pan
      Fold in chopped walnuts

    Do you love quick breads? Also try our amazing Hollywood Monastery Pumpkin Bread recipe.

    Loaf of banana bread on cutting board, with four slices cut off of it.

    Banana Nut Bread

    Nancy Blackstone
    This Banana Nut Bread is just right to go with your morning coffee or for a sweet treat after dinner. It has just the right balance of bananas, sweetness and nuts -- and it's so easy to make!
    5 from 1 vote
    Print Recipe Pin Recipe
    Prep Time 15 minutes mins
    Cook Time 1 hour hr
    Total Time 1 hour hr 15 minutes mins
    Course Breakfasts
    Cuisine American
    Servings 12 Servings
    Calories 278 kcal

    Ingredients


    • 3 very ripe large bananas
    • 1 tablespoon milk
    • 1 cup sugar
    • 8 tablespoons butter
    • 2 large eggs
    • 2 cups flour
    • 1 teaspoon baking soda
    • ⅛ teaspoon salt
    • ½ cup chopped walnuts

    Instructions
     

    • Preheat oven to 350 degrees. Grease a 9" x 5" loaf pan.
    • Mash bananas with 1 tablespoon of milk in a medium bowl and set aside.
    • In a large mixing bowl, cream butter and sugar.
    • Beat eggs, then mix in with butter and sugar.
    • Add flour, baking soda and salt to bowl, and mix just until fully combined.
    • Add in the bananas and mix until fully incorporated into the batter.
    • Fold in the chopped walnuts, then pour into greased 9 x 5" pan.
    • Bake at 350 degrees 55-60 minutes, until toothpick inserted in center comes out clean. 

    Notes

    Use a 9" x 5" pan or the baking time may vary
    If you want to add spices, try adding any combination (or all) of the following to the batter: 1 teaspoon vanilla, ¼ teaspoon cinnamon, ¼ teaspoon nutmeg, ¼ teaspoon cloves

    Nutrition

    Calories: 278kcalCarbohydrates: 40gProtein: 4gFat: 12gSaturated Fat: 5gPolyunsaturated Fat: 3gMonounsaturated Fat: 3gTrans Fat: 1gCholesterol: 51mgSodium: 195mgPotassium: 165mgFiber: 2gSugar: 21gVitamin A: 300IUVitamin C: 3mgCalcium: 18mgIron: 1mg
    Keyword Banana Quick Bread, Banana Walnut Bread, Old fashioned banana bread, Quick breads, Spicy Banana Nut Bread
    Tried this recipe?Let us know how it was!

    Halloween Cocktails: The Corpse Reviver #2 is Frightfully Delicious

    October 16, 2020

    Cocktail served in a coupe glass with ingredients bottles blurred in the background

    Even though it shares a name with another famous cocktail, the Corpse Reviver #2 is a very different drink and is not just a variation on the original. It is delicious in its own right.

    Cocktail served in a coupe glass with ingredients bottles blurred in the background
    Even our spooky spider likes the Corpse Reviver #2!

    The Corpse Reviver #2 was Supposed to Cure a Hangover

    Because it is fall, I have been writing posts with a Halloween theme. Last week I wrote about the Corpse Reviver cocktail to start things off. That drink is a brandy-based reviver cocktail. This post's subject is named similarly, but is a gin-based reviver.

    Just the name alone makes the Corpse Revivers a good Halloween drink. However, this reviver is a great tasting cocktail regardless of time of year. I find that the absinthe gives it a sweet, candy-like flavor that makes it a wonderful cocktail that I'll add to my regular stable of drinks.

    It's hard to believe, but these drinks were originally conceived to be hangover cures. Created in the mid-1800's in England, they were from the school of thinking, "hair of the dog that bit you". In other words, to feel better from too much alcohol the night before, you need even more alcohol the next morning. There was even a recommendation to not drink more than 4 of these at a time. Now that is some good advice!

    Ingredients You'll Need

    There are many opinions on which type of gin to mix this cocktail with. Some say to use a very 'juniper-y' gin, some say it is best made with a dry gin. There are those who recommend an Old Tom gin. I fall firmly into the dry gin camp and prefer something less botanical. I want my ingredients to mix nicely with one another and not have one overpower the rest.

    Regarding the vermouth, I've always found Lillet Blanc to be overly sweet. So I've become a fan of Cocchi Americano for its light, herbal taste that still has a bite due to the quinine. I use it in several other cocktails such as the James Bond-inspired Vesper and it never disappoints. From what I've read, it's close to the old recipe for Kina Lillet that was changed in the late 1960's.

    There are several ingredients needed to give the Corpse Reviver #2 its unique flavor:

    • Dry gin
    • Orange liqueur
    • Dry vermouth
    • Absinthe
    • Fresh-squeezed lemon juice

    Tips for a Successful Corpse Reviver #2

    This cocktail is not very difficult to make. Here are a few things to do to ensure your cocktail doesn't taste like something the "black cat" dragged in...

    • Absinthe is a unique liqueur that is not frequently used these days. However, you should do yourself a favor and invest in a good bottle. Don't buy a poor quality bottle to mix with, as they do not taste as good or mix as well as a reputable absinthe. Treat yourself to something nice like Pernod.
    • This drink should be served ice cold. So please do not stir it in a mixing glass unless you're prepared to stir for a long, long time!

    Which Corpse Reviver do you prefer, 1 or 2? There are actually several more, but these are the best known revivers.

    Cocktail served in a coupe glass with ingredients bottles blurred in the background

    Halloween Cocktails: The Corpse Reviver #2 is Frightfully Delicious

    Kevin Mayfield
    This drink is a perfect Halloween cocktail because of its name and licorice candy taste.
    5 from 1 vote
    Print Recipe Pin Recipe
    Prep Time 5 minutes mins
    Total Time 5 minutes mins
    Course Classic Cocktails
    Cuisine American
    Servings 1 Cocktail
    Calories 215 kcal

    Ingredients


    • 1 Ounce Dry Gin
    • 1 Ounce Cointreau
    • 1 Ounce Cocchi Americano
    • 1 Ounce fresh-squeezed lemon juice
    • ½ Ounce Absinthe

    Instructions
     

    • Add one large scoop of ice to a cocktail shaker.
    • Pour in all ingredients and shake for 30 seconds.
    • Strain into chilled coupe glass.
    • Add an orange peel garnish--spider is optional!

    Notes

    I typically use a half ounce of absinthe because I think it stands up well to the other ingredients, but some find it a little over-powering. Feel free to experiment using less until you find a blend that works for you.
    You can use Lillet Blanc rather than Cocchi Americano, but I think Cocchi Americano gives a more balanced less sweet taste to the drink.

    Nutrition

    Calories: 215kcalCarbohydrates: 12gProtein: 1gFat: 1gSaturated Fat: 1gPolyunsaturated Fat: 1gMonounsaturated Fat: 1gSodium: 4mgPotassium: 67mgFiber: 1gSugar: 10gVitamin A: 2IUVitamin C: 11mgCalcium: 4mgIron: 1mg
    Keyword Absinthe, Cointreau, Gin, Halloween Cocktail, Pernod
    Tried this recipe?Let us know how it was!

    Penne Pasta in Vodka Sauce, aka Penne Alla Vodka

    October 13, 2020

    Penne Pasta in Vodka Sauce is a creamy, rich and flavorful dish that cooks up in less than half an hour. Served with garlic bread and a glass of wine, it's sure to impress your guests!

    Penne pasta in vodka sauce in a white bowl with a fork, a bottle of wine and a glass of wine in the background
    Penne Pasta in Vodka Sauce

    I have turned again to the handmade family cookbook of my Italian-American friend, Mary Ann. She's a Rochester, New York native who compiled longtime family recipes in a charming three ring binder with a photo of her mom on the front. Her son Joel happens to be my neighbor, and he generously allowed me to raid the amazing recipes, of which this is one. He remembers this being a favorite dish that his uncle made for the family.

    Penne Pasta in Vodka Sauce - Italian? Or Italian-American?

    Both Italy and America lay claim to the origin of this dish. The evidence seems to suggest that it was on the menu at Dante, a restaurant in Bologna, Italy in the early 1970's and was popularized in the U.S. after that. Regardless of its origins, this is one fun dish to make and eat -- it's made with one full cup of vodka! We loved adding alcohol to our food in mid-century, didn't we? Don't worry if you don't like vodka, though. It blends in with the other flavors so you can't actually taste the vodka itself.

    Mary Ann's hand typed recipe for penne in vodka sauce
    Mary Ann's hand typed recipe for penne alla vodka

    A Few Recipe Modifications

    When I made this pasta dish, I did make a few modifications. Mary Ann's version calls for half and half, which would cut down on the fat and calories. However, if I'm making a pasta dish like this, I'd rather have the extra richness and thickness of heavy cream, so that's what I used. However, half and half is certainly an option.

    I also added in ¼ cup of chopped Italian flat leaf parsley for extra fresh flavor. Speaking of extra flavor, many vodka sauce recipes call for pancetta. I did not add it this time, but I included it as an option on the recipe card. Kevin does prefer the version with pancetta, while I prefer the vegetarian option. You could also use bacon or shrimp in place of the pancetta.

    This recipe is made with crushed tomatoes, which gives the tomato sauce a bit of texture. In previous family recipes Mary Ann has recommended San Marzano tomatoes from San Marzano sul Sarno, Italy, so I used those in this recipe. If you prefer a smooth sauce without the texture of crushed tomatoes, you will get the same excellent flavor if you use the same sized can of San Marzano tomato sauce.

    A while bowl with penne pasta in vodka sauce piled high inside
    Penne pasta in vodka sauce

    Prepare Your Ingredients

    Here's what you'll have to have on hand to make penne alla vodka:

    • penne pasta
    • butter
    • garlic
    • red pepper flakes
    • vodka
    • crushed tomatoes
    • Italian parsley
    • heavy cream
    • salt/pepper
    • grated parmesan cheese
    • optional: pancetta, bacon or shrimp

    There is Some Alcohol In The Finished Meal

    It's important to note that this dish does not cook for very long, so all of the alcohol does not cook out of it. According to the USDA, after 15 minutes of simmering, roughly 60% of the alcohol is cooked off. It takes a full 3 hours of simmering to completely cook off the alcohol content in a sauce. Considering that it is being served diluted and with a heavy pasta, you are not likely to feel any affects from the alcohol. However, if you are avoiding alcohol for any reason or debating whether to serve it to children, this is something you should keep in mind.

    Other Italian Recipes to Try

    If you love authentic Italian food, try some of the other old family recipes that my friend Mary Ann has shared, including authentic Italian meatballs, authentic Italian Sunday sauce, and authentic Italian lasagna.

    Let's make some penne pasta in vodka sauce!

    A while bowl with penne pasta in vodka sauce piled high inside

    Penne Pasta in Vodka Sauce, aka Penne Alla Vodka

    Nancy Blackstone
    Penne Pasta in Vodka Sauce is a creamy, rich and flavorful dish that cooks up in less than half an hour. Served with garlic bread and a glass of wine, it's sure to impress your guests!
    5 from 1 vote
    Print Recipe Pin Recipe
    Prep Time 5 minutes mins
    Cook Time 23 minutes mins
    Total Time 28 minutes mins
    Course Main Dish
    Cuisine Italian
    Servings 6 Servings
    Calories 886 kcal

    Ingredients


    • 1 pound penne pasta
    • 6 tablespoons butter
    • 2 cloves minced garlic
    • 1 teaspoon red pepper flakes
    • 1 cup vodka
    • 28 ounce San Marzano crushed tomatoes
    • ¼ cup chopped Italian parsley
    • 1 cup heavy cream
    • 1 teaspoon salt
    • 1 cup grated parmesan cheese
    • ½ teaspoon pepper
    • 8 ounces diced pancetta optional

    Instructions
     

    • In a deep skillet, melt butter. Add garlic and red pepper flakes. If you're using pancetta, you should add it now, too. Saute for 2-3 minutes.
    • Add vodka to skillet and simmer for 5 minutes, stirring occasionally.
    • Stir in crushed tomatoes and chopped parsley, and simmer for another 5 minutes.
    • Mix in heavy cream and salt. Simmer on low heat for 10 minutes, stirring frequently. 
    • While the sauce is simmering, cook pasta to al dente, drain and set aside.
    • Add parmesan cheese and pepper to the sauce, mix well. Serve over pasta.

    Notes

    You can substitute half and half for heavy cream if you prefer
    In place of pancetta, you can add bacon or shrimp

    Nutrition

    Calories: 886kcalCarbohydrates: 69gProtein: 24gFat: 47gSaturated Fat: 25gPolyunsaturated Fat: 4gMonounsaturated Fat: 15gTrans Fat: 1gCholesterol: 124mgSodium: 1194mgPotassium: 712mgFiber: 5gSugar: 8gVitamin A: 1686IUVitamin C: 16mgCalcium: 284mgIron: 3mg
    Keyword Italian dinners, Italian main dish, pasta dinners, vegetarian pasta, vodka sauce
    Tried this recipe?Let us know how it was!

    • « Go to Previous Page
    • Page 1
    • Page 2
    • Page 3
    • Page 4
    • Page 5
    • Go to Next Page »

    Primary Sidebar

    Nancy and Bentley

    Hi, I'm Nancy! Welcome to Flourchild where I share classic mid-century recipes from the 1940's - 1970's. I feature many vintage handwritten recipes, and provide modern shortcuts and a variety of healthy and special diet-friendly versions whenever possible. Join me in exploring the delicious flavors and from-scratch cooking techniques of our past!

    More about me →

      Favorites

      • Tuna Noodle Casserole With Buttered Cracker Topping
      • Close up of a sloppy Joe on a bun
        World's Best Sloppy Joes From Scratch
      • Kentucky Style Biscuits and Gravy - A Southern breakfast favorite
      • Two large cinnamon apple pancakes on a black plate with apple topping and maple syrup running down the sides.
        Cinnamon Apple Pancakes with Apple & Brown Sugar Topping
      • Hot Toddy cocktail in a clear mug with a lemon wheel and 2 small cranberries for garnish
        How to Make an Easy Bourbon and Honey Hot Toddy
      • An apple butter old fashioned cocktail in a tumbler with apples and fall-related items in the background
        Sip into Fall: How to Make the Perfect Apple Butter Old-Fashioned Cocktail

      Popular Recipes

      • A blue serving bowl filled with deviled egg salad garnished with paprika and green onions on a red background.
        Fast and Easy Deviled Egg Salad Recipe with Macaroni
      • Rock Hudson's chicken casserole in a white serving bowl.
        Rock Hudson's Favorite Chicken Casserole Recipe
      • Two gingerbread squares stacked on a Christmas dessert plate.
        Frank Sinatra's Favorite Gingerbread Cake Squares
      • A bowl of chasers chili with chopped onions and oyster crackers on top, and a slice of cornbread on the side.
        Elizabeth Taylor's Favorite Recipe -- Chasen's Chili

      • Email
      • Instagram
      • Pinterest

      Footer

      ↑ back to top

      About

      • Privacy Policy
      • Accessibility Policy

      Newsletter

      • Sign Up! for emails and updates

      Contact

      • Contact

      As an Amazon Associate I earn from qualifying purchases.

      Copyright © 2025 Brunch Pro on the Brunch Pro Theme

      Rate This Recipe

      Your vote:


      Let us know what you thought of this recipe:

      This worked exactly as written, thanks!
      My family loved this!
      Thank you for sharing this recipe

      Or write in your own words:

      A rating is required
      A name is required
      An email is required